 When editing photos, one of the most common and useful techniques that we need to learn is object removal. Let's admit, we could not take a picture-perfect photo at any time, especially if you're in an uncontrolled setting. An unwanted passerby, power line, blemish, or other unwanted element can distract the focus away from the subject. That's why removing such distractions will result in a cleaner composition and aesthetic photo. This is where Adobe Lightroom shines, as it provides a powerful tool to remove unwanted objects from photos. These tools help editors and casual users to quickly refine images without a complicated process. So, in this post, let's explore how to remove objects in Lightroom and discover other alternatives.
Understanding Lightroom’s Object Removal Tools
Adobe Lightroom offers several ways to remove objects in photos. Each tool presents a range of options suited to different editing scenarios. Whether you’re dealing with small imperfections or more complex distractions, each tool serves a unique purpose. Here’s a closer look at the main options, how they work, and when to use them for the best results.
Spot Removal Tool (with Clone and Heal Modes)
Ideal Use Case: The Spot Removal Tool is perfect for small to medium distractions that don’t require complex editing.
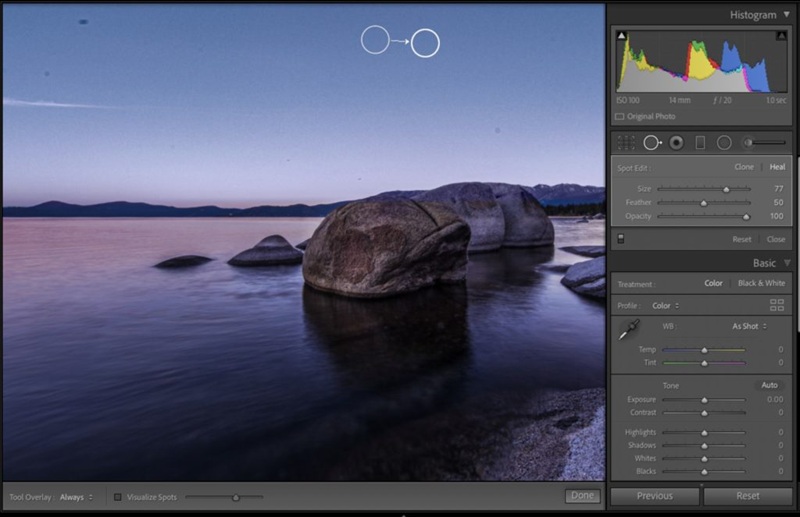
The Spot Removal Tool is one of the most used tools for how to remove an object in Lightroom. It is especially effective for correcting small imperfections and distractions that can take away from the main subject. The tool works in two modes: Clone and Heal, each designed to handle different editing needs. Additionally, it offers an easy way to remove dust spots, scratches, blemishes, and even minor background distractions. Furthermore, it saves editing time where you only need to edit the targeted corrections without affecting the whole image. This feature is what makes it easy to use for me since it does not compromise the photo quality.
Key Features:
- Clone Mode: Duplicates pixels from a selected source area and pastes them over the distraction for a perfect match in texture and detail.
- Heal Mode: Blends sampled pixels with the target area, creating a natural, seamless transition.
- Brush Size Adjustment: Allows precise control, making it easy to match the size of the distraction.
- Feather and Opacity Settings: Provides control over edge softness and blending for subtle corrections.
Content-Aware Remove Tool
Ideal Use Case: Best for distractions like wires, signs, trash, or stray objects in landscapes and urban photography. It’s particularly effective when you want fast, natural results without spending too much time fine-tuning.
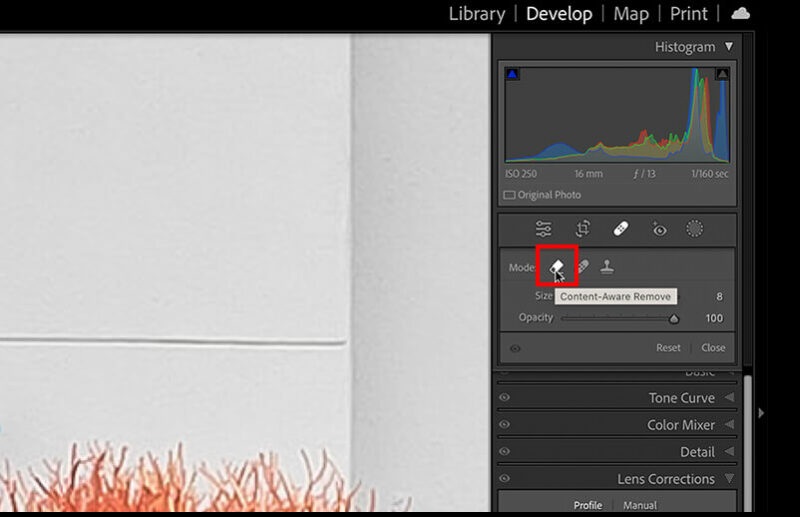
For faster and more natural results on how to remove something in Lightroom, use the Content-Aware Remove Tool. It analyzes the surrounding pixels and fills the gap, offering seamless results, making a perfect tool to remove tattoo from photo. Furthermore, this function is pretty straightforward to use, as you let Lightroom analyze the surrounding area without manual editing. Unlike simple cloning or healing, this tool uses advanced algorithms to recreate textures, colors, and patterns. What I like about this tool is that it works well on different textures and backgrounds. Also, it can remove medium-sized objects with ease.
Key Features:
- Intelligent Pixel Analysis: Automatically studies surrounding areas to generate realistic replacements.
- One-Click Object Removal: Quickly erases distractions without the need for manual blending.
- Refine Tool: Allows you to resample or adjust areas if the initial result isn’t perfect.
- Non-Destructive Editing: Edits can be adjusted or reversed at any time without harming the original image.
Generative Remove Tool (AI-Powered)
Ideal Use Case: Perfect for editing out people, vehicles, or large objects in landscapes, street photography, or architectural shots.
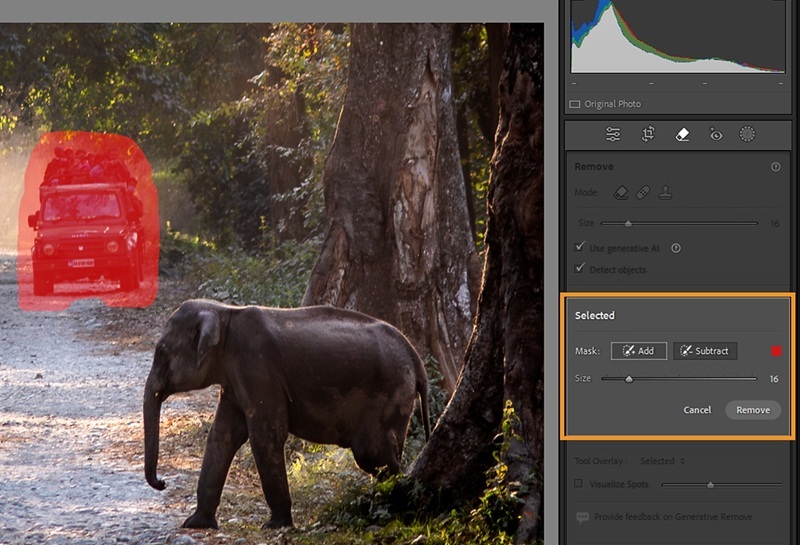
If you're still wondering if can Lightroom remove objects, another function it has is the Generative Remove Tool. Powered by AI, this tool can generate entirely new, realistic content to replace removed objects. This makes it especially effective in challenging scenarios where standard tools may leave visible traces. Meanwhile, this feature can produce pro-quality results with minimal effort. It makes it perfect for a non-pro editor like me who still wants to enhance high-quality images. Also, it can handle complex objects that other tools usually struggle with. Furthermore, it is ideal for editing bulk images and will not compromise the image quality.
Key Features:
- AI-Powered Pixel Generation: Creates new, realistic content instead of just cloning or blending nearby areas.
- Smart Scene Analysis: Understands context, textures, lighting, and perspective for natural results.
- Customizable Results: Offers multiple generated variations so users can choose the best outcome.
- Handles Complex Edits: Works even on large or intricate objects without noticeable artifacts.
- Non-Destructive Workflow: Edits remain adjustable, preserving full creative flexibility.
Detect Objects Feature
Ideal Use Case: Perfect for portraits, wildlife, and scenes with clear subjects where distractions need to be removed without affecting the main focus.
The last option on how to cut out an object in Lightroom is the Detect Objects feature. The good thing about it is that we don't need to manually select the area to remove the object. Here, it automatically detects and identifies the unwanted element in the frame. However, this tool will not remove the object, which I find annoying at times. So, to remove shadows from photos or any object, you need to use the first three tools mentioned above. Meanwhile, it ensures accuracy when editing around subjects and reduces errors.
Key Features:
- AI-Powered Detection: Automatically recognizes subjects such as people, skies, animals, and objects.
- One-Click Selections: Quickly create masks around detected objects without manual brushing.
- Editable Masks: Users can refine, invert, or combine selections for greater control.
- Integration with Removal Tools: Works seamlessly with Spot Removal, Content-Aware Remove, and Generative Remove for precise edits.
- Non-Destructive Workflow: Selections remain adjustable throughout the editing process.
Guide to Removing Objects with Lightroom
Now, we know what the tools Lightroom offers are to remove unwanted objects from pictures. In this section, let us all learn how to use each of them so we can choose which is ideal for our needs and skill set.
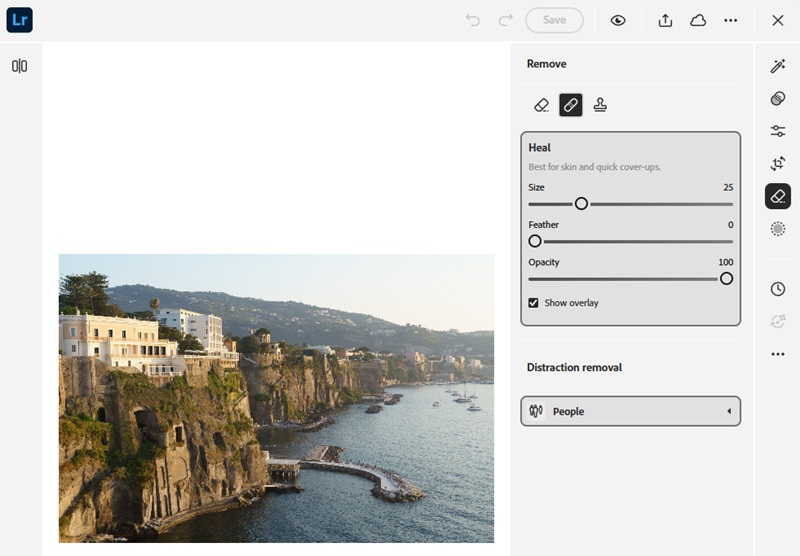
How to Delete an Object in Lightroom using Spot Removal Tool
- First, open Lightroom and import your image and go to the Develop Module.
- Next, find and click on the band-aid icon in the toolbar and choose your desired mode (Clone or Heal).
- After that, you can set the brush size, feather, and opacity to match the distraction you’re removing.
- Wait and let Lightroom automatically sample a nearby area. Then, drag the sample circle if needed to select a more suitable source.
- Refine the image until you're satisfied with the results. For easier control, zoom in and so you can scan the photo properly. Once done, save and export the photo.
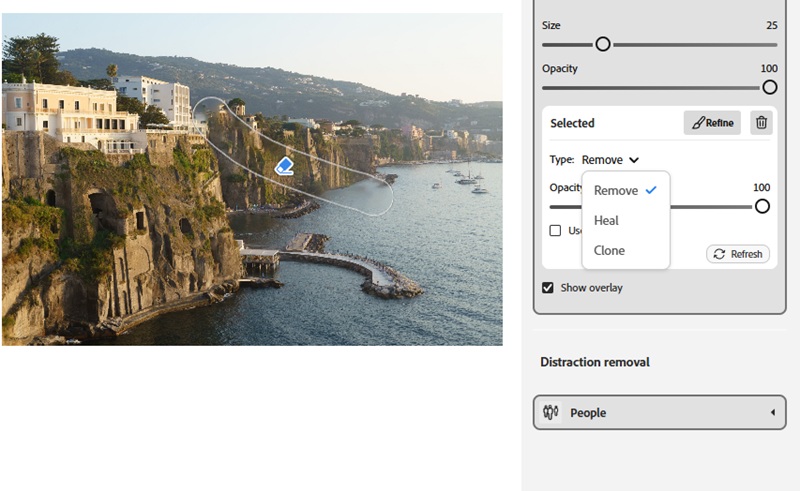
How to Remove an Object in Lightroom with Content-Aware Remove
- Open the image using Lightroom and go to the Develop Module mode.
- Next, hit the Healing Tool and click on the band-aid icon in the toolbar.
- From here, select "Content-Aware Remove," then adjust the size, feather, and opacity of the brush. Make sure it fits on the object you want to remove.
- Brush over the object and let Lightroom analyze surrounding pixels and replace the area with natural-looking textures.
- Review the result and make small adjustments if necessary. If satisfied, save your work and export the picture.
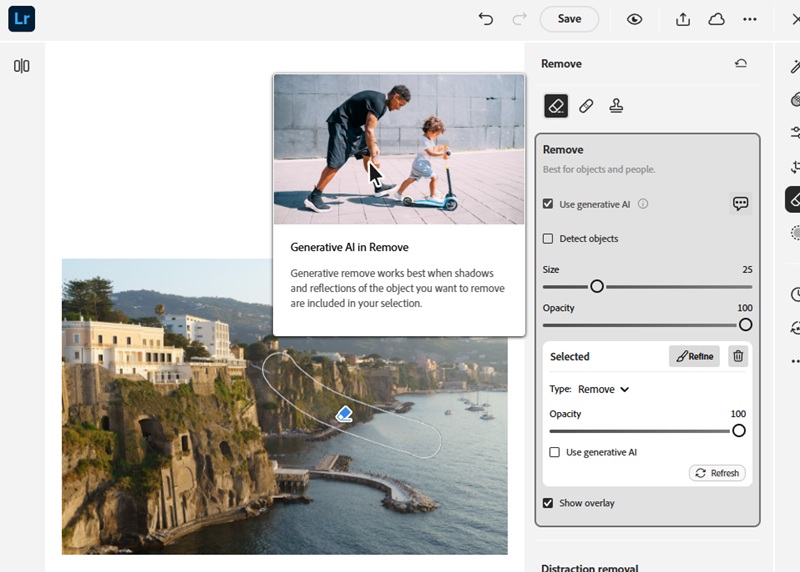
How to Remove Something in Lightroom using Generative Remove
- To begin, open Lightroom and import the image and switch to the Develop Module.
- Next, select the healing tool and hit on the band-aid icon to activate it.
- After that, choose "Generative Remove" and adjust the brush size, feather, and opacity.
- Here, brush across the object you want to remove and let Lightroom analyze and generate a new scene, replacing the highlighted object.
- Select which result you prefer, then save and export the photo.
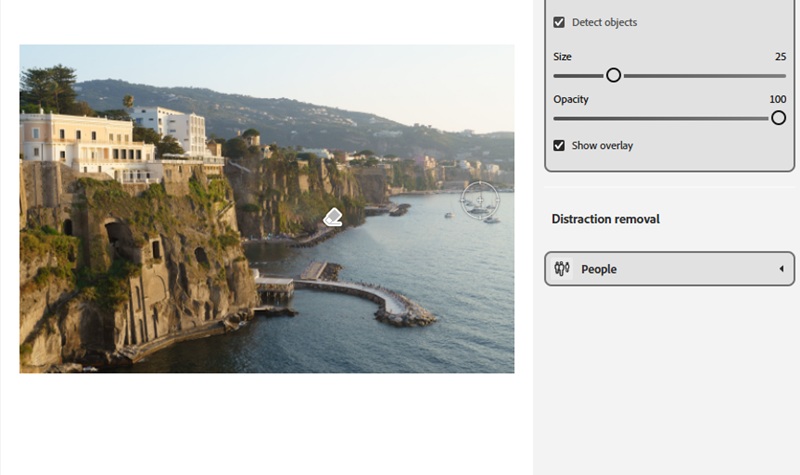
How to Cut out an Object in Lightroom with Detect Objects Feature
- Open Lightroom and upload your image. Then, click on the "Masking tool" icon from the toolbar.
- Then, select "Object" from the list and draw a rough outline around the object you want to remove.
- Wait and let Lightroom detect the area and create a mask for it. Next, use the "add" or "subtract" options to adjust the mask.
- After that, apply any object removal tool you prefer and save the result afterward.

Alternative Method for Object Removal
It is true that can Lightroom remove objects. However, they can be complicated and seem to have a lot of steps, especially for a beginner. So, if you find Lightroom too complicated, there are other ways to remove objects from photos. In this section, let’s discover the best alternative to Lightroom.
AceThinker PicWish
Ideal Use Case: Suitable for beginners or users who just want a quick result.
First on the list is AceThinker PicWish. It is a desktop app that uses AI technology to remove objects or crop a person out of a photo efficiently. Additionally, it offers several brush tools to perfectly highlight the unwanted element. These include the brush, marquee, and lasso tools. The brush tool is perfect for beginners since you only need to highlight the object that you want to remove. On the other hand, Marquee is an optional tool where it is appropriate for removing texts, shapes, or logos on the photo. Users like me who have used PicWish for a long time can use the Lasso tool. Here, it lets us outline an object to remove it. This tool is perfect for complicated objects like pets, people, and others.
How to Remove Objects in Lightroom Alternative
Try it for Free
Free Download
Windows 8/10/11
Secure Download
Free Download
Mac OS X 10.15 and above
Secure Download
Step 1 Download and Install the Lightroom Alternative
First, click any of the download buttons available above according to your operating system. Once the installer is saved, open it and follow the instructions to install it on your device. Finally, open AceThinker PicWish and access its interface.

Step 2 Upload the Photo
From its interface, select the "Remove Objects" and upload the photo(s). It even lets you upload an entire folder if you're dealing with a bulk process.

Step 3 Highlight the Unwanted Object
Next, choose among the three selection tools available – Marquee, Lasso, and Brush. In this example, let's use the Brush tool. Click it and adjust the brush size according to the element that we need to highlight. Then, use your mouse to highlight the object completely. Once done, hit the "Remove Now" button to continue.

Step 4 Download the Photo
Wait for a few seconds for the result to show. Once finished, AceThinker PicWish will show a preview of the output. You may repeat the same method above in case there are still objects you want to remove. If satisfied, hit "Save All," then access its download folder to open and check the photo.

Conclusion
Learning how to remove objects in Lightroom is an essential skill for those who want to produce clean images. All the tools Lightroom offers powerful solutions for every scenario. Each tool has its unique strengths, making it possible to enhance any photo without compromising quality. Although Lightroom provides robust editing options, alternatives like AceThinker PicWish are simpler choices for beginners or those looking for quick AI-powered results, it is also a great alternative to make background transparent in GIMP.
