 People often have to take drawings, sketches, or doodles of a picture. This could be a scanned document with handwritten notes, a photograph with accidental marks, or an image that requires cleaning before sharing online. Still, in any case, these blemishes are distracting. Removal of such drawings should be done with caution, not to destroy the originality of the photo and make it look natural. Just cutting out the picture or placing a blur over marks is frequently noticeable and reduces sharpness. The real restoration of an image requires tools that not only delete the drawings but also blend edited areas seamlessly into the background. This makes the changes unnoticeable and preserves the photo's integrity. This post will teach you some of the best techniques and resources to remove drawing from picture. The solutions are offered to various levels of abilities. You can easily achieve flawless-quality results with ease.
Most Effective Way to Take Off a Sketch in a Picture
AceThinker PicWish is a robust program that makes object removal easier even for novices. It is an AI powered program that produces high quality image results. In addition to its precise Object Remover, PicWish offers other valuable tools. These include a Background Remover that can neatly cut out objects, an AI Image Enhancer to clarify blurry images. It also offers a Batch Processing Mode that enables simultaneous work with multiple files. Removing drawings or doodles from photos is one of the most helpful functions of PicWish. If you're looking for how to remove drawing from a picture while keeping the image clean and natural, this tool excels. It utilizes its smart detection and fill algorithm, automatically inpainting the marked area with surrounding textures and colors as you brush over it. This helps make the photo look natural and unedited. Download a scanned page with markups, repair a portion of a personal image, and prepare a product photograph to post online. PicWish offers you a complete walkthrough experience. It can provide realistic results with just a few clicks, and you don't need advanced Photoshop skills to work with it.
Try it for Free
Step 1 Download and Launch PicWish
Begin by visiting the official AceThinker PicWish website. Locate the download button and install the PicWish desktop application that matches your operating system. Once the installation is complete, open the program to access the main interface. On the home screen, locate and click the "Remove Objects" option from the list of tools to begin the drawing removal process.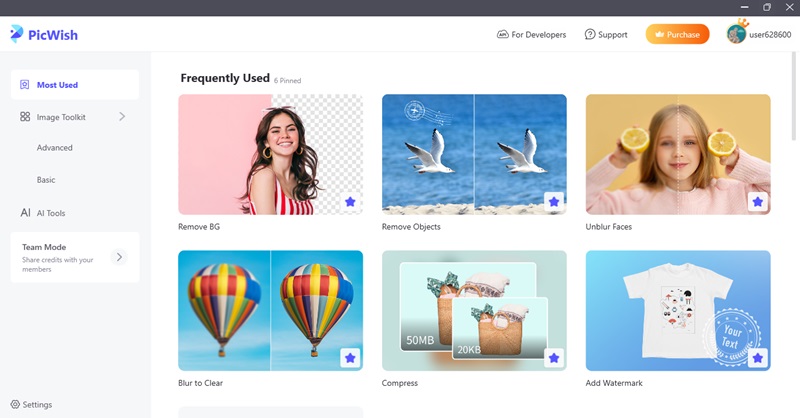
Step 2 Upload the Image with Drawing
Click the "Upload a file" button on the "Remove Objects" screen. This will open a file browser window where you can navigate to the photo that contains the drawing, sketch, or unwanted marks. Select your file and confirm the upload. The image will be loaded into the editor, allowing you to zoom in and review the area you want to clean.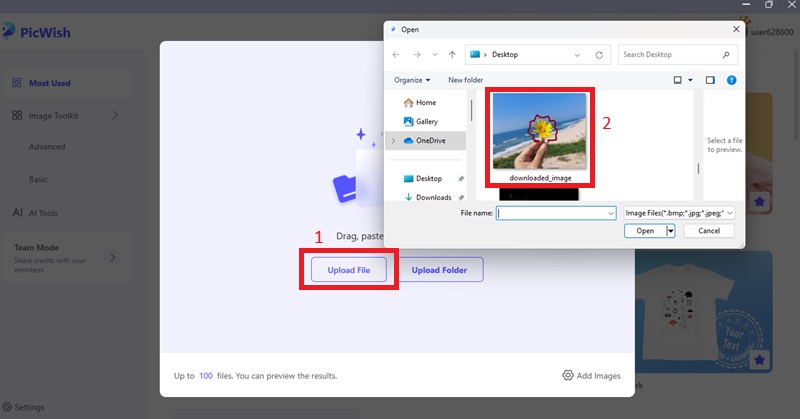
Step 3 Highlight the Drawing You Want to Remove
After your image is uploaded, select a tool from the left-hand panel, such as the brush or lasso. Use the tool to carefully highlight the specific drawing or annotation that you wish to remove. You can adjust the brush size for more accuracy, especially when dealing with small or intricate markings. Once the selection is complete, click the "Remove Now" button. The AI will process the highlighted area and automatically remove the drawing by filling it in with matching background content.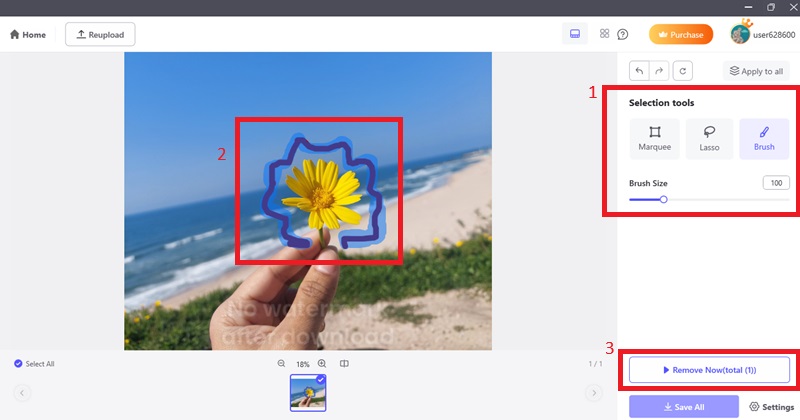
Step 4 Save the Edited Image to Your Computer
Once the drawing has been successfully removed, click the gear icon labeled "Settings" to configure your export preferences. You can choose the desired file format and adjust the output quality if needed. When everything is set, click the "Save All" button to export the edited image to your computer. The final photo will be saved in the designated folder, now free of any unwanted drawings or markings.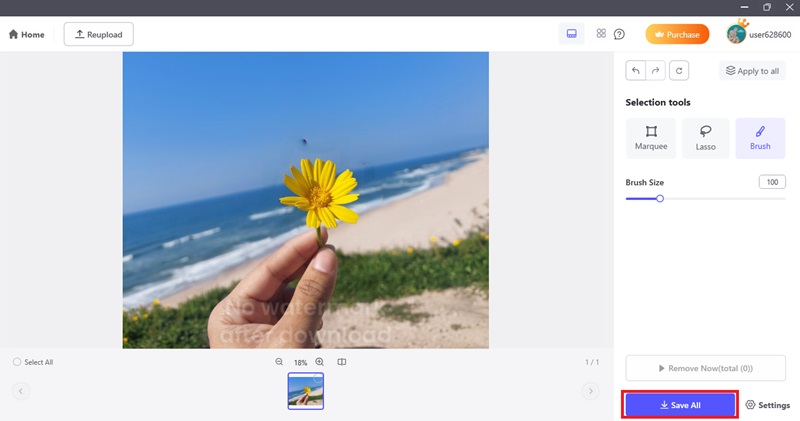
Alternative Tools to Remove Drawings from Images
1. AceThinker Free Online Image Background Remover
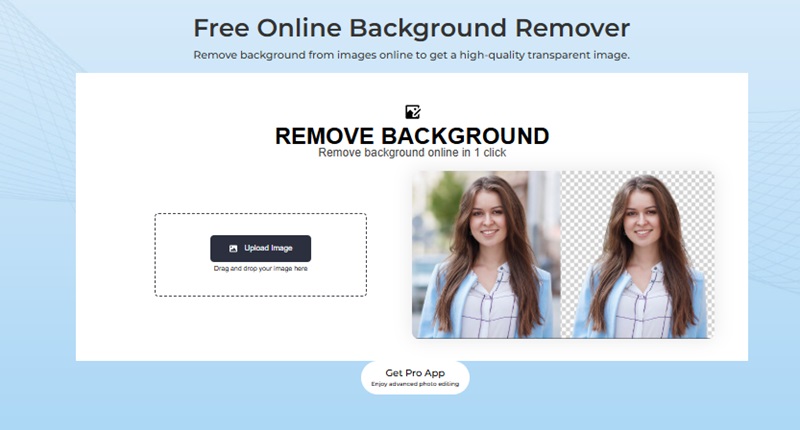
Free Online Image Background Remover is not merely a background removal tool; it also features a powerful Object Remover that can be used to clean up photos with doodles, drawing patterns, or undesired markings. Its brush is powered by AI that indicates and removes marked areas, replacing them with natural-looking background textures. The browser-based platform requires no installation, login, or purchase. It allows for exporting high-quality pictures in their original sizes, clean of watermarks. The beginner-friendly interface, using intelligent technological expertise to provide surprisingly professional results, is what makes AceThinker unique. For those wondering how to erase drawing on a picture quickly and effectively, this tool offers a smart and accessible solution. Editing an image on a scanned document, a social media update, or a product photograph has never been easier with this tool without sacrificing image quality. It comes in particularly handy in on-the-go fast editing, where ease and speed are paramount.
Steps to Remove Drawings Using AceThinker:
- Go to the AceThinker Online Background Remover using any web browser. Click the "Upload Image" button and select the photo with the drawing or doodle you want to remove. The image will load into the online editor automatically, no login or installation required.
- Once your image is visible in the editor, click on the "Object Remover" tool in the sidebar. This will activate a red brush tool. Adjust the brush size as needed, then carefully paint over the drawing, mark, or sketch you want to remove. Ensure you cover the full area for the most accurate result.
- Click the "Erase" or "Generate" button to let the AI remove the highlighted area and automatically blend the background. After reviewing the result, click "Download" to save the clean, high-quality image to your device. Your final image will be free from marks, without any visible edits or quality loss.
2. GIMP (GNU Image Manipulation Program)
GIMP (GNU Image Manipulation Program) is a free, open-source image editor that contains numerous powerful functions comparable to those found in high-end software brands such as Adobe Photoshop. It is particularly handy for users who need to remove unwanted drawings, scribbles, or marks on photos that obstruct a clear view of the subject. While there is no built-in AI-based object remover in GIMP, it is still well-equipped with tools like the Clone tool, Heal tool, that allows to make background transparent in GIMP and the Resynthesizer plug-in to manually smooth over and restore areas after unwanted details are removed. If you're looking for how to get rid of drawing on a picture with full control over the editing process, GIMP offers the flexibility to do so effectively. These tools allow you to erase marks by duplicating and blending nearby pixels, resulting in a natural and clean appearance. As freeware, GIMP supports layers, custom brushes, and high-resolution editing, making it an excellent alternative for those willing to invest time learning the process to achieve professional-level results.
Steps to Remove Drawings Using GIMP:
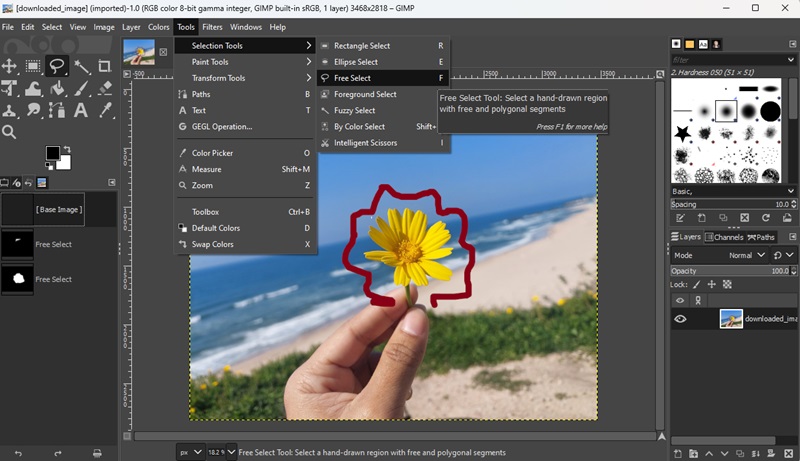
- The first step is to visit the official website gimp.org and download and install GIMP. Once installed, start up the program and then load your image using "File," the "Open” option. Find the photo that you would like to erase, draw, or mark, and enter it in the editor.
- Once that is done, press the toolbox and select the Free Select Tool (represented by a lasso). To start the procedure, use this tool and carefully trace the region that includes the drawing or doodle you want to remove. The menu allows you to click on points around the shape or drag to draw curved lines. Once you are finished with your selection, press Enter to generate it.
- At the final step, run the Heal Tool or Resynthesizer plug-in to smooth the selected area with its adjacent ones. Using the Heal Tool, run your hand briskly over the designated region until the visualization is replaced with adjacent textures. If you are using the Resynthesizer plug-in, open the Filters menu, then select Enhance, and choose "Heal Selection" to enable the software to automatically fill the selection. Save your image after editing by pressing Export As in the File menu and selecting your desired format when you are satisfied with the result.
3. Adobe Photoshop
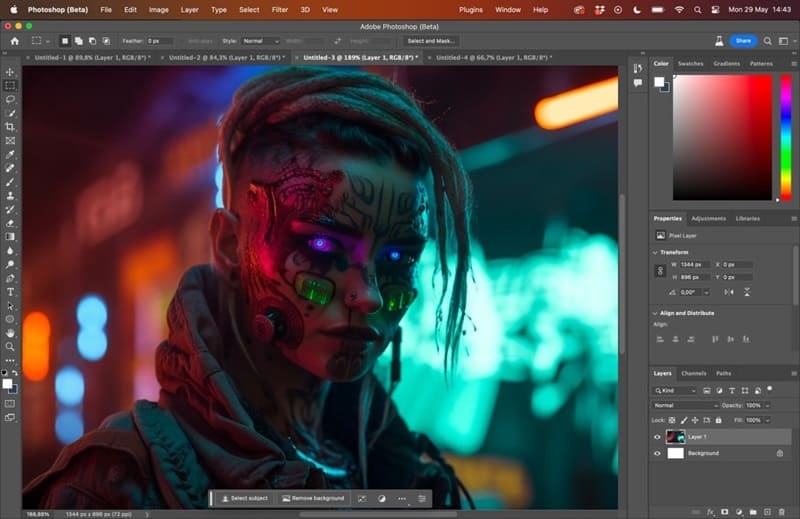
Adobe Photoshop is widely regarded as the most effective and accurate image editing tool available. Professionals worldwide rely on it when performing tasks such as photo restoration, object removal, and high-end retouching. For those searching for how to remove doodle from photo projects, or remove background in photoshop offers a smooth and reliable solution through its wide range of intelligent tools. The most prominent feature for this task is Content-Aware Fill, which allows the surrounding area to adjust itself and seamlessly blend the removed part with the nearby background, incorporating realistic texture and coloring based on complex algorithms. Additional useful tools that designers can use include the Spot Healing Brush and Clone Stamp, which enable them to make accurate manual corrections and detailed touch-ups. Photoshop, despite its steep learning curve and subscription-based nature, delivers unrivaled quality and flexibility to users who require the reproduction of high-quality or commercial images, especially when resolution and detail are a priority.
Steps to Remove Drawings Using Adobe Photoshop:
- Begin by launching Adobe Photoshop on your computer. Open the image that contains the drawing or doodle by clicking on the File menu and selecting Open. Locate your image file, and double-click on it to load it into the workspace. If the image appears as a locked background layer, unlock it by double-clicking the layer in the Layers panel and confirming the conversion to an editable layer.
- Once the image is open, use one of the selection tools to highlight the area that contains the unwanted drawing. You can use the Lasso Tool for freehand selection or the Quick Selection Tool if the area is well-defined. Carefully outline the entire drawing or doodle you want to remove. To make the final result blend more naturally, go to the Select menu, choose Modify, and then select Feather. Set a small feather radius to slightly soften the edges of the selection.
- After the area is selected and feathered, press the delete shortcut or open the Fill dialog box from the Edit menu and choose Content-Aware as the fill method. Photoshop will automatically analyze the surrounding area and generate a realistic fill that removes the selected mark. If needed, refine the result using the Spot Healing Brush to fix small imperfections or use the Clone Stamp Tool for detailed blending. Once you're satisfied with the Cleanup, go to the File menu and choose Save As or Export to save the edited version of your image.
4. Inpaint Online
Inpaint offers both a web-based and professional tool. It features an intuitive interface that allows users to easily remove unwanted objects from a picture, such as drawings, watermarks, or scratches, with just a few clicks. It applies an intelligent, content-sensitive fill to replace the chosen space with textures derived from surrounding pixels, creating a smooth and natural appearance. It's easy: upload your picture and use the brush to trace the part you want to erase in red, and the software will take care of the rest. Inpaint lacks the expanded manual editing capabilities of software like Photoshop. Still, it is lightning-fast and easier to use, making Inpaint a desirable alternative to more in-depth software, requiring no download and minimal learning. You can access it directly through your browser, and it can handle the majority of image formats, producing decent results for simple cleanup work.
Steps to Remove Drawings Using Inpaint Online:
- To begin, visit the official Inpaint website using your preferred web browser. Once you are on the homepage, click the Upload Image button and select the photo that contains the drawing or doodle you wish to remove. The image will load into the online editor, where you can start working on it immediately.
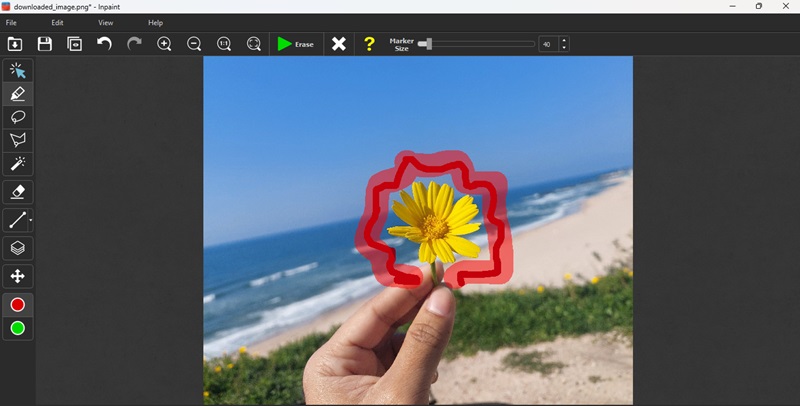
- After the image appears on the screen, select the red Marker Tool from the toolbar at the top. You can adjust the brush size to match the thickness of the drawing you want to erase. Carefully paint over the doodle or mark, making sure the entire unwanted area is covered with the red overlay. You may zoom in to improve accuracy if needed.
- Once the area is fully marked, click the Erase button to let Inpaint process the image. The tool will automatically remove the selected drawing and fill the space with surrounding textures. Review the result, and if you are satisfied, click the Download button to save the cleaned image to your computer or device.
5. Cleanup.pictures
Cleanup.pictures is a free online tool, powered by AI, that helps you eliminate unpleasant items, writing, sketches, or imperfections in a photograph with minimal brush use. Its smart algorithm immediately interprets the brushed region. It fills it with information based on nearby textures, so the editing is natural and seamless. This tool is one of the best when it comes to fast Cleanup, and you still need high-quality results. There is no need to install any software or create an account; the interface is minimized, so you can start editing right away. Cleanup.pictures can work on images of any size; however, the free version can only export images up to 720 pixels in width. Pro offers full keyboard input resolution download, and if you require a higher-quality output, you can upgrade to Pro. The fact that it is fast retouching (in real-time), combined with its ease of use, has made it a popular choice among casual users, as well as content creators who need to edit social media graphics or other images online.
Steps to Remove Drawings Using Cleanup.pictures:
- Launch the web browser, visit the Cleanup.pictures site. After the homepage opens, you can move your image directly to the work area by dragging and dropping it, or use the upload button to select the photo you want to add a drawing or doodle to on your device.
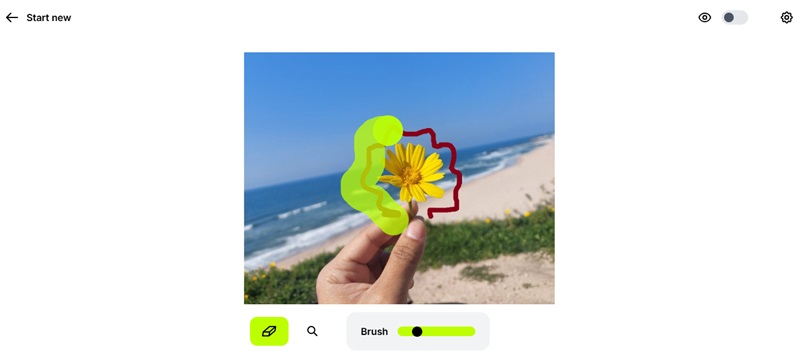
- Once the picture is open, an automatic brush tool will also appear. The slider allows you to adjust the brush size to match the size of the mark you want to erase. Next, click and drag your cursor to paint on top of the drawing. Once you brush over the marked region, the tool will start working in real-time and remove the unwanted element, replacing it with minimal texture.
- Once the result is displayed and you are convinced of the clean-up, proceed to the upper-right corner of the screen and initiate the download to save the image. Please note that for the free version, the image will be stored in standard resolution. Upgrade to the Pro plan to access high-resolution exports.
Conclusion
It is not difficult to remove drawings from photos using the appropriate tool. This tutorial discussed five tools: AceThinker to edit quickly and powered by AI online, GIMP to manually fix it free of charge, Photoshop to apply advanced professional removal, Inpaint Online to do it fast online, and Cleanup.pictures to use real-time erasing with AI. If you're wondering how to remove sketch from photo files effectively, these tools offer a range of solutions based on your skill level and editing needs. Select your tool depending on the complexity of the work and your editing expertise. Don't forget to zoom in when you want to maintain the natural style of appearance: pay attention to matching textures and choose high-resolution exports, such as PNG or JPEG. A professional, clean, polished image will make your picture ready to share, print, or use in business.
