 When working on designs, resolution plays a big role in how sharp and clear your work looks. For print projects, you want your images to be crisp so they don’t look blurry on paper. For digital media, on the other hand, high resolution makes your graphics stand out with clean edges and professional quality. But if you’re using Adobe Illustrator, resolution works a little differently compared to programs like Photoshop. That’s because Illustrator is vector-based, meaning your designs are made of paths and shapes instead of pixels. This usually keeps them sharp, regardless of size, but there are times when you still need to adjust resolution. Also, it is useful when exporting logos, preparing vector art for print, or saving files for the web. In this article, we’ll explore how to increase resolution in Illustrator, along with some helpful third-party apps that make the process even easier.
How Resolution Works in Illustrator
Before diving into how to increase image quality in Illustrator, it’s important first to understand what resolution means. Illustrator handles images differently compared to other software, so knowing the basics helps you avoid confusion. This section will walk you through what resolution is, why it matters, and the common requirements you should know when working on both digital and print projects.
What Is Resolution?
Resolution refers to the quantity of detail an image holds. In most design tools, it’s measured in DPI (dots per inch) or PPI (pixels per inch). In other words, the higher the resolution, the sharper and clearer the image looks. But Illustrator is a bit different because it’s a vector-based program. That means your shapes and paths are made with math, not pixels, so they don’t lose quality when you resize them. Compared to trying to fix pixelated image problems in raster files like JPEGs or PNGs, working with vectors gives you a major advantage: your artwork stays sharp no matter the size.
Why Resolution Matters
Resolution is important because it determines the quality of your design. For print, low-resolution files can turn out blurry, grainy, or pixelated on paper. For digital media, on the other hand, poor resolution makes graphics look unclear and less appealing. Even though Illustrator keeps vector art sharp, the moment you export to formats like JPEG, PNG, or PDF, resolution settings directly impact quality. Therefore, if you want your logos, posters, or web graphics to stand out, you need to pay attention to resolution. Getting it right ensures your design looks sharp whether it’s displayed on a screen or printed on large paper.
Common Resolution Requirements
Different projects require different resolution settings. For print work, such as brochures, posters, or business cards, 300 DPI is the standard to ensure sharp, high-quality results. On the other hand, for digital projects like web graphics, icons, or social media posts, 72 DPI is usually enough since screens don’t need as much detail. In addition, Illustrator allows you to adjust these settings when exporting your files. So, knowing these requirements helps you prepare your designs correctly and saves you from issues like blurry prints or oversized digital files. Simply choose the right resolution depending on where your design will be used. And while some designers try to increase photo resolution in Photoshop to fix raster images, Illustrator makes it easier to avoid those issues altogether.
How to Increase Resolution in Adobe Illustrator | Step-by-Step Guide
Illustrator increases resolution by using vector graphics, which allows you to scale designs to any size without losing sharpness or quality. See the provided detailed guide below that you can follow.
Step 1 Upload Your Photo
Begin by opening Adobe Illustrator on your computer. If you don't have it, you can get it on its official website. Next, go to the "File" menu and select the "Place" option. Next, choose the photo you want to increase the resolution for in the pop-up window and click the "Place" button. After that, position the image on your artboard as desired and resize it.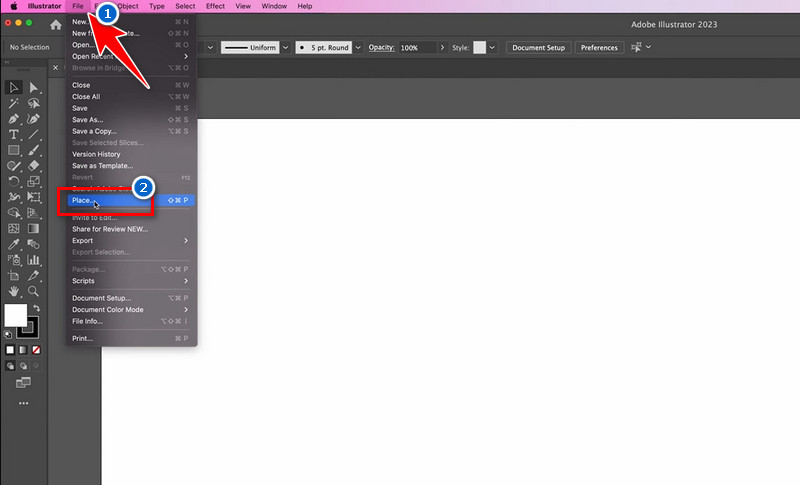
Step 2 Open Raster Effects Settings and Adjust Resolution
Next, go to the "Effect" menu and hover over the "Raster Effects Settings" option. Then, select "Document Raster Effects Settings" and a new dialog box will appear. Within the dialog box, you will find options to adjust the resolution. You can select High (300 PPI) for print-quality or choose a custom value if needed. Also, you can change the Color Model, Background, and more.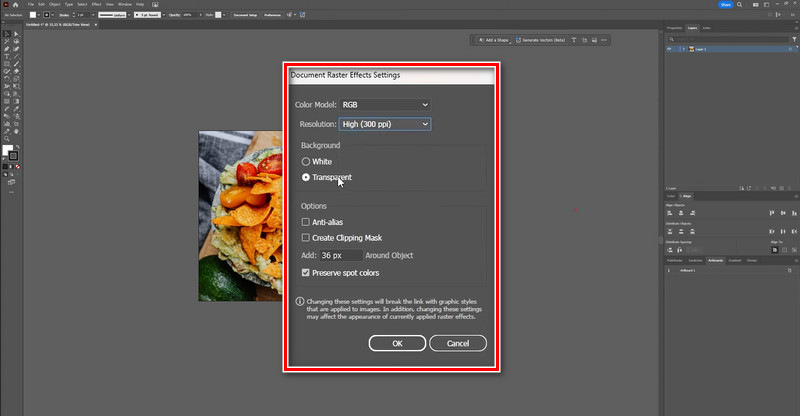
Step 3 Export Your Enhanced Image
Once satisfied with the adjustments, proceed to export the image. Go to the "File" menu and select the "Export" option. Then, choose "Export As" and select the desired file format, such as JPEG and PNG, and specify the export location from the dialog box. Lastly, click "Export" to save your high-resolution image.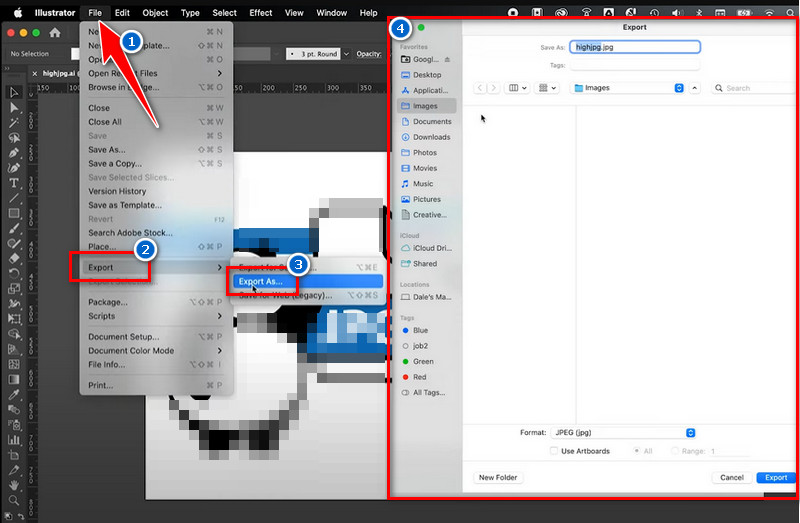
Alternative Tools to Increase Image Quality
1. AceThinker PicWish
Another AI tool that helps you increase JPEG image resolution, aside from Adobe Illustrator, is AceThinker PicWish. This photo editor lets you turn your low-resolution images into high-resolution images by using its AI capabilities. Besides that, it helps you upscale your pictures up to 4x, which increases the dimensions of your photo while keeping it sharp, suitable for both printing and digital use. More than that, while enlarging, the tool keeps the original colors, textures, and edges intact. This ensures that the enlarged image looks clean and professional rather than distorted. Furthermore, AceThinker PicWish stands out with its AI-detailed enhancement. That said, it uses AI to reconstruct and enhance details when enlarging images. It fills in missing information intelligently, reducing blur or pixelation for a more natural look. We provided a detailed guide below on how to increase image resolution in Adobe Illustrator alternative.
Try it for Free
Step 1 Open AceThinker PicWish
Begin by downloading the AceThinker PicWish file installer. To get it, you can opt for the download buttons given above this step, depending on your computer OS. Once you get the file, locate it on your local storage and start the installation process. Make sure to follow and approve the prompts that appear on your screen. When the installation is successful, AceThinker PicWish will open automatically.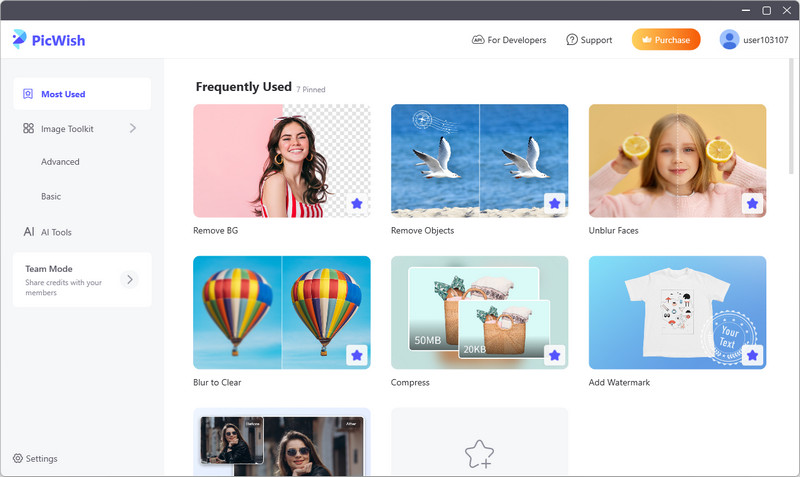
Step 2 Upload Your Photo
From the main interface of the tool, scroll down to the various tools until you find the "Enlarge" option. Then, click on the tool and choose "Upload File" from the pop-up window. Next, select the image you want to increase the resolution of from your files. Once found, double-click on it and click the "Start" button to upload it to the tool.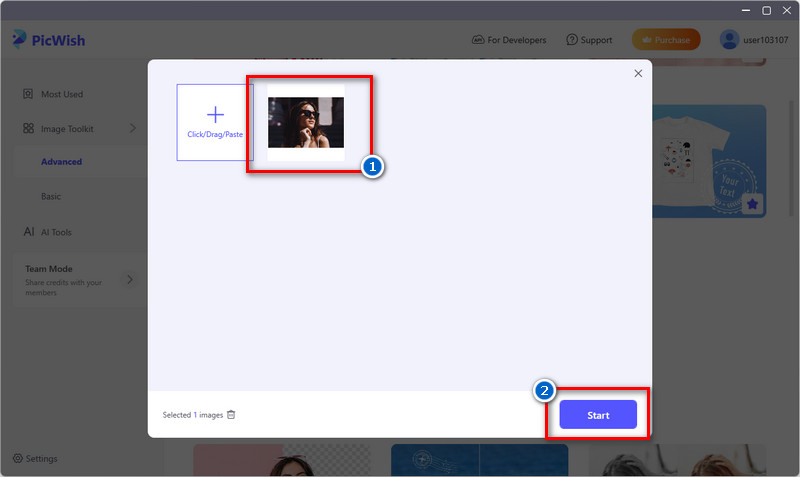
Step 3 Start the Process of Increasing Resolution
After the photo is uploaded, PicWish will start processing the image at its maximum size. But if you want to scale it to a specific dimension, you can manually adjust the settings from the right-hand corner. Then, click the "Start" button to process it again. Once satisfied, click the “Save All” button below and choose the desired output location on your computer.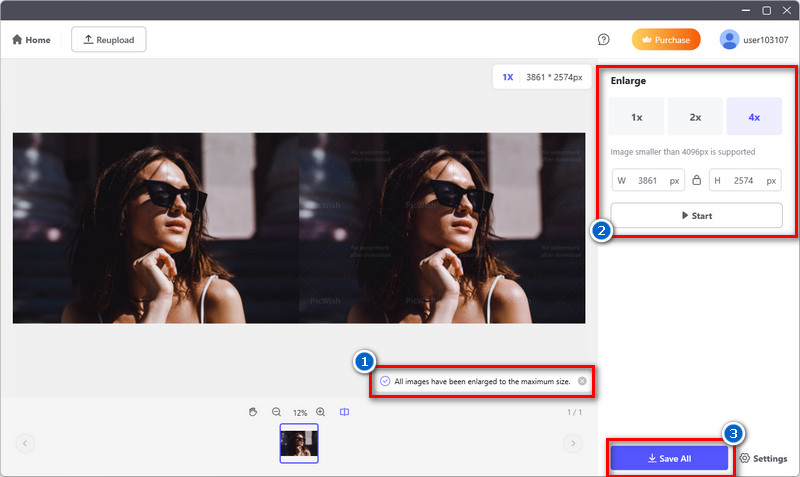
2. AceThinker Online Image Upscaler
Suppose you’re also looking for an online photo editor to increase image resolution without dealing with installation processes. In that case, you go with AceThinker Online Image Upscaler. This tool is accessible and works on any browser and device. That means you can upscale your JPEG photo resolution on any computer, mobile device, or tablet with any browser. Furthermore, the online photo upscaler comes with up to 16x upscaling capabilities, so you can enhance your image depending on your desired resolution. Likewise, it also provides a Smooth and Detailed enhancement mode. The enhancement modes let you choose optimal results for your image type: Smooth mode reduces noise for polished portraits, while Detailed mode preserves fine textures for artwork and intricate visuals. See the guide we present below on how to increase quality of image in Illustrator online alternative.
Step 1 Access the Online Upscaler
First, open a browser on your device and search for AceThinker AI Image Generator and Editor. Next, please scroll down to its homepage until you find the Image Upscaler. Once found, click on it to access the online tool.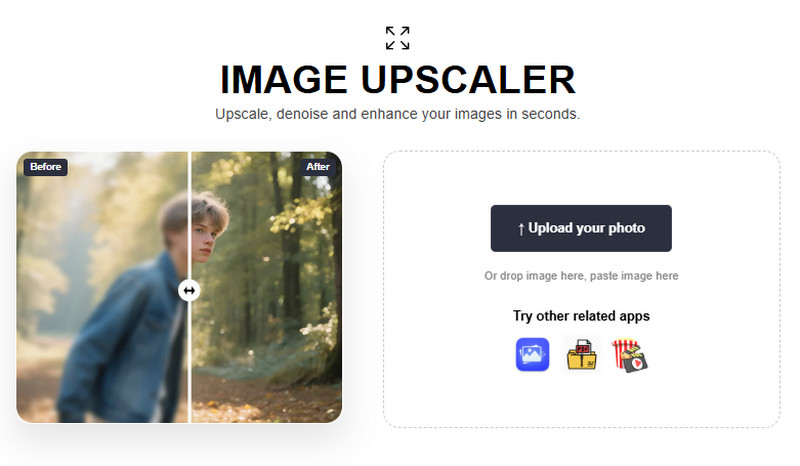
Step 2 Upload the Image
On the tool's interface, locate and click the "Upload Image" button to import the image. Or drag and drop your photo file directly into the designated area. Once uploaded, select the desired enhancement mode and upscale factor.
Step 3 Start to increase the Image Resolution
Once ready, click the “Upscale” button to initiate the resolution enhancement process. It only takes 1-2 minutes for the tool to process the image and provide a high-resolution output. Finally, click the "Download" button above to get your newly enhanced image to your local storage.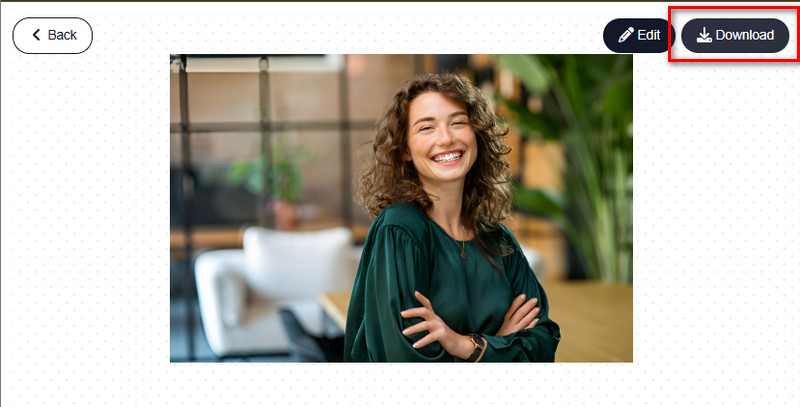
Frequently Asked Questions
Which type of image is resolution-independent?
Vector images are resolution-independent. This means they are made of paths and shapes instead of pixels, so they don’t lose quality when resized. That’s why logos and graphics are usually created as vectors.

What does it mean that Illustrator is resolution independent?
Illustrator is resolution-independent because it works with vector graphics. No matter how much you zoom in or scale up your design, the image stays sharp. This makes it perfect for creating designs used in both small and large formats.
What is high resolution in Illustrator?
High resolution in Illustrator usually refers to exporting or rasterizing your vector art with more detail. When you save or export, you can set a higher DPI (dots per inch) up to 300 for clear and sharp results. This is especially important for printing, so your designs don’t look blurry.
Conclusion and Chart
In summary, increasing resolution in Illustrator mainly revolves around adjusting raster effects and export settings. Unlike pixel-based programs, Illustrator keeps vector artwork sharp by default. However, effects like shadows, glows, and placed images still need proper resolution settings to look their best. By using the Document Raster Effects Settings and selecting the appropriate DPI for your project, you can ensure that all effects remain crisp, whether your design is for print or digital use. Also, when exporting, always double-check your resolution options for formats like PNG, JPG, or PDF. As a best practice, work with high-quality images, scale effects consistently, and preview your artwork before finalizing. Moreover, suppose you need an alternative or want a quicker solution. In that case, tools like AceThinker Online Image Upscaler and AceThinker PicWish can help enhance image resolution easily.
| Tool | Supported Image Formats | Photo Editor Type |
|---|---|---|
| Adobe Illustrator | AI, EPS, PDF, SVG, PNG, JPG, TIFF | Vector-based editor |
| AceThinker PicWish | JPG, PNG, BMP, TIFF | AI-powered image editor |
| AceThinker Online Image Upscaler | JPG, PNG, BMP | AI-powered image upscaler |
