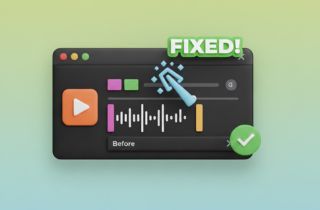
 VLC Media Player is a popular and powerful player known for playing almost any video or audio format. However, one of the issues that users always face is this delayed audio sync. Sometimes, you may notice that the audio is out of sync with the video. This means the sound plays too early or too late, making it hard to enjoy your movie or video. This issue can happen for various causes, such as video encoding problems, hardware performance, or incorrect settings. The good news is that VLC provides simple tools to fix this problem in just a few steps. In this article, we will explain why audio sync issues happen and show you how to adjust the audio timing in VLC. Following these easy steps can quickly VLC fix audio sync problem and enjoy a smooth viewing experience.
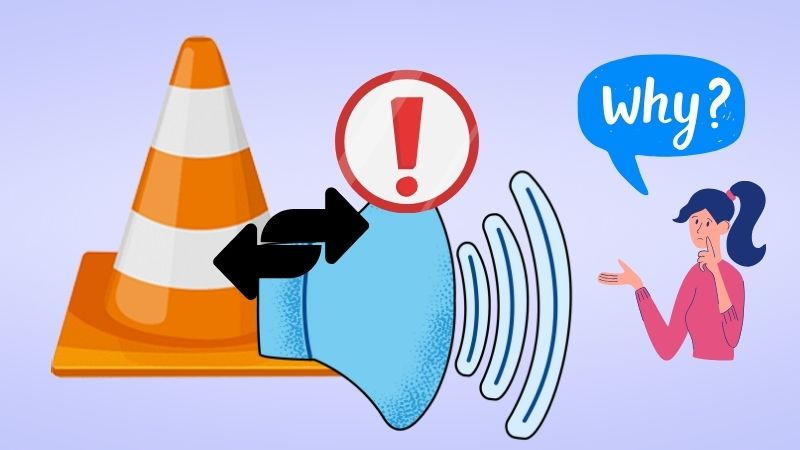
Why the Audio Delay in VLC?
Audio video delay in VLC can happen for several reasons. Here are the most common causes:
- Video Encoding Issues – If a video file is poorly encoded or converted, the audio and video may not perfectly align.
- Playback Performance – If your computer or device is struggling to process the video, it may cause a delay in either the video or audio.
- Incorrect Audio Settings – Sometimes, VLC's settings may not match the video's properties, leading to synchronization issues.
- Hardware Problems – Issues with your speakers, headphones, or sound card can also cause delays in audio playback.
- Corrupted or Damaged Files – If the video file is incomplete or damaged, it can lead to audio sync problems.
Videos downloaded or streamed from the internet might have been encoded or compressed in a way that causes the audio and video tracks to fall out of sync.
Bugs in media players or streaming apps can sometimes cause audio and video to desynchronize.
Quick Ways to Fix Audio Video Delay in VLC
This section will discuss simple methods to fix audio delay VLC that we tried and tested. You can follow each method until the issue is fixed.
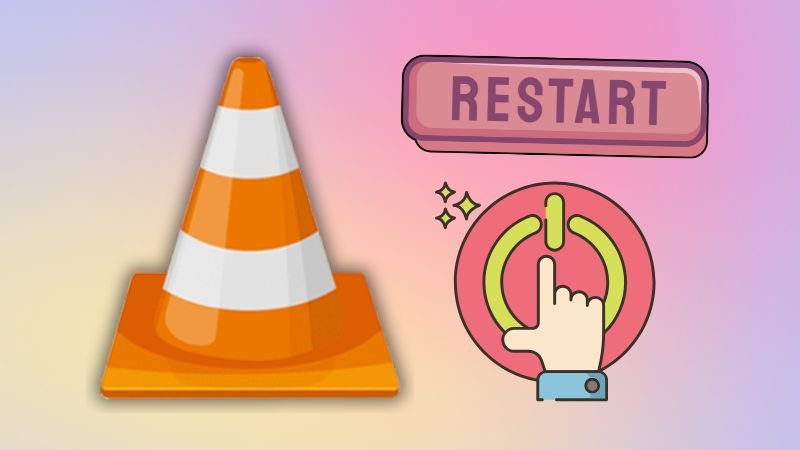
Method 1. Restart VLC App to Fix Audio Out of Sync
| Effectiveness | Low – Works only for temporary glitches. |
| Time Needed (Approx.) | 1–2 minutes |
If the problem was caused by a temporary software glitch, restarting VLC can quickly fix it. Sometimes, simply restarting the VLC Media Player can fix audio sync issues. This is because VLC might experience temporary glitches or memory issues that cause the audio to fall out of sync with the video. It only takes a few seconds, but the result is good, especially if the issue is temporary. However, if the problem persists, then try the next method.
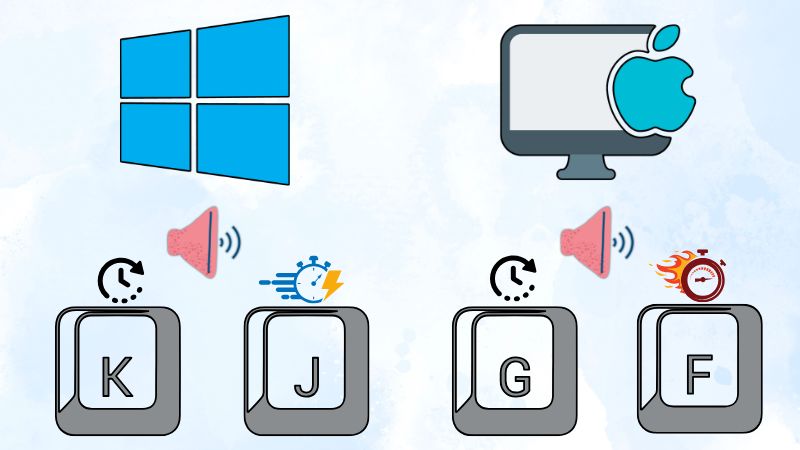
Method 2. Fix VLC Audio Delay Using Keyboard Shortcut Keys
| Effectiveness | Medium – Quick fix but only works during playback. |
| Time Needed (Approx.) | Few seconds |
A quick and easy way to adjust audio sync in VLC is using keyboard shortcuts.
- For Windows computers, if the audio plays before the video, hit the ‘K’ hotkey from your keyboard to delay the audio. On the other hand, suppose the audio plays ahead of the video. You can hit the ‘J’ hotkey to advance the audio.
- For a Mac computer, press the ‘G’ key on your keyboard to slow down the audio. Otherwise, press the ‘F’ key on your keyboard to make the audio faster if the audio plays before the video.
By doing this, VLC will tweak the audio track synchronization by 50 milliseconds every time. You can see a tiny sync adjustment notification at the top of the video to confirm the hotkeys you press are working. However, this method only works while watching a movie and is not a permanent fix. This means you must repeat the same process whenever you open the video.
Method 3. Set Audio Desynchronization Compensation in VLC
| Effectiveness | High – Saves sync settings for future playback. |
| Time Needed (Approx.) | 2–3 minutes |
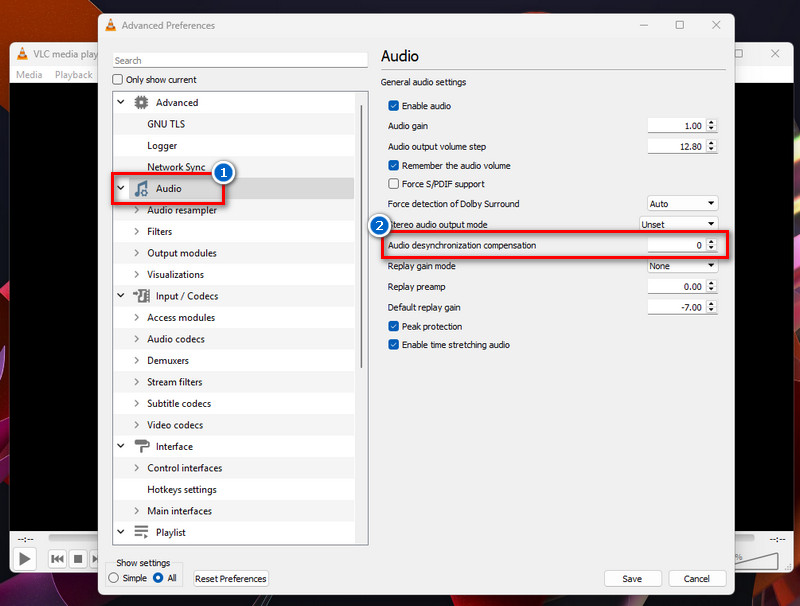
Another method for VLC to fix audio delay is to adjust the track synchronization settings. VLC Player has a feature called ‘VLC Audio Desynchronization compensation’ that allows you to permanently resolve the audio-video sync issue. This means that every time you play a video with an audio delay, VLC will fix it automatically. We provide a step-by-step guide below that you can follow.
User Guide:
- On the menu bar, navigate to the Tools option and select Preferences. Next, go to the Audio section and head over to the bottom part. Tick the All option from the Show settings instead of Simple to show the advanced settings.
- The Audio option is on the left side panel in the next window. Click on it for various settings, including the Audio Desynchronization compensation option. Next, enter your desired track synchronization value in seconds.
- We suggest trying a positive or negative 0.100s value as the initial input and testing the result. Next, click the Save button below to save the changes. Finally, open the video and see if VLC syncs audio correctly.
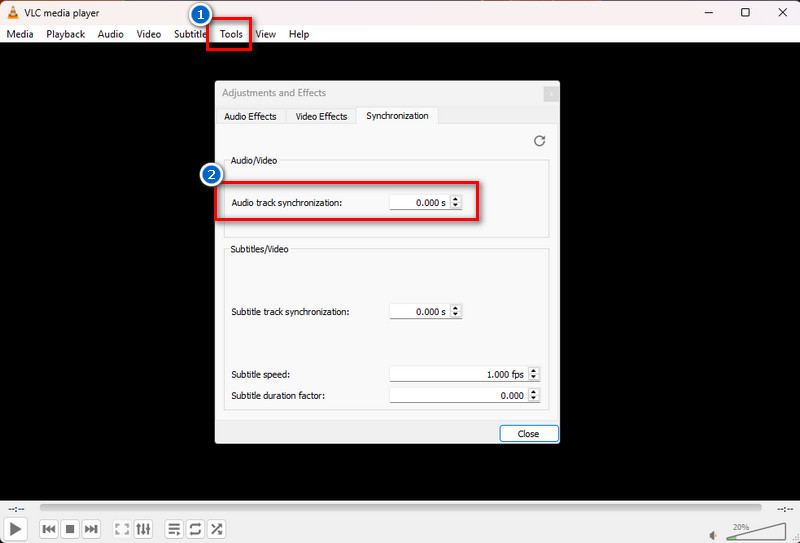
Method 4. VLC Fix Audio Delay with Audio Track Synchronization
| Effectiveness | High – Precise manual adjustment, but not permanent. |
| Time Needed (Approx.) | 2–3 minutes |
The Audio Track Synchronization feature in VLC is another simple method to fix VLC no sound or audio sync issue. This feature lets you manually adjust audio-video delay in real-time. Compared to the Desynchronization Compensation feature, this method will not permanently fix the audio problem, meaning you must manually set up every video playback. Also, this method is suggested for the video you watch. So, if you have video files with different lag issue levels, this method suits you.
User Guide:
- While the video is playing in VLC, click the ‘Tools’ in the menu bar and select ‘Effects and Filters.’ Here, you can see advanced settings related to audio and video.
- Next, go to the ‘Synchronization’ tab and find the ‘Audio/Video’ section. Under this section, you can see the ‘Audio Track Synchronization’ option.
- Enter a numerical value in seconds to offset the audio. If the audio plays before the video, enter a positive value such as 0.100s, or if the audio plays ahead of the video, enter negative values like -0.100s.
- After you make the adjustments, click the ‘Close’ button below to save the settings. Finally, continue playing and see that the set track synchronization value fixes the issue.
How to VLC Adjust Audio Sync on Android and iOS Devices
| Effectiveness | Medium – Works well but requires manual adjustments. |
| Time Needed (Approx.) | 1–2 minutes |
VLC Media Player is available not only on desktop devices but also on Android and iOS devices. There are also instances when we experience delayed audio sync with video playback. So, we searched if the VLC player app on mobile devices has the same feature when fixing audio delay issues. Luckily, we discovered that the VLC for Android and iOS has the same settings as on the desktop. Before doing this solurion, it's best to set VLC as your default player on your device so all videos automatically open with VLC. Here's the steps on how to do it.
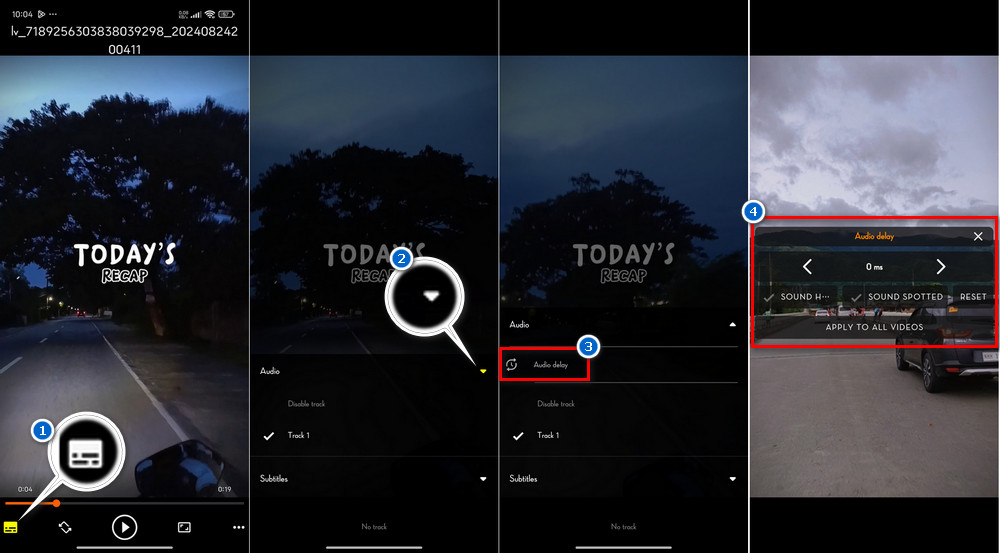
On Android Devices:
- On your Android device, open the VLC Media Player app. Next, start the video that has the audio sync video issue. While playing the video, tap on the player’s screen to show the playback options.
- Tap the subtitle track icon below, and a pop-up window will appear. Here, you can see the audio and subtitle settings. Next, tap the drop-down icon from the audio to see the Audio Delay settings.
- Once you activate the settings, you can see the adjustments menu on your player’s screen. To sync video and audio, you can tweak the audio delay by tapping the plus and minus icons. After adjustments, preview the video to ensure audio sync.
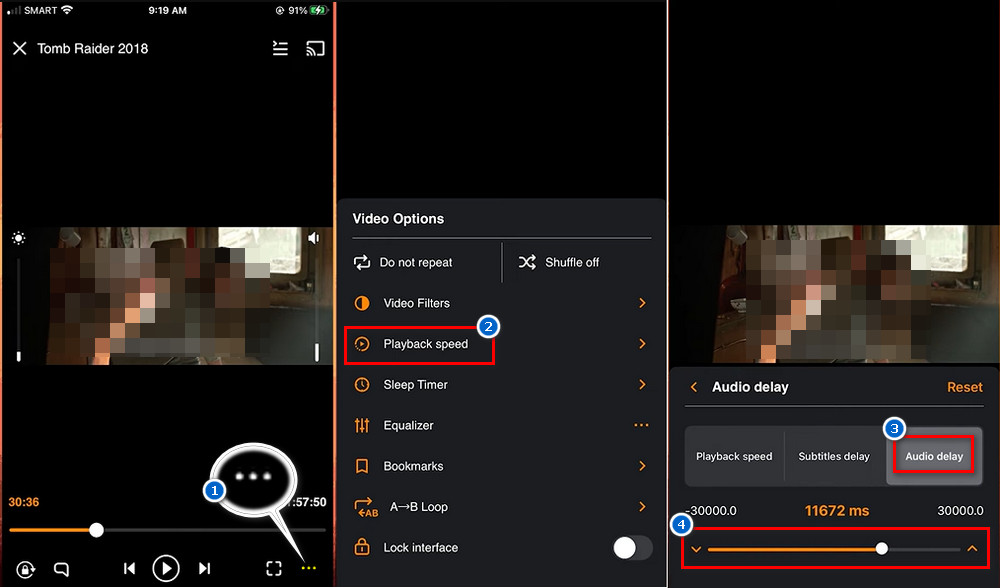
On iOS Devices:
- Play the video in VLC and tap the three-dot icon to reveal more playback options in the lower right corner of the screen. From the pop-up menu, select the Playback Speed option. Here, you can see the three options, including the Audio Delay settings.
- Go to the Audi Delay section, and you will see the slider that you can use to adjust the audio timing. You can drag the slider to the left or right to decrease or increase the audio delay respectively.
- Continue adjusting the audio delay slider until the audio and video are properly synchronized. Once you are done, tap anywhere on the screen to close the menu and continue watching the video with the adjustments you made.
Fix Audio Video Delay with VLC's Alternative Player
| Effectiveness | High – Best if the issue is due to VLC limitations. |
| Time Needed (Approx.) | 5–10 minutes |
The problem may be with the video file itself if none of the above methods work. In this case, we try to play the video in VLC alternative for Mac and Windows, the AceThinker Player. This media player can seamlessly play high-definition videos with zero delay issues. We also discovered that this player supports Blu-ray, DVDs, 4K, HD video, and more videos. Moreover, the media player supports almost all audio and video file formats like MP4, MOV, MKV, AVI, WMV, MP3, AAC, and more. Some file formats may not be compatible with your Mac. Still, AceThinker Player offers a versatile video and audio playback solution. You don’t need to convert files originally created for Windows or other platforms, as the player recognizes these formats and plays them directly on your Mac. There’s also no need to worry about installing complex codecs to achieve smooth playback of your videos. What we love about this player is that it uses hardware acceleration technology to ensure smooth playback, no delay issues, properly synchronized video and audio, and the best visual experience. Below, we provide a simple guide on how to use the media player.
Try it for Free
How to Use AceThinker Player
Step 1 Install AceThinker Player
First, download the AceThinker Player installer file by clicking the download button above this step. Once downloaded, start the installation process by double-clicking the .exe file. Then, follow the wizard prompts on your screen to install the player successfully.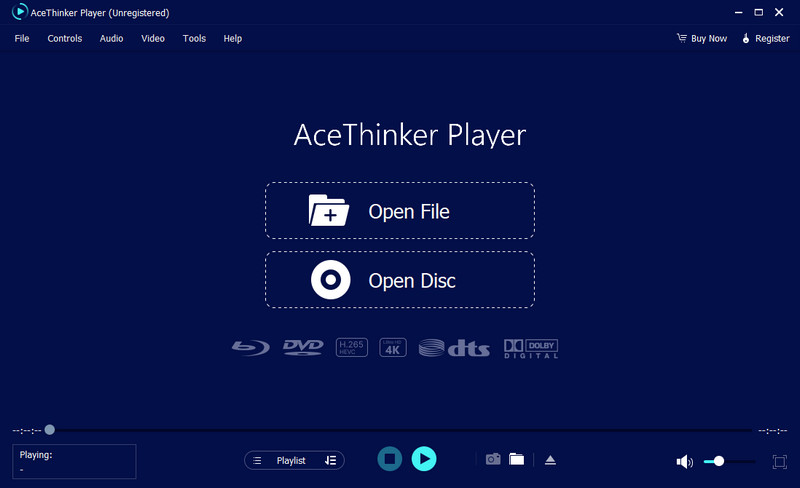
Step 2 Open your Media File
Launch the player once it is installed on your computer. Then, import the media file by clicking the ‘Open File’ button on the main interface. From there, locate your video file in the Explorer and hit the ‘Open’ button to import it into the player.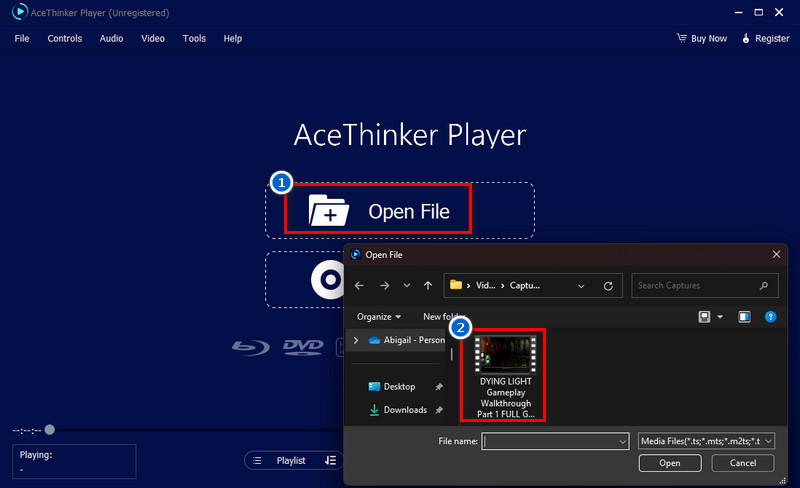
Step 3 Enjoy Smooth Playback
Once the video is imported, it automatically starts to play. The various playback options on the interface are visible, including the full-screen button, rewind, forward, pause, play, stop, volume, playlists for other videos, and many more. Finally, you can now enjoy your favorite video without audio sync issues.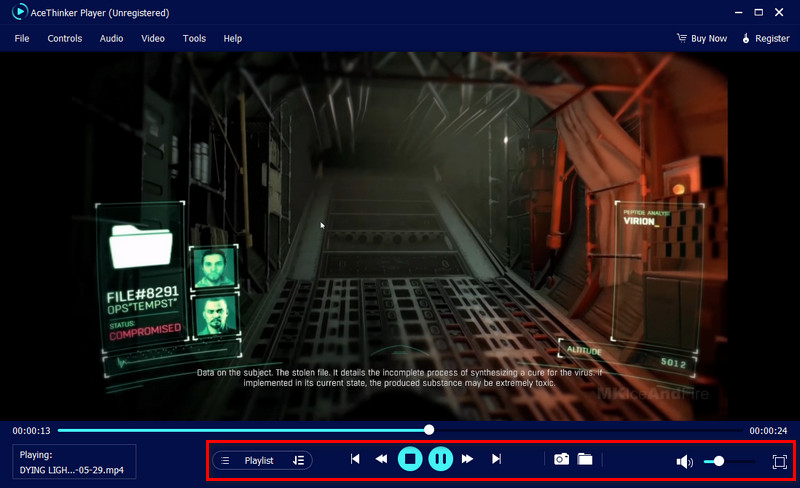
Out-of-Sync Audio in VLC FAQs
Why does my audio delay only happen with certain videos?Question
Audio delay may occur only in certain videos due to poor encoding, file corruption, etc. The audio may not sync correctly if the video was improperly converted or has missing frames. Different videos have different encoding settings, which can cause varying levels of delay.

Does VLC automatically fix audio sync issues?
No, VLC does not automatically fix audio sync issues but allows manual adjustments. You can correct delays by using keyboard shortcuts or the Audio Track Synchronization feature. You must manually set a desynchronization value in VLC’s preferences if you need a permanent fix.
How do I save the audio sync adjustment for future playback?
To save the audio sync adjustment, go to Tools > Preferences > Audio and set the Audio Desynchronization Compensation value. This ensures that VLC applies the same adjustment every time you play the video. However, this setting is not ideal for videos with varying audio delays.