 The introduction of Minecraft into the gaming world has seen it gain lots of approvals from gamers. Minecraft allows players to build their very own buildings, and structures, by arranging several sizes of blocks up. The popularity of the game has seen users sought for a lighter and accessible version, of which the developers duly obliged and created Minecraft Pocket Edition. The PE version can easily be carried around by users anywhere they go on their devices. With the competitive features of the game, players are always looking for ways to record Minecraft Pocket Edition so that they can show off their gameplays to colleagues and friends both offline and online. When it comes to recording Minecraft PE, the device OS of the player is an essential factor to be considered. To help you, we have listed some of the recommend iOS recorders for MCPE.
AceThinker Mirror - Best Minecraft Gameplay Recorder
An efficient way to record Minecraft PE on iOS is by using AceThinker Mirror. This is a good way to play Minecraft PE because of its full-screen feature, which gives the impression that it is not a mobile version of the game. The tool's recorder feature is very reliable because it does not have a limit and records videos in high resolution. It can also take screenshots of the game, which is a cool feature because it can take in-game images. The videos taken using the tool can then be uploaded because the tool has a direct upload button to various video-sharing sites, which eases the upload process tremendously. To learn how to use iOS Mirror, follow the steps below.
Step 1 Download the installer of AceThinker Mirror
Download the installer by clicking one of the buttons above. Wait for the download process to finish and then run the installer on the PC. Follow the instructions that will appear from the setup wizard to avoid compatibility issues later on.Try it for Free
Free Download
Windows 8/10/11
Secure Download
Free Download
Mac OS X 10.15 and above
Secure Download
Step 2 Connect iOS device to AceThinker Mirror
It is essential to ensure that both devices are connected to the same internet network for the mirroring to work. Launch iOS Mirror from the PC after installation, and then on the iOS device, swipe up from the bottom part of the screen to launch the Control Center. Tap the "Screen Mirroring" option and then select which PC to connect to from the window that will appear, and the mirroring will start after that.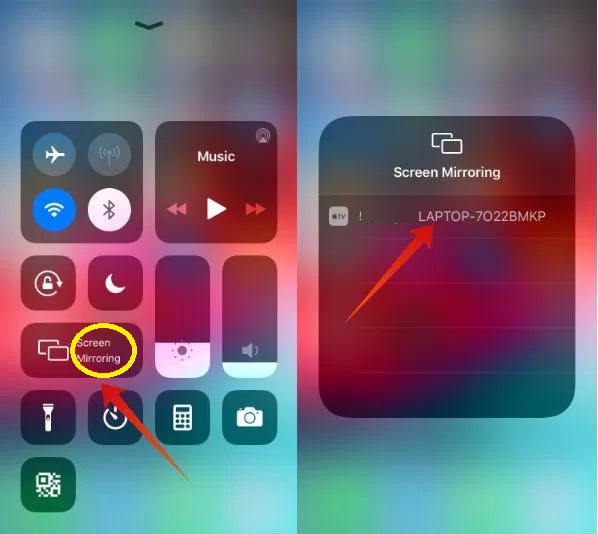
Step 3 Record the Minecraft PE gameplay
Launch Minecraft PE from the iOS device, and use it as a controller, while the PC monitor is the monitor. Go full screen to have the best gaming experience and then record the gameplay by clicking the "Record" button. Similarly, to end the recording process, click the "Stop" button, and then the video will be saved on the PC.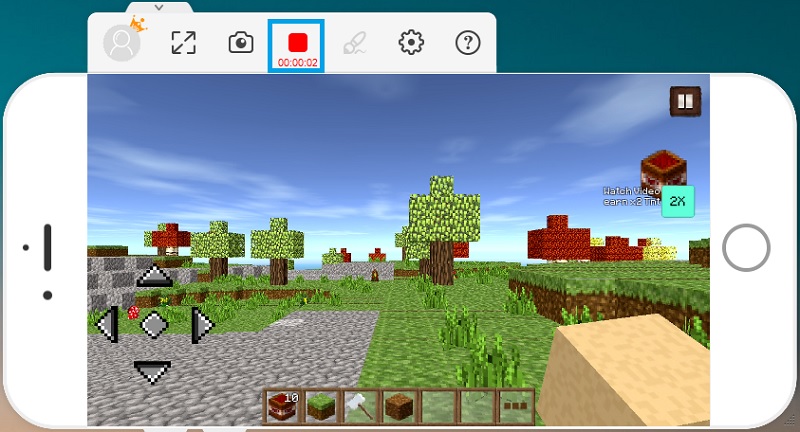
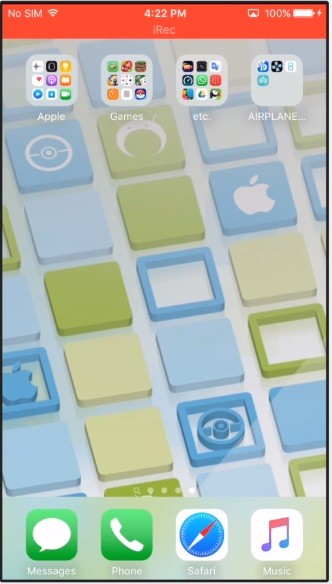
Capture Minecraft on iPhone/iPad with iRec 2.0
iRec 2.0 presents another way for players to record on their iPhone/iPad. It is a high functioning but a bit complicated recorder, which lets you capture on-screen activities. To install the app, users have to go to the official site, follow the specified guidelines, download an IPA file, and install a couple of third-party applications. The process involved means users consider it to be a bit risky, but you can try. Note that it can be a complicated process to install the app. Also, there is a red recording bar that shows at the top of the screen, which cannot be removed.
User Guide :
- Download the latest IPA file of iRec 2.0 by visiting Cydia App using the default web browser of your iOS device. From here, you need to use Cydia Impactor to install the app successfully.
- To start recording, launch the tool, and select different recording options like record landscape or portrait.
- Once done, select the recording option, the app will start recording. Click the home button of your iOS device and tap the Clash of Clan app to record the screen while.
- To stop the recording process, go back to the iRec 2.0 app. And a pop-up window will appear for permission to save the recording clip.
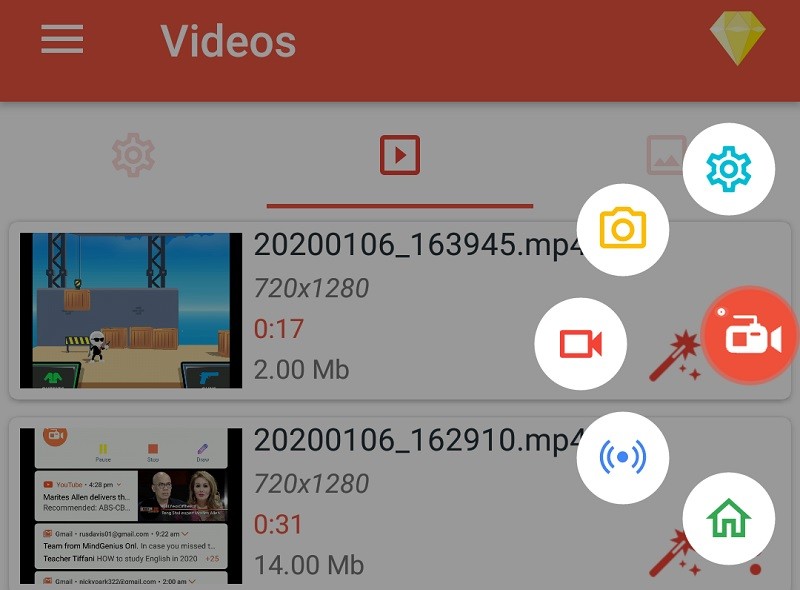
Record Minecraft on Android Using AZ Screen Recorder
AZ Screen Recorder is an excellent way for Android users to record and capture the contents of their screen. The app has a series of eye-catching features such as a draw function, overlay front camera, and a magic button that ensures a flexible recording experience. However, currently, it only supports Android 5.0 upwards. Furthermore, they need to inform users that they have to pay before they can use it.
User Guide:
- Using your Android device, go to "Play Store" to download and install the AZ Screen Recorder app.
- After obtaining the app, you may launch the tool from the home screen of your device, and the "AZ Recorder" floating icon will appear.
- Once done, launch the Clash of Clan app, then tap floating icon and tap the "Screen Record" icon.
- Next, a confirmation window will appear and tap "Start Now" to start the mobile screen recording process.
- To stop the screen recording, click the "Stop" icon on the "Notification" panel of your mobile device.