- Download the AceThinker iPhone Data Recovery and install it on your PC.
- Open the software and connect your mobile device.
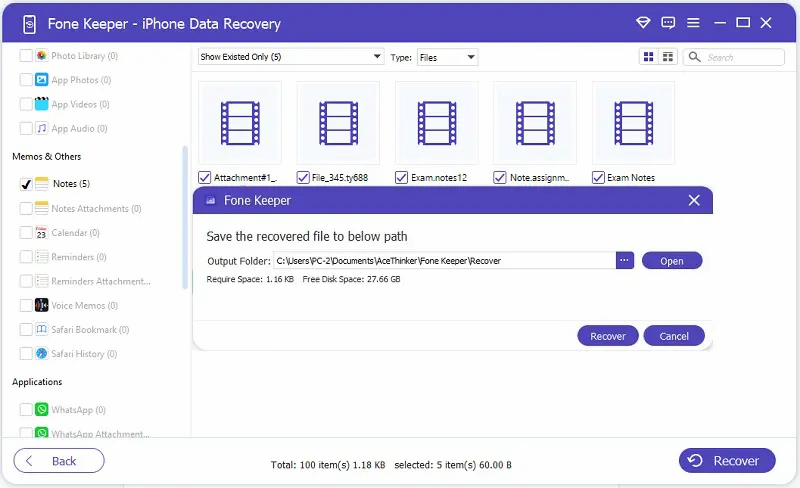
- Select all your Notes and click the "Recover" button.

The Notes app on iPhones is a useful tool that many people use daily to keep track of important information. From grocery lists to reminders, the Notes app helps people stay organized and on top of their to-do lists. One of the great benefits of this app is the ease with which you can revert actions. If you accidentally delete something or make a mistake, you don't have to worry about losing all of your hard work. With the Notes app, you can undo your last action and return to where you were before. This feature is a game-changer for anyone constantly on the go and needs to make changes or corrections to their notes quickly. Plus, it's a great way to keep your notes organized and error-free. Whether you're a student, a working professional, or simply someone who wants to manage their daily tasks effectively, the Notes app is a crucial tool that can support you in being productive and keeping things orderly. In this article, we will guide you through various methods to undo a Note on iPhone.
What is Notes App and Its Role in Users?
The Notes app is versatile for note-taking, organization, and productivity. It is designed to help users quickly jot down their thoughts and ideas, whether at home or on the go. With its clean and intuitive interface and wide range of features, the app makes it easy to keep track of everything from to-do lists and reminders to project notes and brainstorming sessions. One of the key features of the Notes app is its ability to create and organize notes in a variety of formats. Users can start with a simple text note, then add photos, videos, and audio recordings, or even sketch their ideas using the built-in drawing tools. Once created, notes can be organized into folders and subfolders, making it easy to find exactly what you need when you need it.
In addition to note-taking, the app offers a range of productivity features designed to help users stay on top of their tasks and projects. These include setting reminders and alarms, sharing notes with others, and collaborating on notes in real-time. Overall, the Notes app is essential for anyone looking to stay organized, productive, and on top of their game. If you're a student, a working individual, or simply someone who enjoys organizing thoughts and ideas, this app has everything you need to take your note-taking to the next level.

The Importance of Being Able To iPhone Undo Notes
It's crucial to be able to undo delete in iPhone Notes app to prevent accidental deletions or modifications. Here are some common scenarios where users may need to undo actions:
- Accidentally deleting a note: This can result in losing important information that cannot be retrieved.
- Accidentally modifying a note: This can irreversibly change the note's content, leading to confusion or misinformation.
- Moving a note to the wrong folder: This can make it difficult to find the note later on and cause frustration.
- Changing the formatting of a note: This can make the note harder to read or less organized, leading to confusion or mistakes.
- Accidentally deleting a note meant to be kept: This can be time-consuming and frustrating, as the user will need to recreate the note from scratch.
In all of these scenarios, the potential consequences of not being able to undo actions are serious. Users risk losing important information or making irreversible changes to their notes. By providing the ability to undo actions, the Notes app ensures that users can confidently work and avoid these potential consequences.

Top 5 Methods to Undo Actions in the Notes App
Method 1. Use the "Undo" Button on the Toolbar
The first and straightforward method to undo delete in Notes iPhone is to utilize the "Undo" button conveniently located on the app's toolbar. By simply tapping on the curve arrow icon, you can easily reverse any accidental deletion or modification of your notes. In addition, even if you accidentally delete all the content, this feature can easily back them all. See the guide below for a step-by-step explanation of how to use the "Undo" button.
Step 1 Tap the Brush Icon
To start with, open your Notes App and look for the "Brush" icon on the toolbar at the bottom of your screen. Once you find it, you will notice the presence of curved arrows pointing left and right.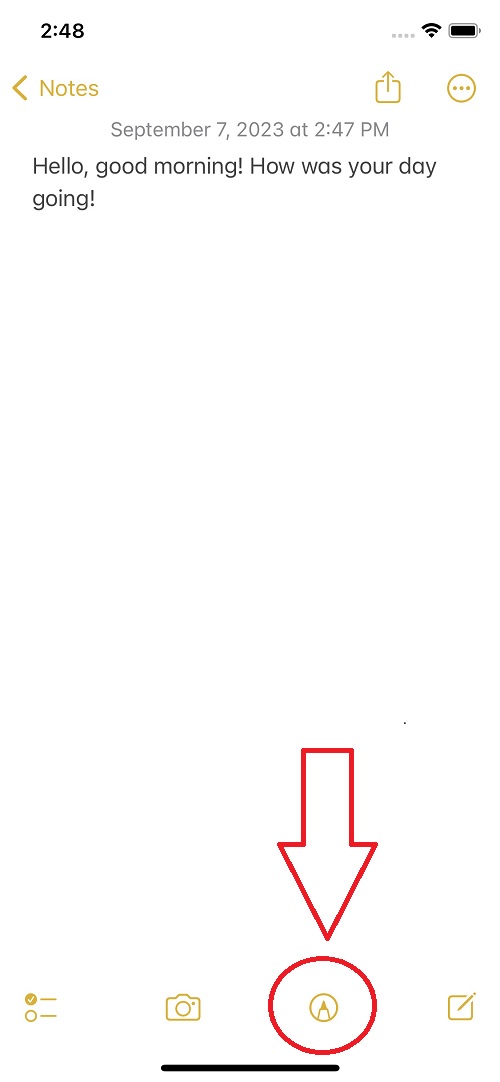
Step 2 Undo the Action
The curved arrow pointing to the left is the symbol for the "Undo" button. Keep tapping on the icon with the curved arrow until you can see all the content you accidentally deleted in your notes.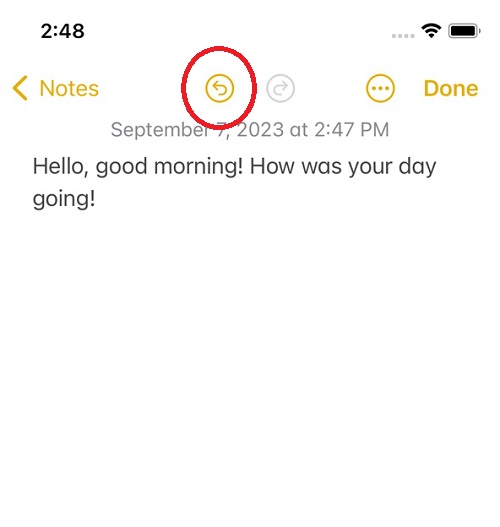
Step 3 Undoing Action is Successful
And there you have it! Your deleted content will be brought back successfully. But if you close the Notes App without hitting the "Undo" button, the restoration won't happen.
Method 2. Shake Your iPhone
If you prefer a more interactive method, you can shake your iPhone to undo actions in the Notes App. The iPhone device has a built-in feature called "Shake to Undo." This feature allows you to shake your device to undo actions. Additionally, this works not only in the Notes App but also in many other apps and situations where you must undo a recent action like typing and deleting text, moving or resizing objects, and more. However, please ensure this feature is enabled in your device's settings.
Step 1 Launch Settings App
To check if the "Shake to Undo" is enabled, go to the "Settings" app. Then, scroll down and tap the "Accessibility" menu. Under the "Physical and Motor" section, tap on "Touch" and then select "Shake to Undo."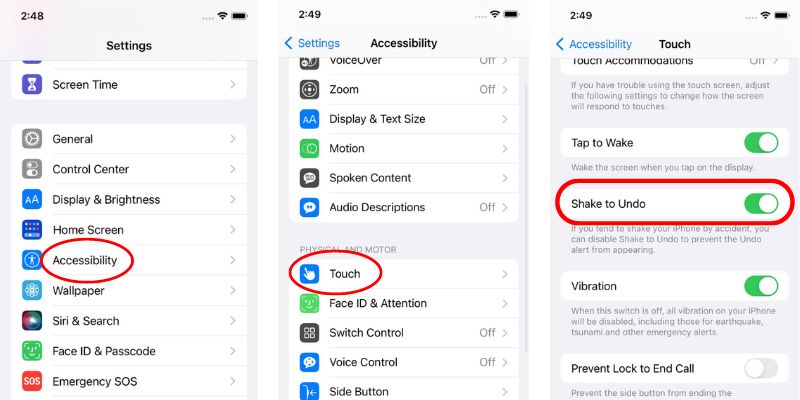
Step 2 Open Notes App
Now, go to your Notes app and try this method. Create a new note and start typing your content. Try to delete or modify the content, and then give your iPhone a gentle shake.
Step 3 Tap the Undo Button
You can feel a vibration on your hands, meaning the prompt asks if you want to undo the action. Simply tap the "Undo" button to restore your notes to their previous state. Repeat the shaking process until your deleted content gets back.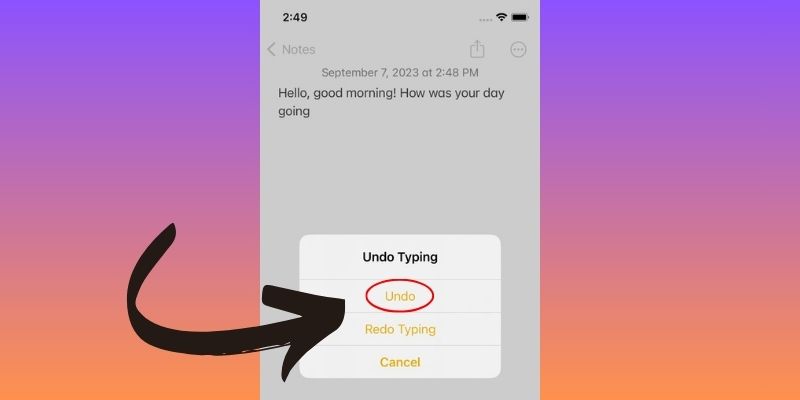
Method 3. Use Motion Gestures (3-Finger Swipe Method)
Motion Gestures or Finger Gestures are another effective way to undo actions on your smartphone. By using your 3-fingers and simply swiping to the left or right on the screen, you can easily undo or redo any action. While the feature is mainly designed for iPad users, iPhone users can also use it. However, also make sure that your device supports this feature. To use this 3-finger swipe motion, follow these steps:
Step 1 Place Your 3-Fingers
Since you are in your Notes App, place your 3-fingers on your iPhone screen and swipe to the left. Swiping your finger to the left means you undo in Notes iPhone the most recent action.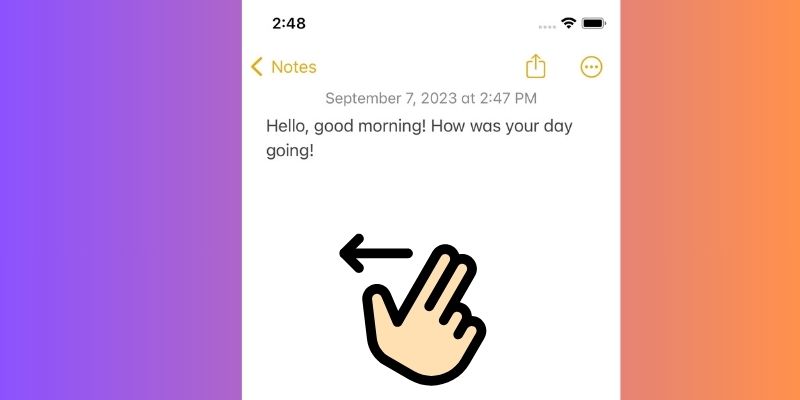
Step 2 Action Has Been Undone
You'll notice a message at the top of the screen that says "Undo." This means that the action has been reversed.
Step 3 Repeat the Process
Repeat swiping to the left to undo multiple actions in successions. So, this is how to use the option gestures to undo actions on your iPhone.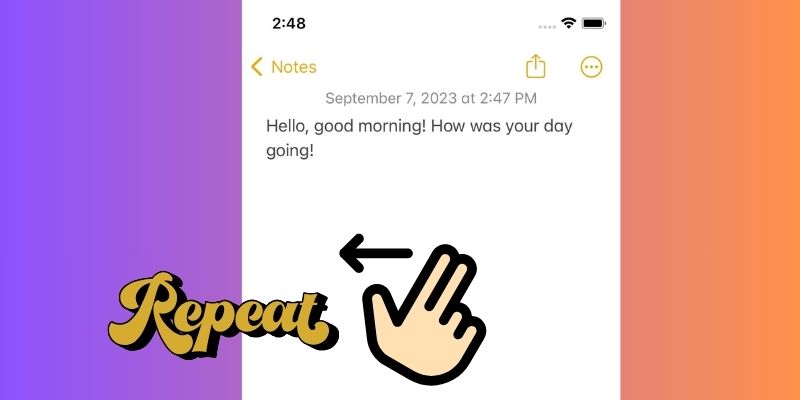
Method 4. Three Finger Single Tap Method
Another way to make the undo actions is using a three-finger single tap. When you do this, a menu will pop up with options like undo, redo, copy, and paste. If you want to undo your changes, you can click on the "Undo" icon, which is the "left arrow curve." This is particularly useful when working with tables in Notes and wanting to reverse a modification you made. These gestures will not only work with the Notes app but also with all other apps on iOS, such as Messages, Twitter, Gmail, and WhatsApp. See the instructions below.
Step 1 Open the Notes App
To try this method, kindly find the Notes App on your smartphone and open it. Next, create a new note by tapping the "Create New" icon at the bottom right corner of the screen or choose an existing note to edit.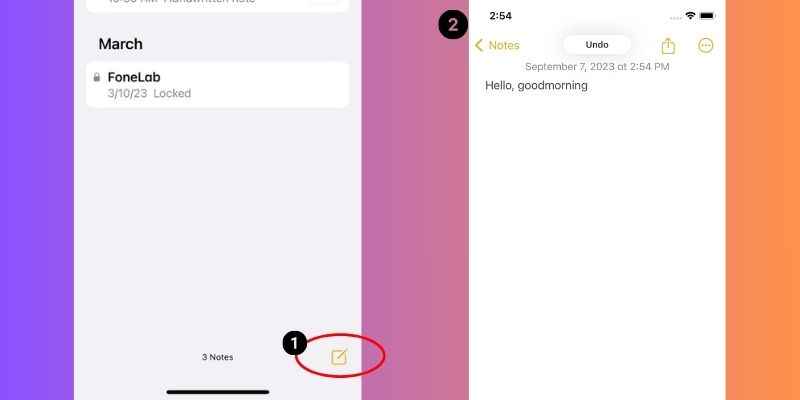
Step 2 Make a Single Tap With 3-fingers on Screen
Now that you have your note open, go ahead and make any edits or changes you need. Afterward, make a single tap with your 3-fingers on your screen. This will pop up the menu with several options, including undo, redo, copy, and paste.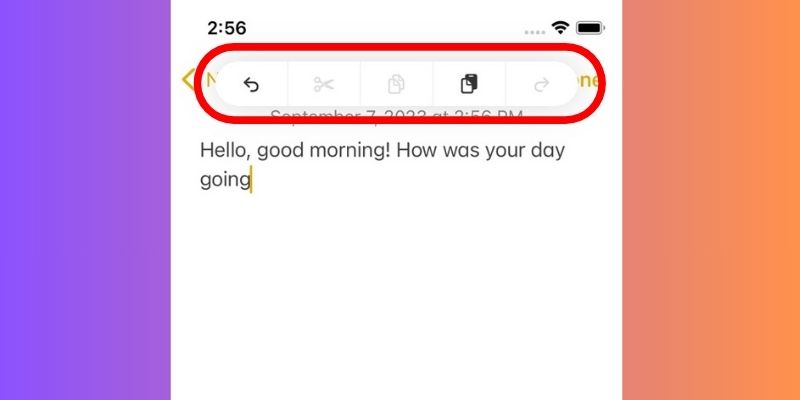
Step 3 Tap the Undo Icon
On the menu that appears, tap the "Undo" icon, represented by a left arrow curve. Continue to tap the icon until you see your content's original restored.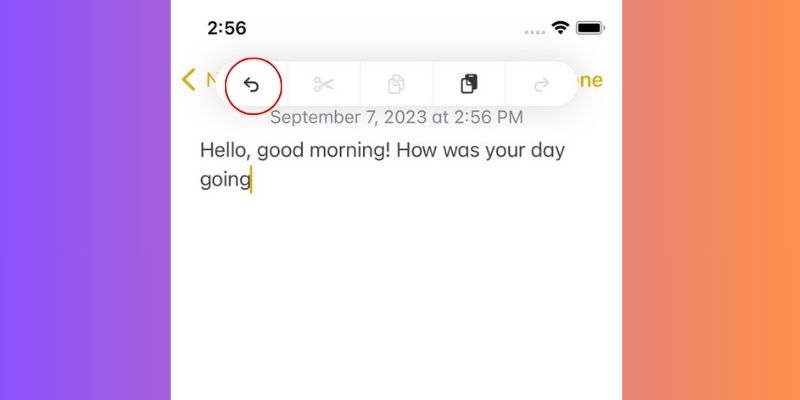
Method 5. Using Keyboard Shortcut
The last method we will present to undo in Notes on iPhone is by using a keyboard shortcut. This method is particularly useful for those who prefer using external iPhone keyboards. By pressing the Command + Z keys on your external keyboard, you can easily undo actions on your iPhone's Notes app. You can perform numerous undo actions by pressing these keyboard shortcuts multiple times.
Step 1 Connect the Keyboard on Your iPhone
First, using the Smart Connector, you must connect your Smart Keyboard to your iPhone. Once the connection is made, you can use the keyboard shortcut to undo any actions in the Notes app.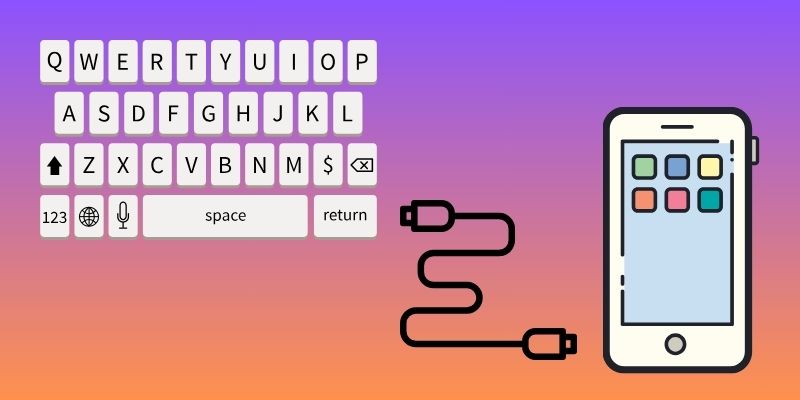
Step 2 Open the Notes App
Open the Notes app on your device by tapping its icon on the home screen. Next, make a new note or edit an existing note.
Step 3 Undo Actions Using the Keyboard
Make edits to your notes, like changing or deleting text. Now, to undo your actions using the keyboard shortcut, press Command + Z on your external keyboard. Do this action until you see the desired content restored.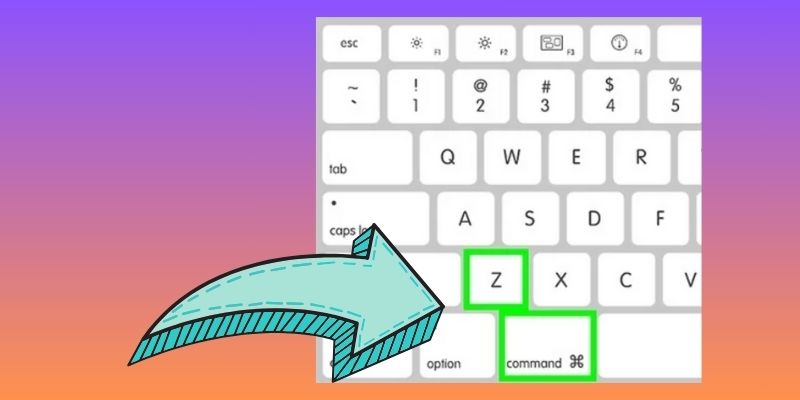
Helpful Tips to Recover Deleted Notes on iPhone
Losing important notes can be frustrating and stressful, especially when the deleted notes contain crucial information. Now you try to recover it from the "Recently Deleted" folder, but no recently deleted notes folder on iPhone. In this case, we recommend using a third-party tool like AceThinker iPhone Data Recovery to assist you in recovering your notes even without backup.
AceThinker iPhone Data Recovery lets you easily recover data, including your notes, in three different methods. First, you can recover deleted notes directly from your device. All you need to do is to connect and scan it using the software. Second, you can retrieve important deleted notes using iTunes backup. However, ensure you have previously backed up your iPhone on your computer using the iTunes app. Lastly, you can also recover missing notes using the iCloud backup. Like iTunes, you should have previously created a backup of your Phone data on iCloud. For more key features of this program, read further below.
Key Features:
- Every type of file can be recovered, such as browser bookmarks, notes, history, contacts, photos, videos, and more.
- No matter how you have lost your information, this tool can assist you in retrieving data from many usual situations.
- The recovery process is really quick and easy to understand, even for those who are not tech-savvy.
- The software supports all iPhone models and iOS versions, ensuring compatibility no matter what device you have.
You can see the step-by-step guide below to understand and learn how to use the AceThinker iPhone Data Recovery software.
Try it for Free
Free Download
Windows 8/10/11
Secure Download
Free Download
Mac OS X 10.15 and above
Secure Download
Step 1 Acquire the Software
To begin, go to the AceThinker iPhone Data Recovery's official website and get the software by downloading it. Alternatively, you can initiate the download process by simply clicking the "Free Download" button on this page. Once you get the software, install it on your computer following the on-screen instructions. Afterward, start the program and establish a connection with your computer and smartphone using your charger cable.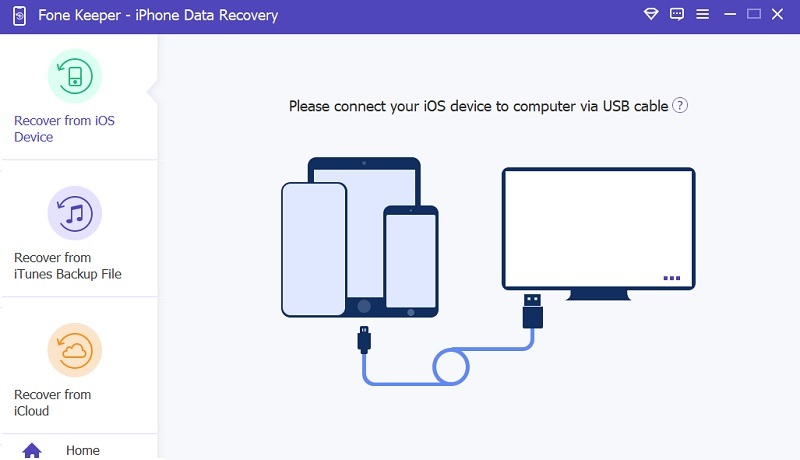
Step 2 Scan Your Device
After successfully connecting your iPhone to the computer, select the "Recover from iOS Device" option on the software interface. Next, hit the "Start Scan" button to start the scanning process. After that, you can see all your data that comes from your iPhone. To see your deleted notes, scroll down to the "Memos & Others" section and tick the "Notes" category. From the Notes category, you will preview all the deleted notes that come with your iPhone.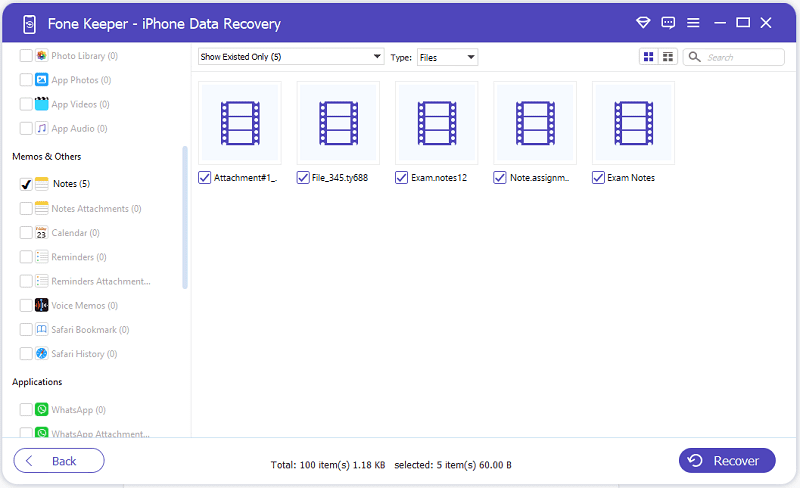
Step 3 Recover Your Deleted Notes
Select the notes you want to recover by ticking the box next to each note, then hit the "Recover" button. Then, a pop-up prompt will appear, asking you to choose a location on your File Manager to save the recovered notes. Afterwards, you should click on the "Recover" button once more in order to initiate the process of recovering the data. After the process, you can check your File Manager to find and access the recovered notes on your computer.