
- Download and install the software that can recover deleted notes without backup.
- Choose "Recover from iOS Devices Directly" from the options.
- Tick all the Notes, hit the Recover button, and view them on the output folder.
Nowadays, the Notes application has become essential. A digital notepad helps us jot down important information, create to-do lists, and organize our thoughts. But there are times that we accidentally delete a note. But don't worry because the Notes app has a recently deleted folder to recover your deleted notes. It gives you 30 days before it disappears and permanently deletes them. However, it is worth noting that the recently deleted folder is not always available on iPhones. Many iPhone users claimed they could not find the recently deleted folder in their Notes app. Several reasons for this issue could be software updates, device settings, or other technical glitches. Whatever the reason, this article shows you how to fix no recently deleted notes folder on iPhone issue and regain access to your deleted notes again.
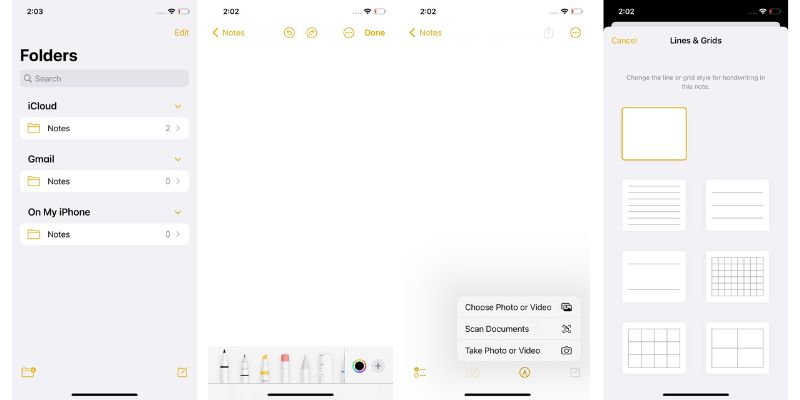
Check If You Are Using Upgraded Version of Notes
If you're experiencing the issue of no recently deleted notes folder on iPhone, the first thing to check is whether you are using an upgraded version. The upgraded version of the Notes app allows you to view your notes on all devices using the same Apple ID. The deleted notes will be moved directly to the "Recently Deleted" folder rather than permanently deleted. On the other hand, if you are using the non-upgraded version, the iCloud notes are not synced, and no recently deleted folder will be available. You can see a list below to determine if you are using an upgraded version of the Notes app.
1.1 Using an Upgraded Version of the Notes App
- It has new features such as paragraph styles, organizing notes, viewing attachments, and even locking them.
- It also has the "Recently Deleted" folder, allowing you to access the Notes you have accidentally lost easily.
- It also has a checklist and a format button in the toolbar, which allow you to customize your Notes easily.
- It works on all iOS devices with iOS 9 or later versions that use the same iCloud account.
1.2 Using an Unupgraded Version of the Notes App
- It has an "Email" and "Delete" in the toolbar.
- The "Recently Deleted" folder is unavailable.
Have You Deleted Notes that Someone Shared With You?
If you have lost notes that they shared with you, they are only removed from your list. Also, you can't access the deleted note from the recently deleted notes folder because it is not stored on your device.
Fortunately, if you want to get them back, you can reach out to the person who shared the notes with you and ask them to resend or share the notes again. Alternatively, you can recover notes from iCloud backups if you previously enabled the automatic backup feature.
Quick Ways to Recover the Deleted iPhone Notes
If you accidentally deleted an important note from your iPhone and cannot find it in the recently deleted folder, using an advanced data recovery tool is quick and efficient. The popular software you can use is the AceThinker iPhone Data Recovery tool. This tool offers three reliable options to recover deleted iPhone notes: recovering from an iOS device, iTunes backup, or iCloud backup. Additionally, it heads up with other tools because it can retrieve your notes even if you don't have backup files stored in cloud storage services. This feature makes it a valuable tool for anyone facing the issue of notes recently deleted folder missing. Furthermore, every type of file can be recovered, including your safari bookmarks, notes, text messages, contacts, and more. You can check the given instructions below on how to use the 3 recovery options in this software.
Try it for Free
Free Download
Windows 8/10/11
Secure Download
Free Download
Mac OS X 10.15 and above
Secure Download
Scenario 1. You Don’t Have Any Backup
If you don't have any backup on your Notes, simply follow the steps below.
Step 1 Get the Recovery Tool
You can get the recovery tool by visiting its official website. Alternatively, you can click the given download button above to download it automatically. Afterward, click the downloaded file, and you must follow the on-screen prompts so the tool is successfully installed. Next, launch the tool, then go to the three available options.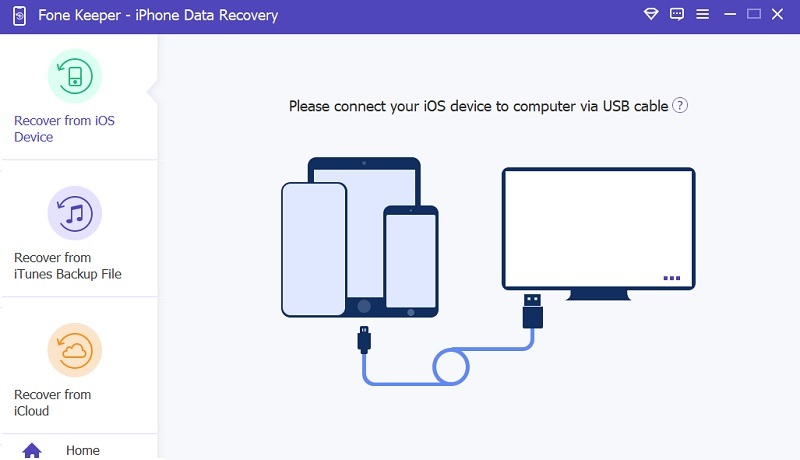
Step 2 Connect and Scan Your Device
Get a lightning wire to connect your iPhone to your computer. Once the software detects it, you can see a "Start Scan" button. Click on it, and the tool initiates the process of scanning. It will take 2-3 minutes to finish the process.
Step 3 Select All Notes
Once the scan process is finished, you can see all your files in the category. On the left side corner, scroll down until you reach the "Memos & Others" section. From there, you can see all the files related to it. Tick the box beside the "Notes" app; the scanned files appear in the right corner. Select them all by ticking the box beside them.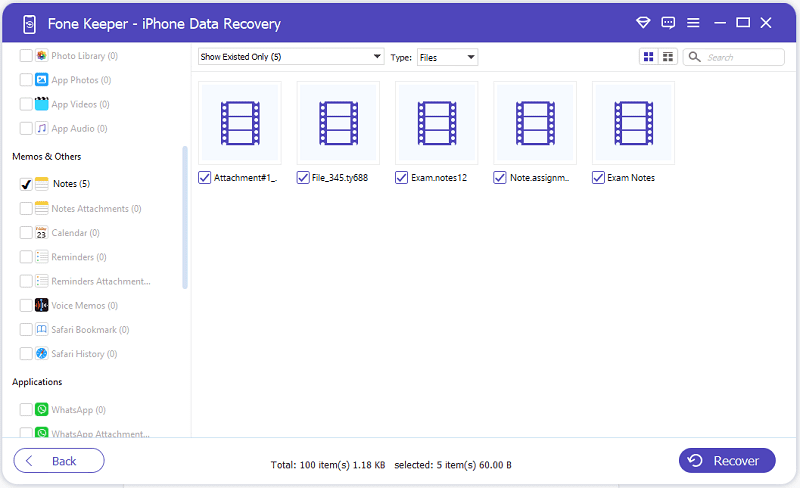
Step 4 Hit the Recover Button
Once you select all the notes you want to recover, tap the "Recover" button in the lower-right corner. Then, a prompt will appear where you can choose your designation folder. Lastly, click the "Recover" button on the on-screen prompt to start the recovery process.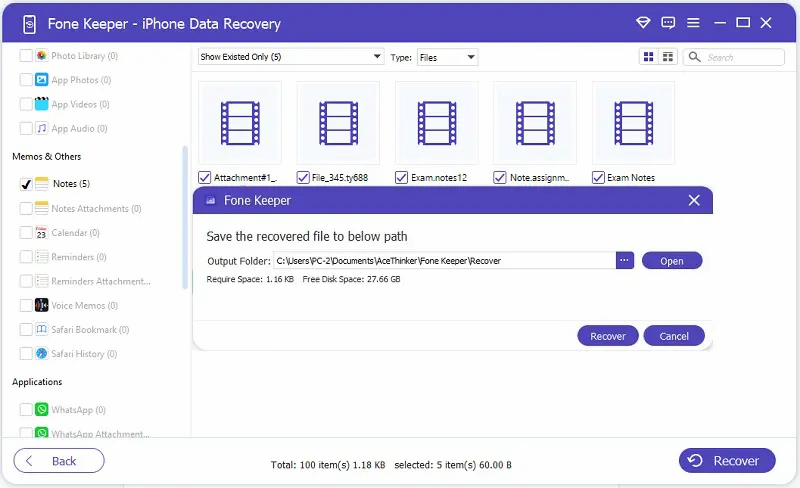
Step 5 Check the Recovered Notes File
Once the recovery process is done, close the program and go to your file manager. From there, locate the output folder you choose. Finally, check if the notes you want to recover are successfully recovered.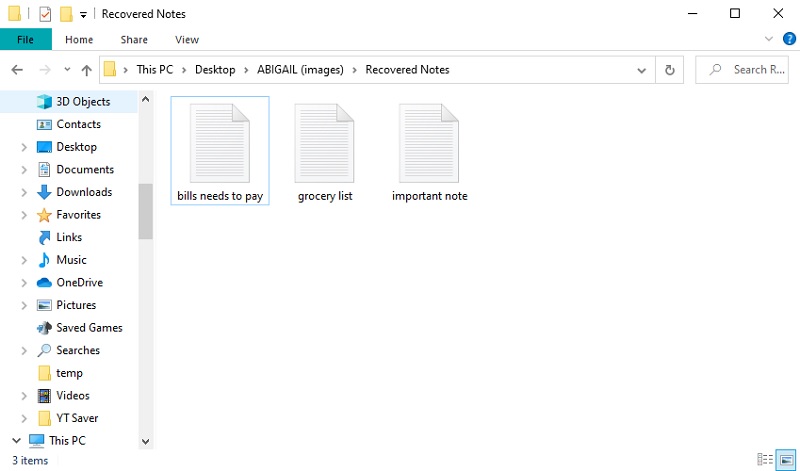
Scenario 2. You Backed up Your Notes on iTunes
If you previously backup your notes on the iTunes application, your deleted notes will be recovered easily. However, make sure you previously sync your iPhone on your computer. Here’s how to extract them.
Step 1 Launch The Software
Since you have the software, the first thing you must do is launch it. Then, on the main interface of the iPhone Data Recovery, it will provide you the three recovery options. Choose “Recover from iTunes Backup.”
Step 2 Select an Output Folder
Once your device is successfully connected, your iPhone’s information will appear on the screen. Then on the lower part, you can see a text that says, “Please select the right folder of the iTunes backup file.” Tap the “Select” button beside the text and choose a designated folder.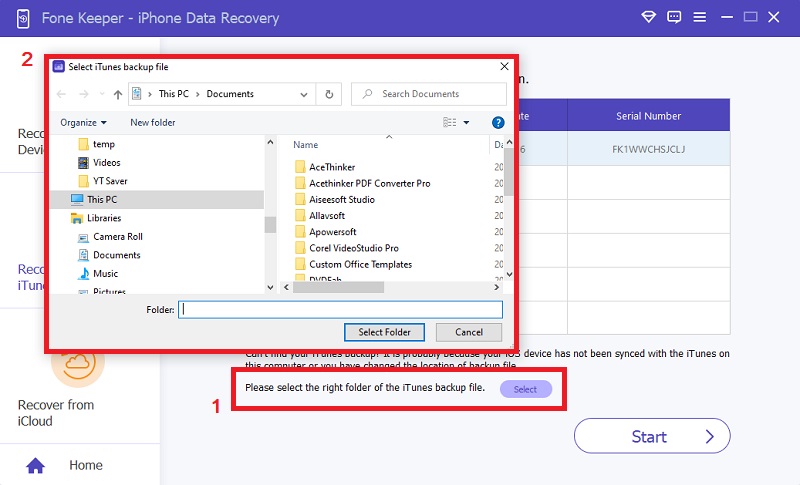
Step 3 Enter Needed Information
For the last step, click the “Start” button on the right side corner. A pop-up window will appear; enter your iTunes password and tap the “OK” button. After that, the software starts scanning your device. Once done, find and select the notes you’ve backed up and proceed accordingly.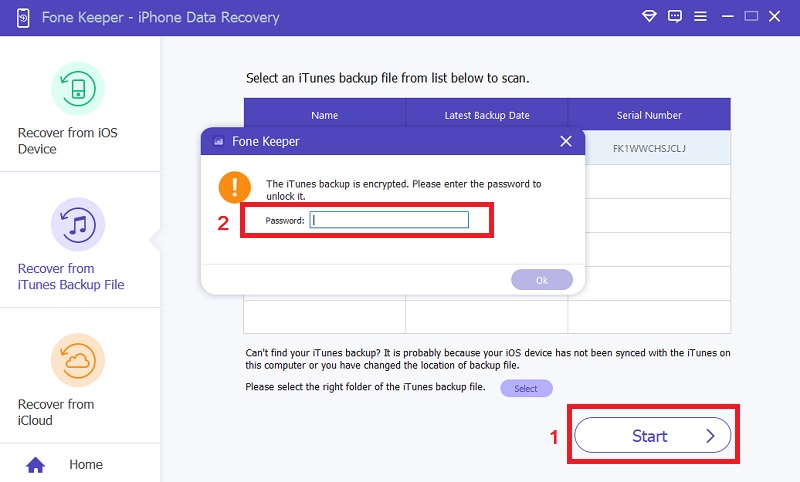
Scenario 3. You Backed Up Your Notes via iCloud
If you previously backed up your notes via iCloud, you can easily recover them with just a few simple steps. You can use this recovery option when your phone is lost or damaged. Follow the steps below.
Step 1 Enter Your Apple ID Information
Open the AceThinker iPhone Data Recovery software on your computer. Choose “Recover from iCloud” from the main window from the options. Next, you need to input your Apple ID email and password to sign in to your iCloud account.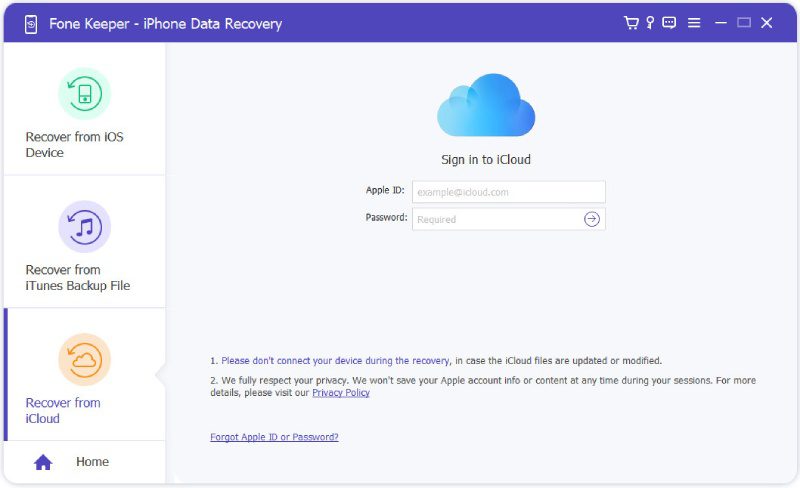
Step 2 Put the Verification Code
After signing in to your iCloud account, a verification code is sent to your email address. Copy and paste the six-digit code into the program. Then, the program will load automatically.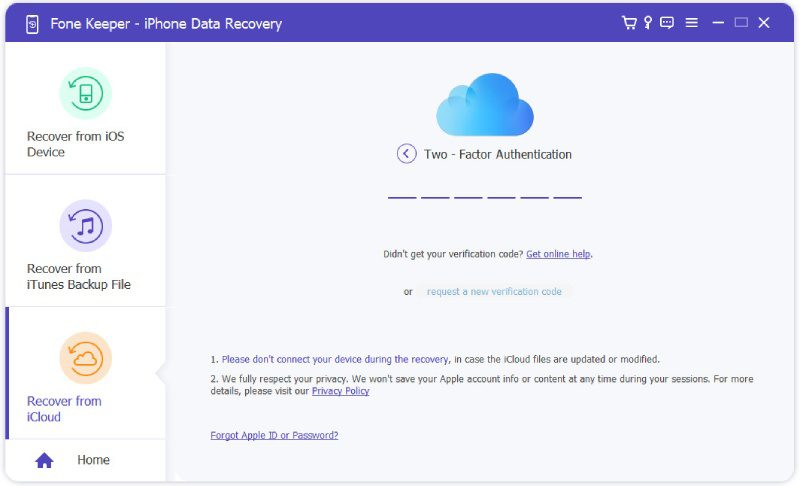
Step 3 Recover Deleted Notes
Here, you can see all your files that are stored in iCloud. Tick the box for “Note & Attachments”; do this to all your files you want to recover except notes. Lastly, click the “Start” button, and the program will start the recovery process. You can see the recovery files in the designated folder on your file manager.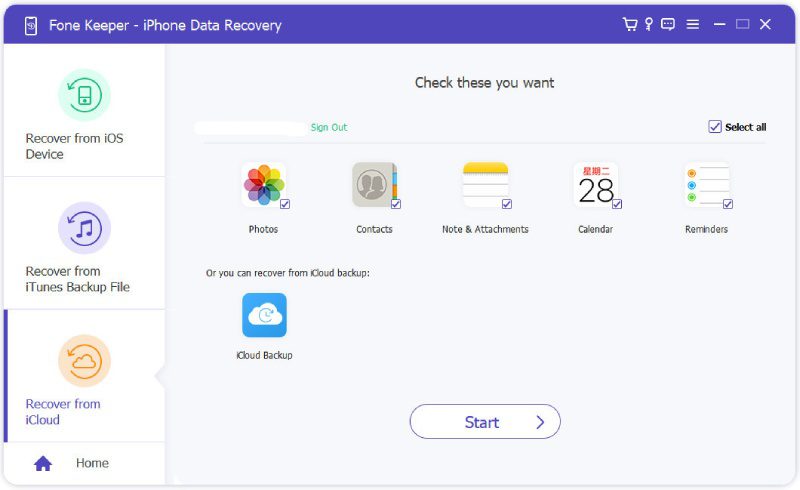
Contact Apple Support for Help
If you have tried all the above steps and still no recently deleted folder on iPhone, it may be time to reach out to Apple Contact Support or the Apple Authorized Service Provider. They have a team of experts who can further assist and guide in resolving this issue.
