
- Download Aqua Demo and install it to your computer.
- Enable system sound and microphone, then start recording.
- Save or share the recordings.

Screen recording refers to the process of capturing or recording your screen and exporting it in a media file. However, like most processes, you can encounter some problems while recording your screen. One of the common problems with this process is a screen recording no audio, this is where users attempt to capture video, but the video lacks audio. This can be a frustrating problem as it limits the effectiveness and usefulness of the recorded content. The audio of a video plays a crucial role in screen recordings as it enhances the overall viewing experience through context and explanation of what is happening on your screen. Luckily, this outline addresses the issue of screen recording without sound, and we will provide you with information on how to resolve it.
Causes of No Sound in Screen Recording
It is essential to pinpoint the specific cause of the no sound issue in screen recordings in order to troubleshoot effectively. By determining the root cause, you can focus on the appropriate solution, saving time and avoiding unnecessary troubleshooting steps. To identify the cause, you can systematically check the potential reasons mentioned below.
1. Incorrect audio settings in the recording software
This can be the most common reason why your recorded video doesn't have a sound. It can occur if you need to configure your screen recorder correctly. You may have selected the wrong audio input source or muted the audio input. The audio settings should be accurately set up before you start recording videos.
2. Audio driver issues or outdated drivers
Your screen recording output will have no sound without the proper audio driver installed. Besides, outdated or faulty drivers can cause the issue of crackling music and games and videos missing sound effects. Updating the audio drivers to the newest version and re-installing them can often resolve the no audio on screen recording.
3. Muted or disabled audio devices
Another reason that can affect the sound of your recorded video is when the audio devices are muted or disabled. When your audio devices are muted or disabled, you cannot hear any sounds, including system sound, applications sound, and microphone. This can occur at both hardware and software levels. Checking your desktop's volume controls and audio settings, including the system tray volume icon and device manager, can help you identify the issue.
4. Audio playback settings on the PC
Lack of sound in screen recordings may result from improperly set up PC audio playback settings. For instance, the audio may not be recorded throughout the recording process if the default playback device is selected improperly. To confirm the right device is chosen, check the playback settings in the sound control or audio settings menu.

Troubleshooting Solutions For No Audio in Screen Recording
A. Check Audio Settings in the Recording Software
It's crucial to check that your recording software has selected the appropriate audio input source before beginning a screen recording; otherwise, it will record video without sound. The audio input source is the device or microphone from which the software will record the audio. You may secure the software records the desired sounds and offer the best recording quality by selecting the proper input source. Further, you have to make sure that the audio source is not muted or turned down at a low volume. To access the setting of your screen recording, click the gear icon, then go to the "Sound/Audio" category. You can modify the audio settings available in your recording software. You can click this page to learn the step-by-step instructions in recording a video or audio using this program.

B. Check System Audio Settings
The audio settings play an important role in ensuring a seamless and enjoyable multimedia experience on your computer. Sometimes, issues with no audio in screen recording can arise due to incorrect settings or configuration. In this context, checking and verifying the system's audio settings is essential. This process involves confirming that the audio devices are not muted or disabled and selecting the correct audio output device. By performing these steps, you can troubleshoot common audio-related problems and ensure your audio setup functions optimally.
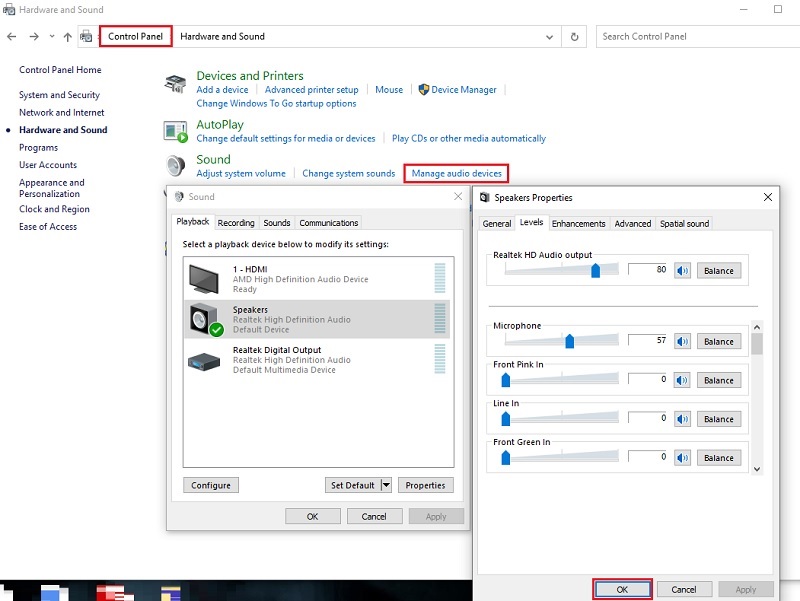
- Open the system settings or control panel on your computer. The steps may differ depending on the operating system you are using. Look for the sound settings or the speaker icon that represents it.
- Then, click "Manage audio devices," from here, you can check if the audio source for playback and recordings is disabled or muted. Additionally, check if there is an option to disable audio devices. Ensure that the desired audio devices are not disabled.
C. Update Audio Drivers
Audio drivers are vital software components that enable communication between your computer's operating system and the audio hardware. Various audio-related problems, such as no sound on screen recording, might be caused by outdated or mismatched audio drivers. For you to address this problem, it is important to check for driver updates using the Device Manager and update the audio drivers if necessary. This process ensures that your audio hardware has the latest software, potentially resolving compatibility issues and restoring sound functionality during screen recording.
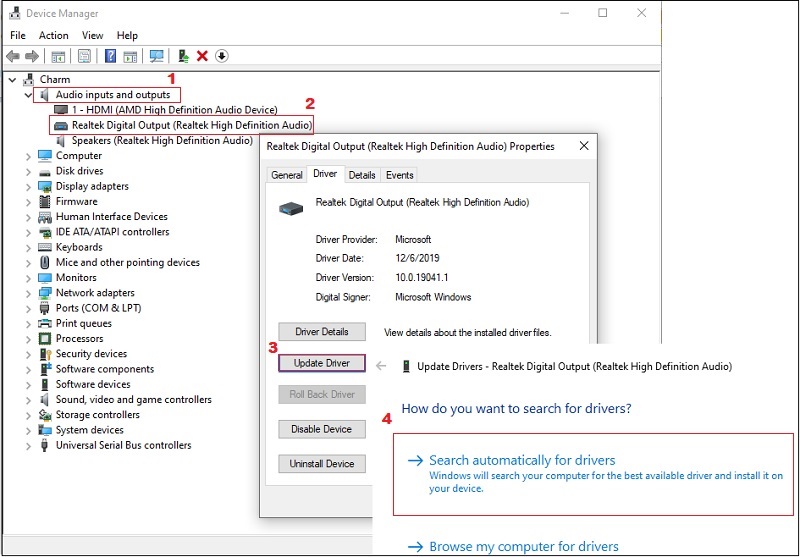
- Open the Device Manager on your computer. The method to access it may vary depending on the operating system. For example, in Windows, you can right-click the Start button and choose "Device Manager" from the menu. In the "Device Manager" tab, find and expand the "Audio inputs and outputs" category.
- Look for your audio device within this category. Common models include "Realtek High Definition Audio," right-click on the audio device you are utilizing and click "Properties" from the context menu.
- In the device "Properties" tab, navigate to the "Driver" category. Click the "Update Driver" button, and Windows will search for available driver updates online.
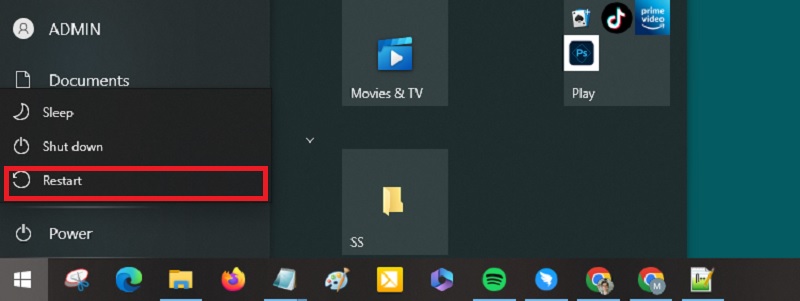
D. Restart the PC and Test Again
Restarting your computer is a simple yet powerful troubleshooting step that can help you to resolve various issues like screen recording no audio. Restarting your computer can temporarily clear the system data and refresh software processes. By performing a restart and then testing the screen recording again, you give your computer a fresh start, which can often resolve minor glitches or conflicts that may be causing the sound-related problem on your recordings.
Best Software to Record Screen with Audio
If you have applied the solutions above and are still wondering why my screen recording doesn t have sound, the problem probably lies with the screen recording software you are using. That said, you can use the Aqua Demo screen recorder. This screen recorder with drawing tools permits you to record your screen with audio without complications. You can record the audio coming from your microphone or system sound. Besides, depending on your need, you can record the microphone and system sound simultaneously. But unlike other software that only gives a few output formats, it supports more formats like MP4, MOV, MKV, and others. As a result, you won't have to worry about your output playing on any device. The walkthroughs to record with audio are below.
Try it for Free
Free Download
Windows 8/10/11
Secure Download
Free Download
Mac OS X 10.15 and above
Secure Download
Step 1 Download the Screen Recorder with Audio
To download Aqua Demo, you can click the download button provided above. Make sure to click the button with the Windows logo if you are using Windows. Then, you have to complete the installation process by following the setup wizard provided. The tool will launch after that.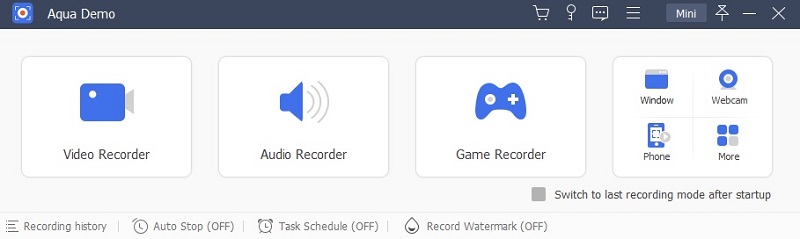
Step 2 Configure Sound Settings
Before starting the recording process, you must configure your sound settings. Click the "Settings" button and go to "Preferences." Afterward, go to "Sound Settings." Then select the source of the audio you want to use. You can also toggle the microphone noise cancellation and enchancement for better voiceover.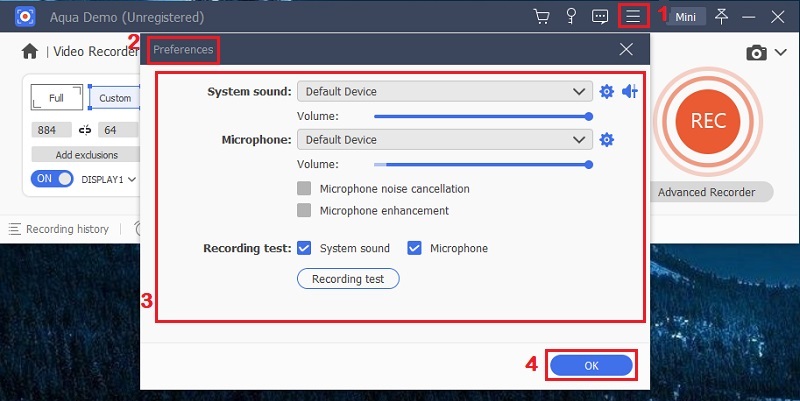
Step 3 Start Recording with Audio
Once you have adjusted the settings of your audio, you can now start recording. Hit the "Video Recorder." Then choose the desired region or area you want to record. Since you already adjusted the audio settings, your recordings will be accompanied by audio from your system and microphone. Click the "Record" button to prompt the recording.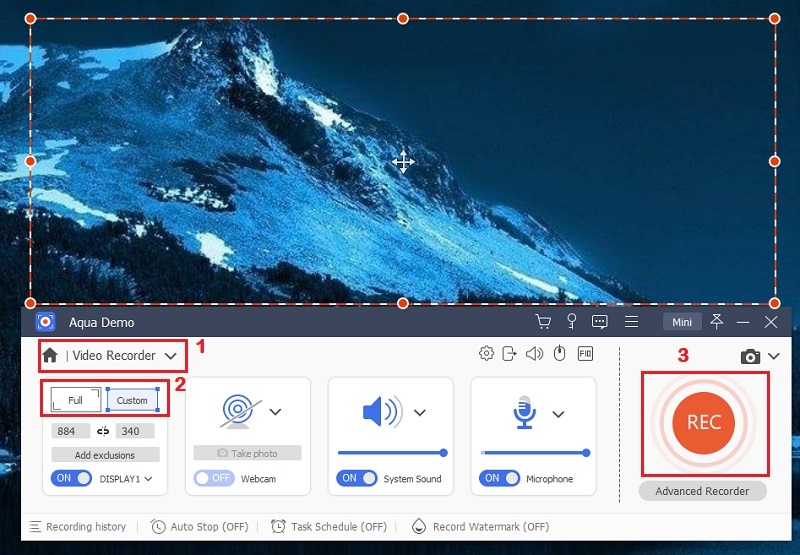
Step 4 Export the Recording with Audio
When you're already satisfied with your video recording with sounds, hit the "Stop" button. You will be moved to the preview panel and can edit your video by trimming unnecessary parts. Click the "Done" button to preserve the video recording and preview the video output to double-check if it has audio.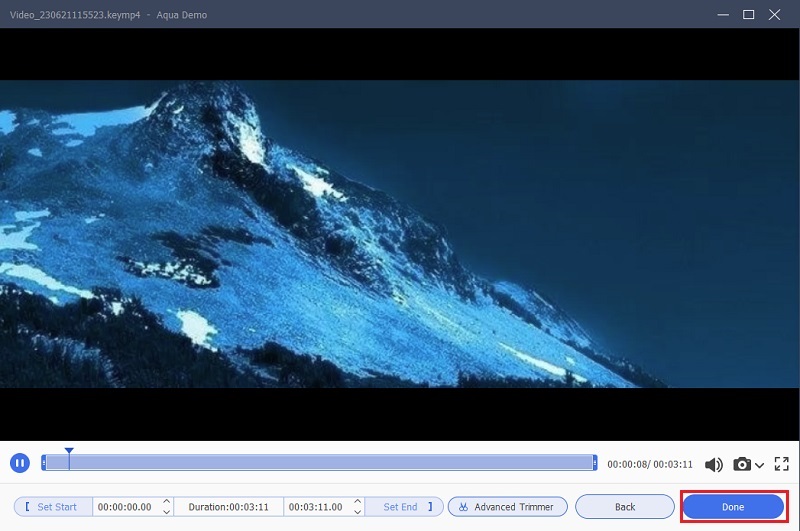
Step 5 Play the Video Playback
You will be moved to the Recording List after you hit the "Done" button. Then, you can open or edit the video you have recorded. Clicking the "Play" sign will open the recorded video on your computer's media player.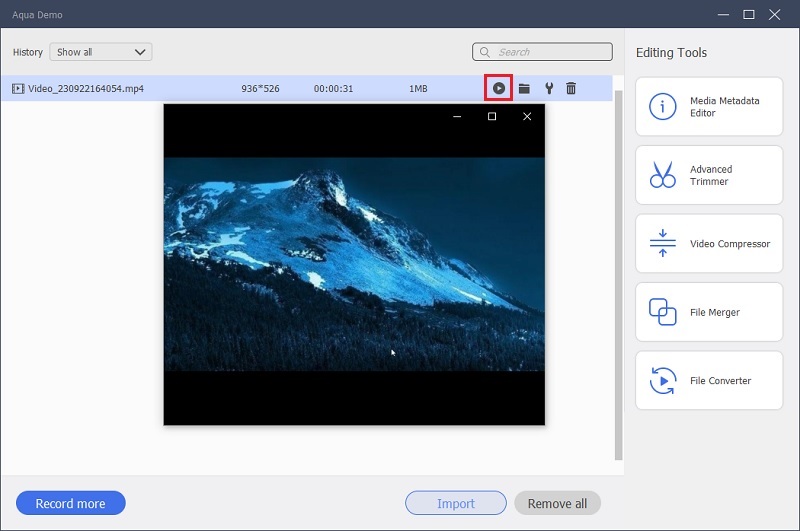
- It comes with multiple recording mode.
- The program can record video with high resolution up to 4K.
- It allows you to highlight moments by using text, shapes, arrows and more.
Conclusion
In conclusion, screen recording without sound on a PC can be caused by various factors, such as incorrect settings and outdated drivers. However, with the troubleshooting instruction outlined in this guide, you should be able to fix the issue in no time. Remember to check your audio settings and update your drivers to the new versions available. It is also important to note that audio is a crucial aspect of screen recordings as it enhances the viewer's experience and helps to convey important information. Therefore, it is essential to take the time to troubleshoot and ensure that your audio is working correctly before recording. If you encounter any challenges during troubleshooting, don't hesitate to seek additional support. Following these steps will guarantee a successful recording experience.