
How to Use Aqua Demo (Formerly Screen Grabber Premium)
Need professional recording software? Then use Aqua Demo ; it is the best recording software out there. With this tool, you can record high-quality video from anywhere. In this post, you will be introduced to how to use Aqua Demo on your device. Make sure you read carefully so you don’t miss out on any useful information.
Getting Started
Step 1Download and Install the Aqua Demo
Start by visiting the Aqua Demo’s main page and clicking the “Free Download” button there to get its installer package. Once downloaded, initiate the installation process and follow all the wizard prompts on your screen. After that, the Aqua Demo will open automatically on your computer.

Step 2Register to Activate the Pro Version
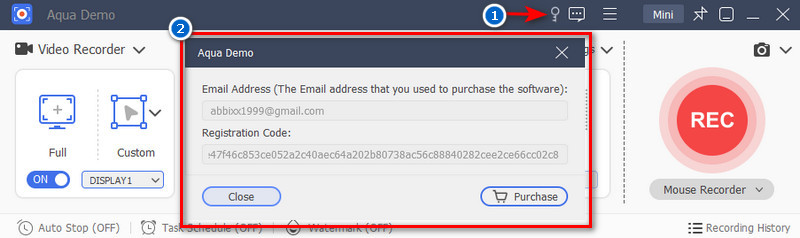
If you purchased a keycode for the pro version, to activate it, simply click the “Key” icon at the top. Then, from the pop-up menu, enter the email address you used when you purchased the keycode. Lastly, paste the keycode in the designated box and click “Activate” to confirm.
How to Record Video on Your Computer
Step 1Access Video Recorder
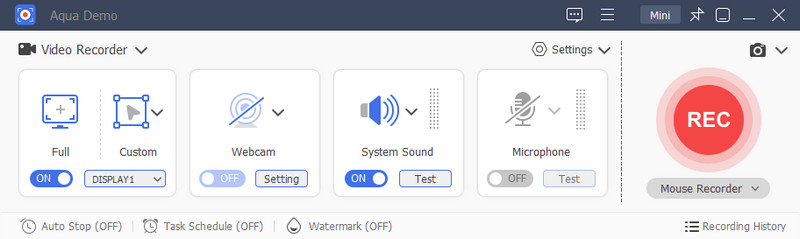
By default, when you open the Aqua Demo, it already sets the recorder type to a Video Recorder. You can view the recording mode, webcam feature, and audio sources, including system sound and microphone audio, in the video recorder window.
Step 2Select Recording Mode
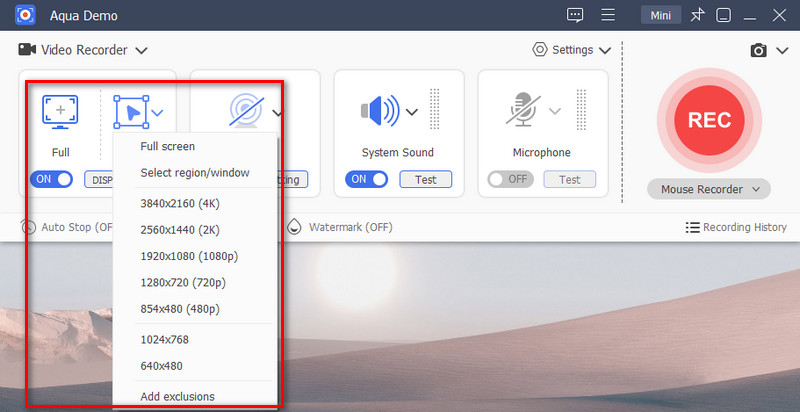
Select a recording mode according to your preference. You can set it to full screen, a selected region, or a window only. Additionally, it offers a customized screen ratio with specific video recording qualities, including 3840x2160 (4K), 2560x1440 (2K), 1920x1080 (1080p), 1280x720 (720p), 854x480 (480p), 1024x768, and 640x480.
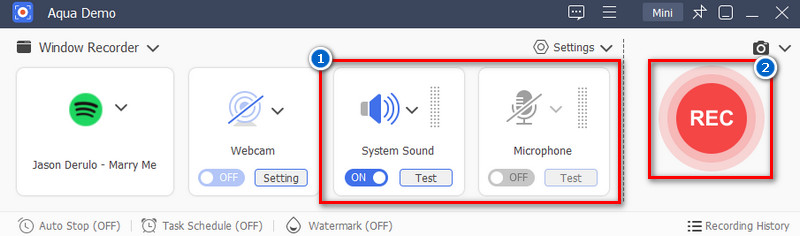
Step 3Enable Audio Sources and Start Recording
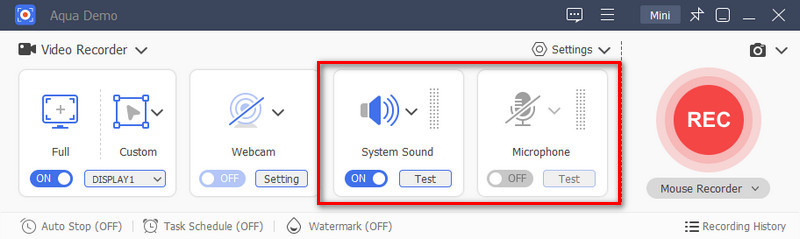
Next, enable both “System Sound” and “Microphone Audio” if you prefer to record your voice and computer sound simultaneously. Alternatively, choose one audio source according to your preference. Once ready, click the big red “Record” button to start the recording process.
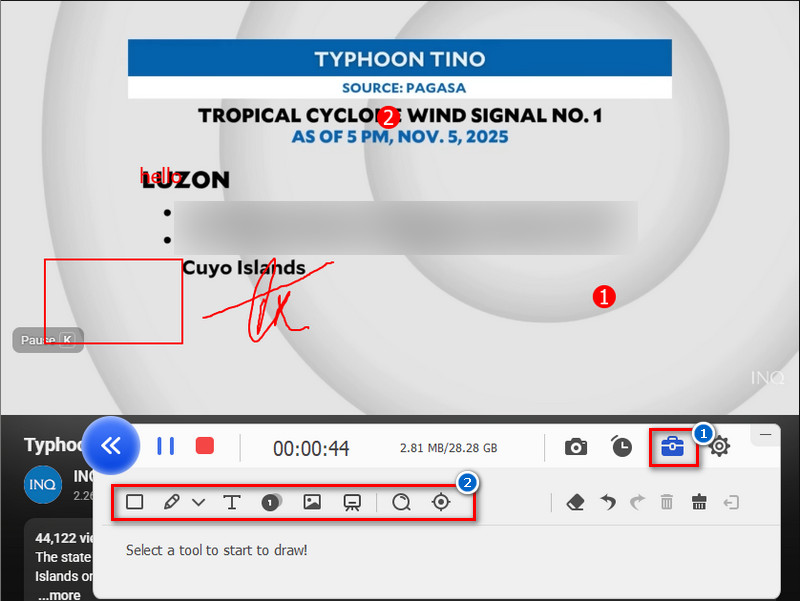
Step 4Use Annotation Tools
While recording, you can use its annotation tools to add shapes, text, lines, labels, and more to your video recording.
Step 5Preview the Recorded Video
To stop the recording, click the stop icon in the toolbar, and the preview window will appear. Review the recorded video and then exit the recording software. Don’t worry about not saving the video, as the tool automatically saves it to your local storage. Unless you trim the video, you need to save it manually. Simply click the “Trim” button, and the tool will save the trim version.

How to Record Audio on PC
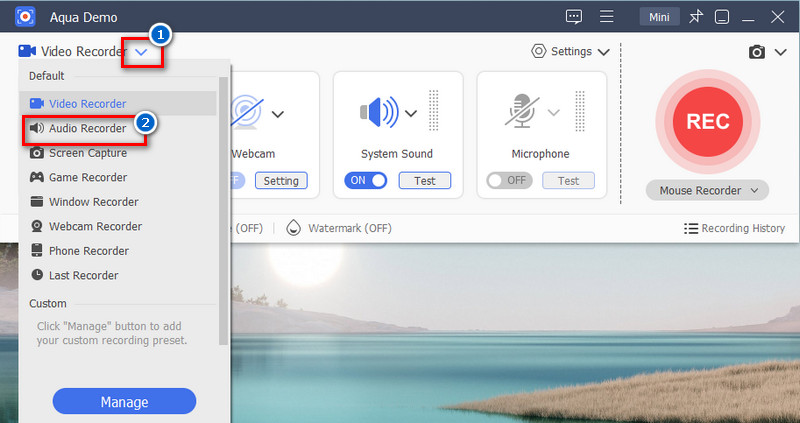
Step 1Access Audio Recorder
To access the Audio Recorder, click the Video Recorder dropdown, and select Audio Recorder from the options.
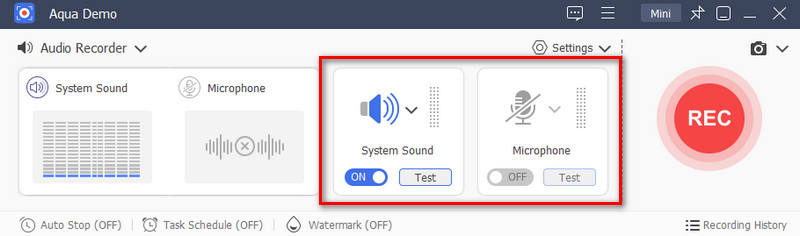
Step 2Choose Sound Input
Choose between System Sound and Microphone Audio depending on what you need to record. Alternatively, you can enable both options to record internal sound and your voice simultaneously.
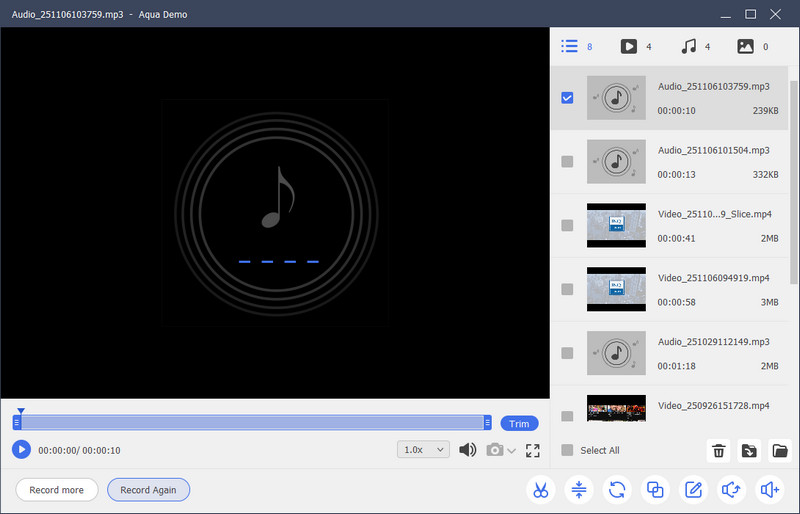
Step 3Preview the Audio Recording
Click the REC button to begin recording, and then click the Stop icon when you are finished. Preview the recorded audio in the pop-up preview window, and since the tool automatically saves the recordings, exit the tool afterward.
How to Record a Gameplay
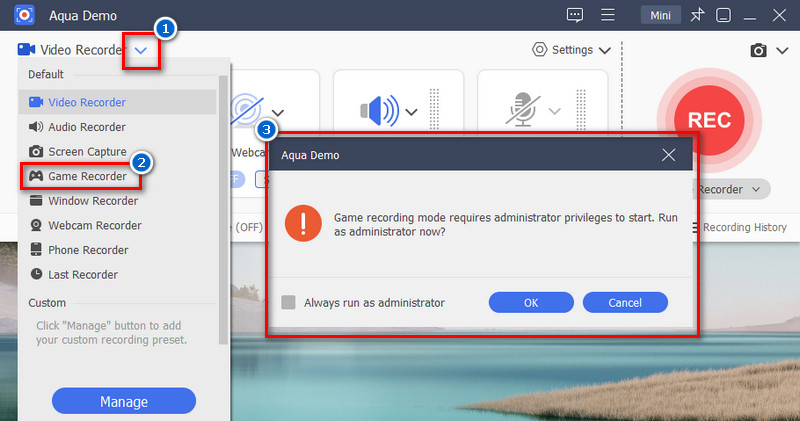
Step 1Enable Game Recorder
On the main interface, click the dropdown icon beside the Video Recorder option. Then, select Game Recorder from the menu. Next, allow the pop-up prompt that asks you to run the game recording as an administrator to enable it.
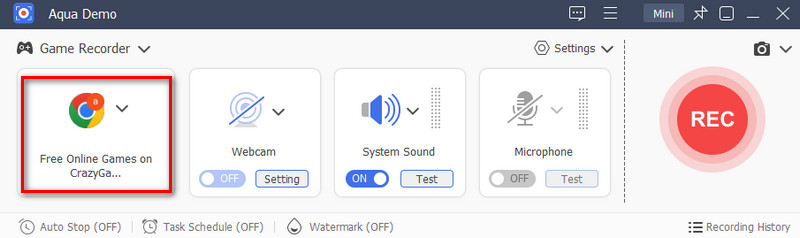
Step 2Select Game Window
Click the dropdown icon on the “Select the Game” option and choose the game window you want to record.
How to Record Specific Window
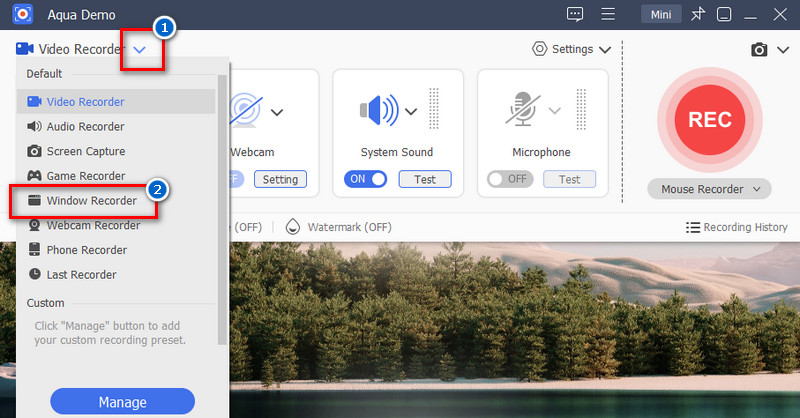
Step 1Select Window Recorder
Choose the Window Recorder from the Video Recorder drop-down menu.
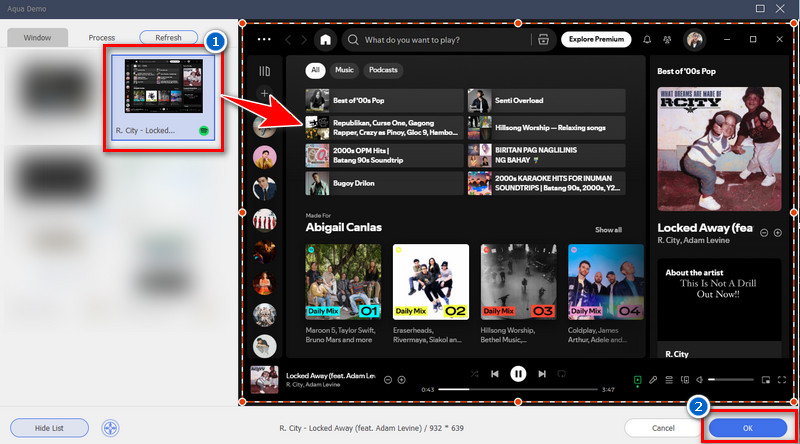
Step 2Choose Window to Record
In the pop-up menu, select the specific window you want to record, and the tool will display the selected window. Click OK to confirm.
Step 3Start Recording
Toggle on the System Sound or Microphone and click the red REC button to start the recording process.
How to Record Screen with Webcam
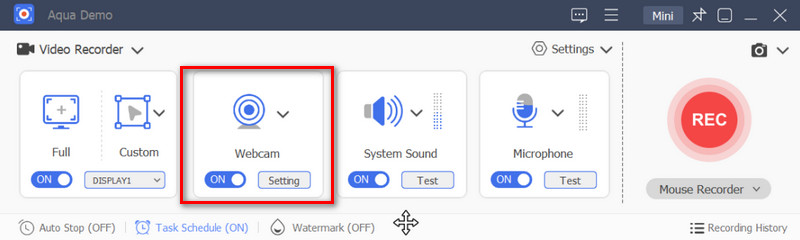
Step 1Enable Webcam
If you are using a computer, connect your webcam to your laptop. Then, toggle on the Webcam feature on the Aqua Demo afterward. For laptop users, since laptops typically have built-in cameras, simply toggle on the webcam through the recording software.
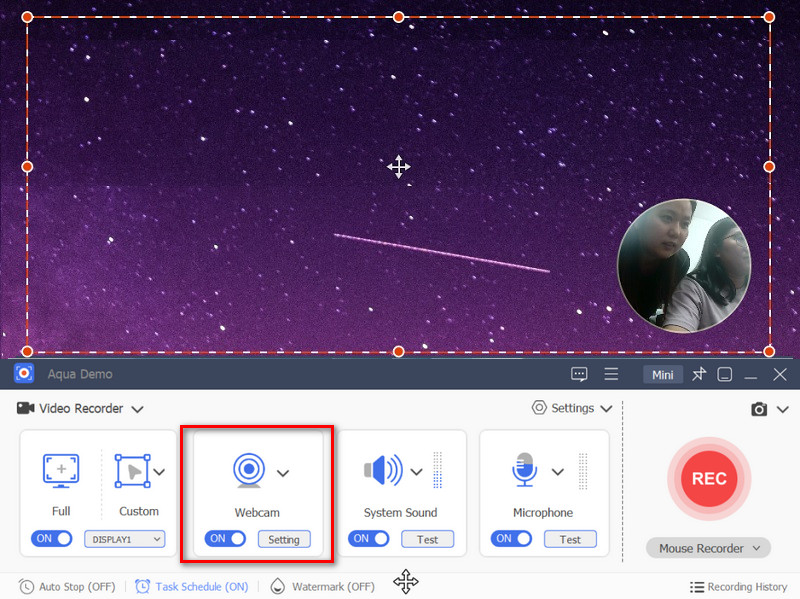
Step 2Start Recording with Webcam
Position the webcam overlay wherever you want it on your screen. Then, click the big REC button to start recording.
How to Record Your Phone Screen
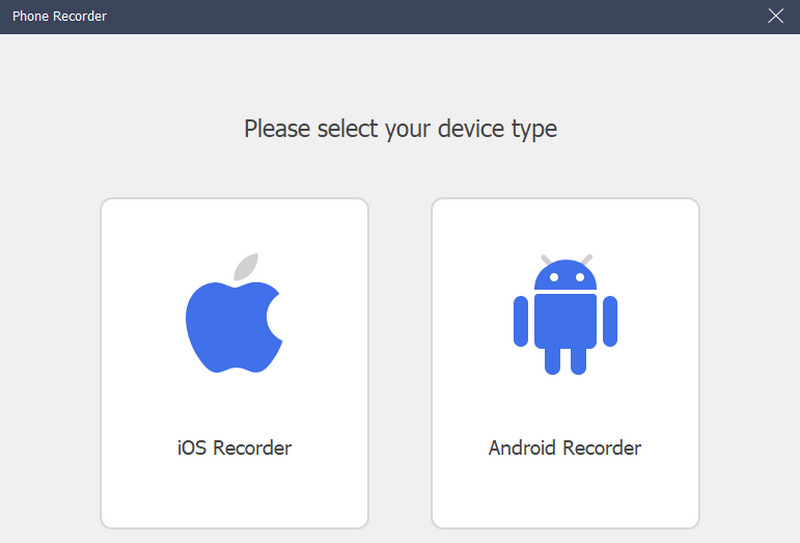
Step 1Select Mobile Phone
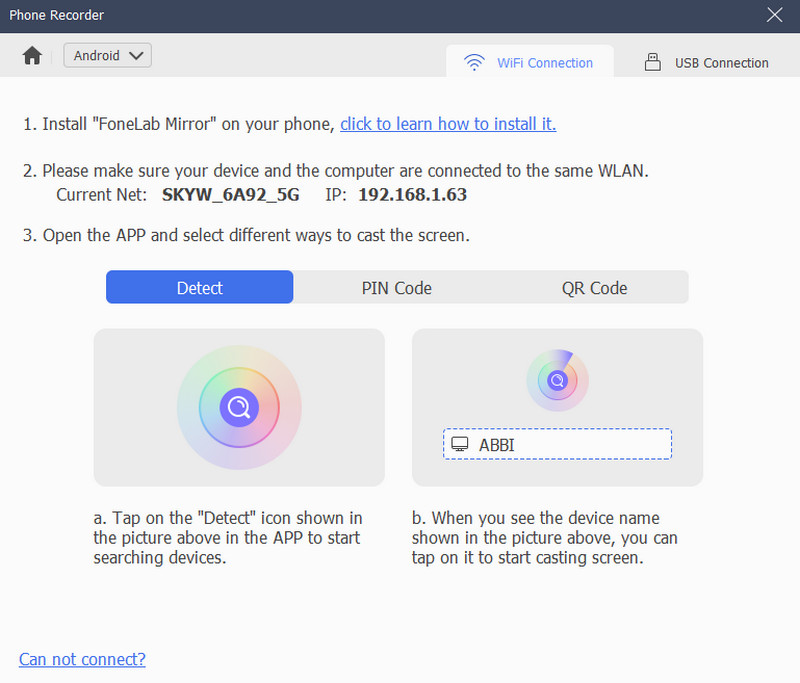
Activate the Phone Recorder and select whether your phone is iOS or Android from the pop-up menu.
Step 2Cast Your Phone Screen
Next, choose whether you want to cast your phone screen using a Wi-Fi connection or a USB connection. Then, follow the instructions for successful phone casting.
How to Take Screenshot of Your Computer Screen
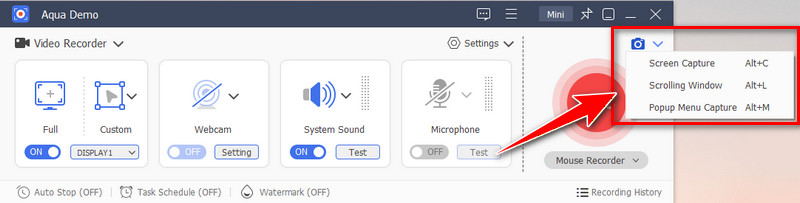
Step 1Choose Screenshot Mode
On the main interface, look for the camera icon next to the Record button. Click on the dropdown icon and choose what type of screen capture you prefer. You can select Screen Capture, Scrolling Window, and Pop-up Menu Capture.
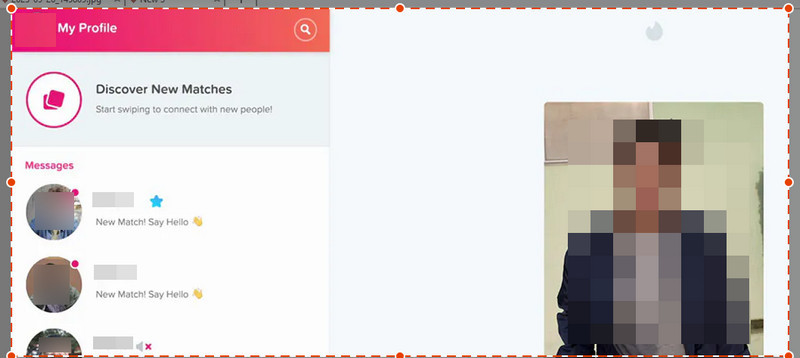
Step 2Select Area to Capture
Next, select the specific area you want to screenshot or the entire computer screen. You can also annotate the screenshot, like adding shapes, lines, text, and more.
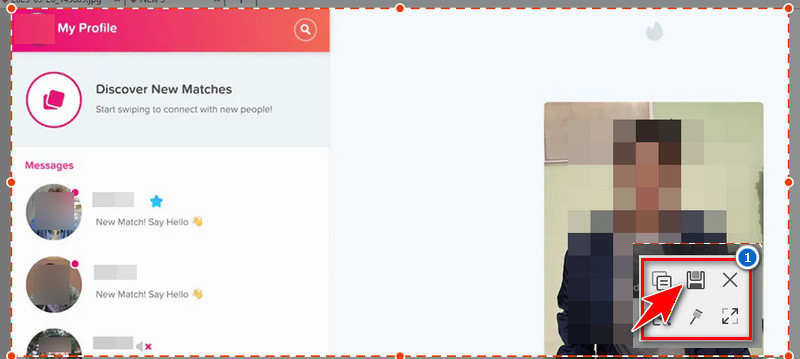
Step 3Save The Screenshot
When you’re done editing, click the Save icon and select the designated folder to save the screenshot.
How to Create a Task Schedule Recording
Step 1Launch Task Scheduler
On the Aqua Demo’s main interface, you can see the Task Scheduler at the bottom. Click on it to start scheduling a recording.

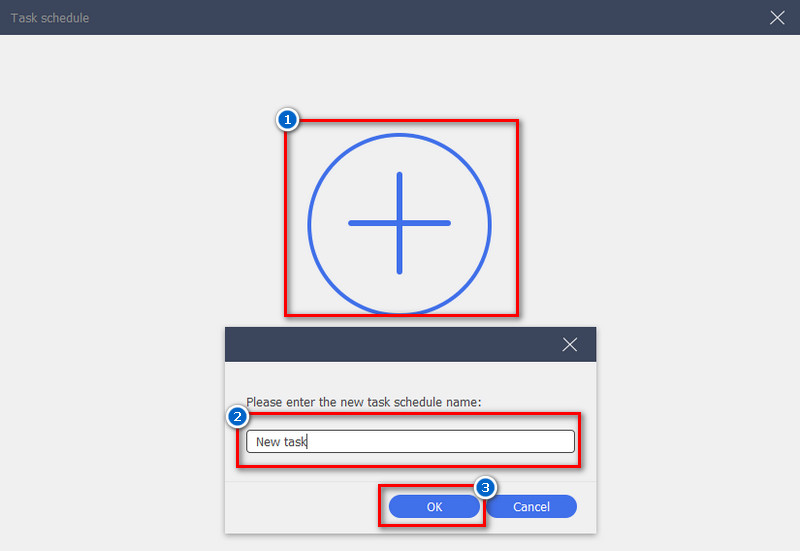
Step 2Create a Task
Create a new scheduled task by clicking the “+” icon in the middle. Then, give a task schedule name from the pop-up menu and click OK to confirm.
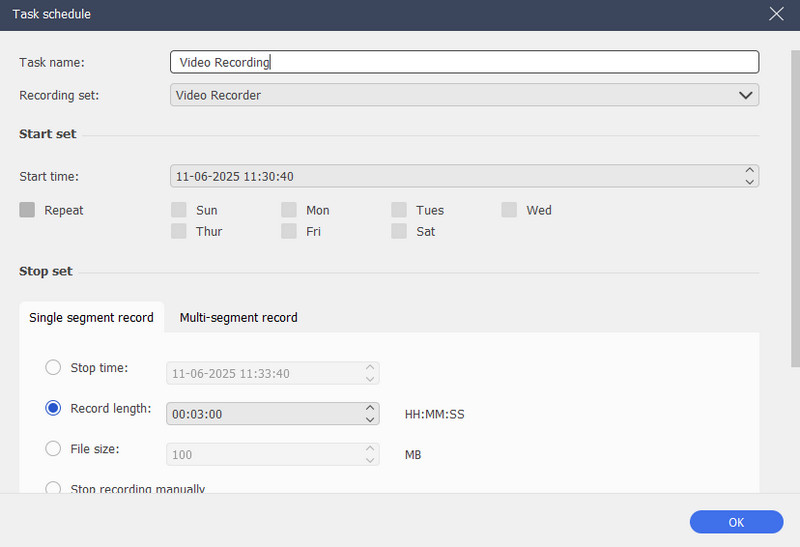
Step 3Save the Schedule
From the next window, set a recording mode, specific time and date, and file size. Lastly, click OK to save and confirm the schedule.
How to Adjust Recording Preferences
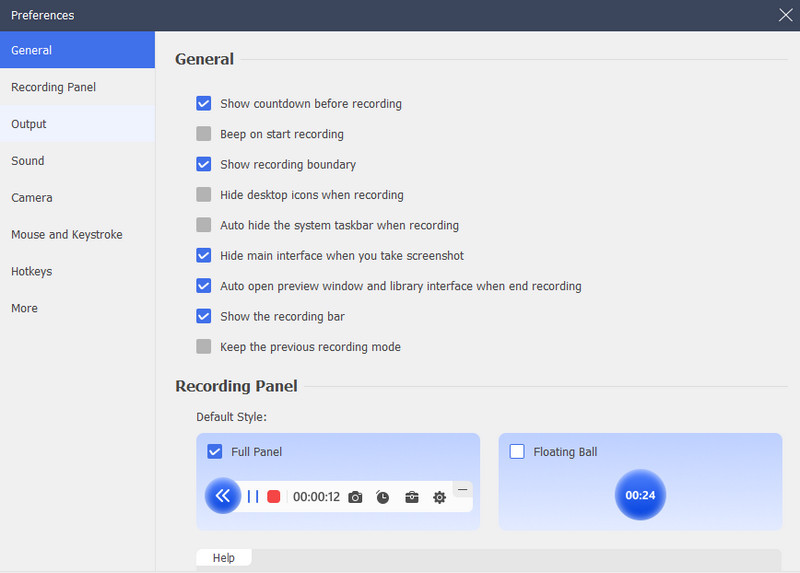
1. General
In this section, you can see the screen recording software’s Preferences window. It includes options to control countdowns, sounds, recording boundaries, and interface behavior during or after recording.
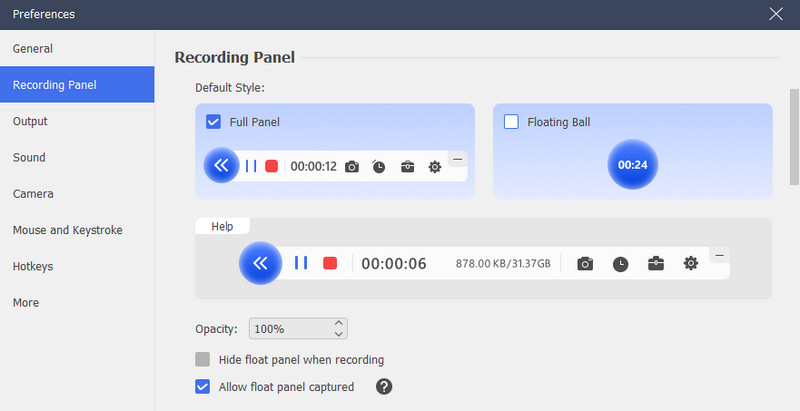
2. Recording Panel
This section allows you to choose how you want to view the recording panel. You can choose between a full panel and a floating ball. You can also adjust the transparency of the recording panel, as well as if you want to hide the panel when recording and allow it to capture the panel.
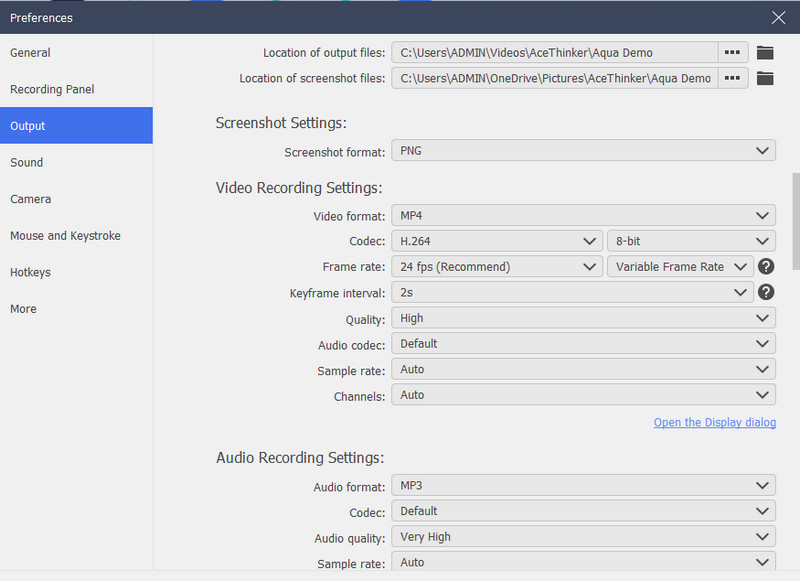
3. Output
Here, you can see the output settings for screenshot, video recording, and audio recording. You can select your preferred output locations, output formats, qualities, codecs, frame rates, and more.
4. Sound
This tab allows you to adjust the recording volume and delay for both system sound and microphone, with options for noise cancellation and enhancement. There’s also an option to install a virtual audio device for improved audio recording, as well as a Recording test button to check sound input.

5. Camera
Here, you can select your desired resolution, style, and opacity for your webcam display. There are also additional options, including camera denoise, making the camera view “Sticky on Top,” and setting how it appears during recording.

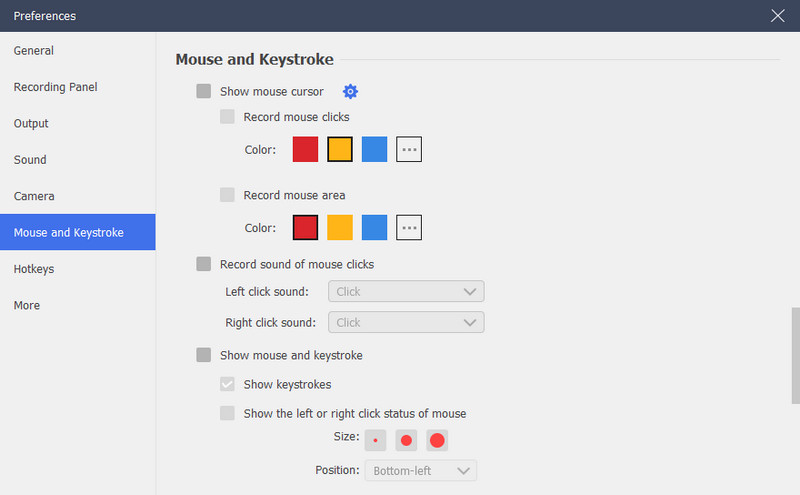
6. Mouse and Keystrokes
In this section, you can choose if you want to show the mouse cursor, record mouse clicks or areas with customizable colors, and even play sounds for mouse clicks. You can also display keyboard presses and mouse click indicators on-screen, with adjustable size and position.
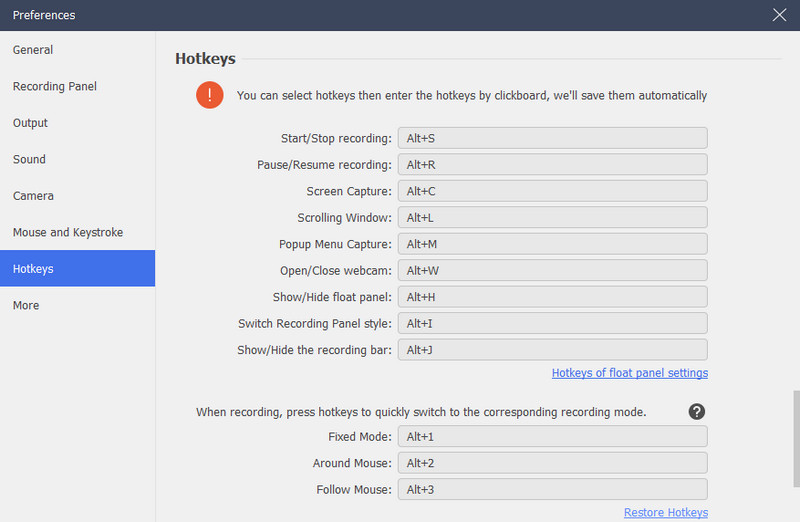
7. Hotkeys
You can view the listed keyboard shortcuts for various actions, such as starting or stopping recording, taking screenshots, opening the webcam, and switching recording modes. Also, you can customize these shortcuts for faster control during recording and restore the default keys if needed.
8. More
In this tab, see the options for screen capture mode, hardware acceleration, update preferences, and startup behavior. You can also choose what happens when closing the program, either minimize it to the system tray or exit completely.

FAQs of AceThinker Aqua Demo
If you have more questions regarding the sales and functions of AceThinker Aqua Demo , you can check its FAQ page to find the answers: https://www.acethinker.com/support/screen-grabber-premium-faq