- Get Aqua Demo and install it in your computer.
- Record a instructional video by hitting the Rec icon.
- Once done, hit Stop on the toolbar to end the recording.
In today's digital age, instructional videos have become a powerful and widely utilized for various purposes, such as teaching, training, and promoting products or services. The advent of technology and the across-the-board availability of high-speed internet have revolutionized the way information is disseminated and consumed. Instructional videos, which present information in a visual and engaging format, have gained significant importance in facilitating learning, improving training efficiency, and boosting marketing efforts. Furthermore, instructional videos can be watched at any time and from any location with an internet connection, making them accessible to anybody. In this thorough guide, we will explore how to create a how to video for your personal needs or share it with your target audience.
Tips for Producing How-to Videos
The first step in creating a successful instructional video is identifying your specific target audience. Understanding their requirements, interests, and learning styles lets you personalize your material to resonate with them effectively. Whether you're an educator looking to teach kids, a business looking to train employees, or a marketer advertising a product, setting clear and attainable goals will help you steer your video creation process with accuracy. Here are some tips for producing effective how-to videos before making instructional videos for YouTube or any streaming platforms:
- Identify Learning Objectives: Determine the key learning objectives your instructional video aims to achieve. Understand what skills, knowledge, or actions you want your audience to gain after watching the video.
- Assess Prior Knowledge: Consider your target audience's existing knowledge and experience level on the subject matter. This will help you refrain from presenting overly basic or overly advanced content.
- Learning Preferences: Analyze the preferred learning styles of your audience. Some learners prefer visual content, while others prefer auditory or hands-on learning experiences. Tailor your instructional videos to accommodate various learning styles.
- Content Relevance: Make sure that the content is relevant to your audience's needs and interests. Address common challenges or questions they may have and provide practical solutions.
- Length and Format: Consider your instructional video's ideal size and format. Shorter videos are generally preferred for quick tips or explanations, while longer videos may be suitable for in-depth training sessions.
- Language and Tone: You must use language and tone that resonate with your target audience. Avoid jargon and complex terminology if the video is meant for beginners while maintaining a professional tone for corporate or technical training.
Writing a Compelling Script
It's important to remember that your script should be concise and engaging, capturing the audience's attention from the beginning. To achieve this, start by identifying the main message you desire to convey and then structure your script around it. You have to make sure that your script flows logically, providing the necessary information in a clear and organized manner. This will help your audience follow along easily, ensuring that your target audience gets all the important points. Also, incorporate interesting facts or stories to keep your audience entertained throughout your presentation.

Preparing and Setting Up Equipment
Start gathering the right equipment before you create animated instructional video or any kind of video. Depending on the type of tutorial, this may include a microphone for clear audio, a camera, and MP4 screen recorder for PC like Aqua Demo from AceThinker. Once you have your equipment, it's time to set up an effective filming environment. Find a quiet space with minimal distractions. Consider using a backdrop or setting up your shot in front of a visually appealing background. Test your equipment and adjust your settings to get the best results.

Lighting and Composition Techniques
Good lighting can make all the difference in how a video looks and feels. It can create a certain mood, highlight important elements, and make everything look more polished and professional. Understanding how to use natural, artificial, and different types of lighting equipment can take your videos to the next level. The next thing you have to consider is the composition techniques. This refers to how you frame your shots and position your subjects within the frame. You can make a more visually interesting and dynamic video by using techniques like the rule of thirds, leading lines, and symmetry. It's all about creating balance and harmony within the frame.
Aqua Demo
Capturing high-quality footage is key to delivering an effective instructional video. Framing shots effectively, especially for different types of how-to videos, ensures that your message is conveyed clearly. Furthermore, incorporating tips for smooth camera movements and steady shots elevates the production value, creating a polished final product. For instance, if you have to make a tutorial and want to make a shot using a screen recorder, Aqua Demo is the right tool. With it, you can select a specific region on your computer screen or record full screen, making it effective for any types of how-to videos. You can also access the microphone with your webcam to create an effective tutorial. Moreover, it can record 4K video making more a outstanding tool.
Try it for Free
Free Download
Windows 8/10/11
Secure Download
Free Download
Mac OS X 10.15 and above
Secure Download
Step 1 Download and Install the Instructional Video Maker
Download the Aqua Demo using the buttons above. You have to make sure that the button you selected applies to your operating system. Then, open the file installer and run it. After that, follow the instructions, and the tool will launch after that.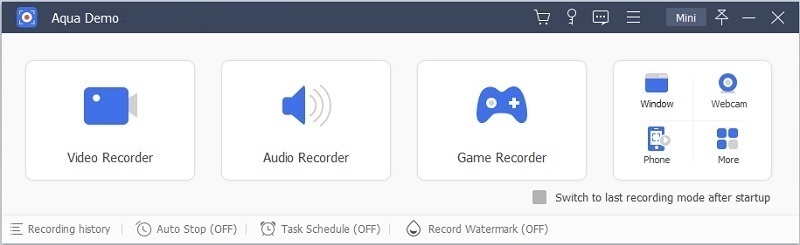
Step 2 Setup your Camera
Connect the external camera and microphone to your computer using a USB connection. Once it is operational, the tools will immediately recognize it and support a webcam for recording. You can enable the camera and microphone by selecting the toggle button given. Or you can navigate to the recording setting to change the output parameters for the camera, such as resolution, style, and opacity.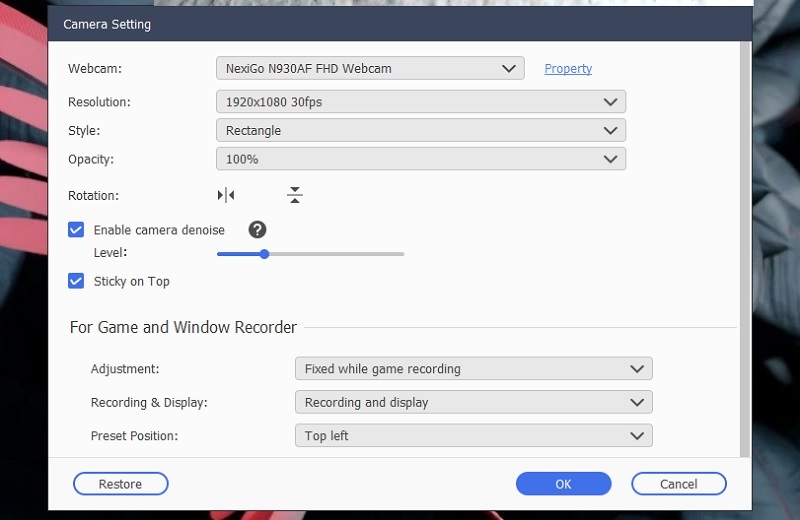
Step 3 Start Recording the Instructional Video
Since you have already set up your equipment and scripts, you can now commence the recording to create instructional videos. On the tool's interface, click the "Video Recorder," then click the "Custom" button to select a specific region from your screen. Subsequently, click the REC button to start your instructional video recording.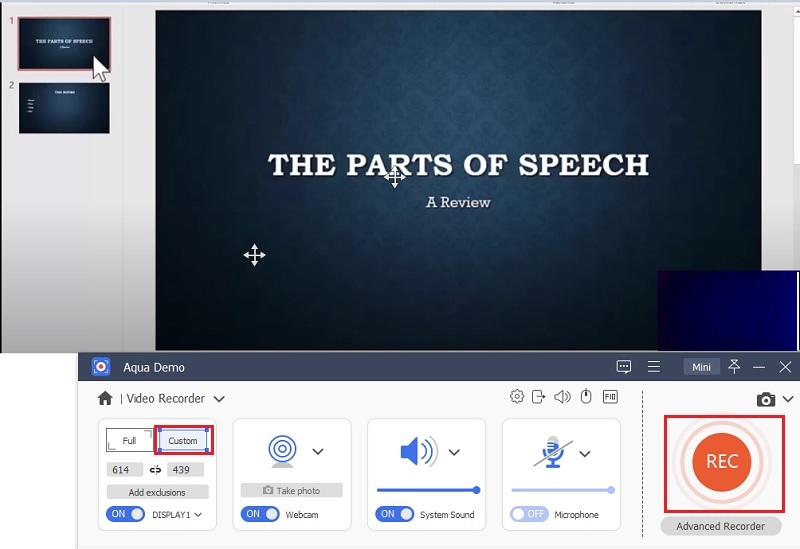
Step 4 Save the Instructional Video
When you are satisfied with the recording, you can hit the "Stop" button. After that, you will see the preview window, and you can review your recordings here. You can also make some adjustments here using the "Advanced Trimmer." When you are done, hit the "Save" button to store the video on your local files. Then, checked the recorded video on the tool's library or on your local drive.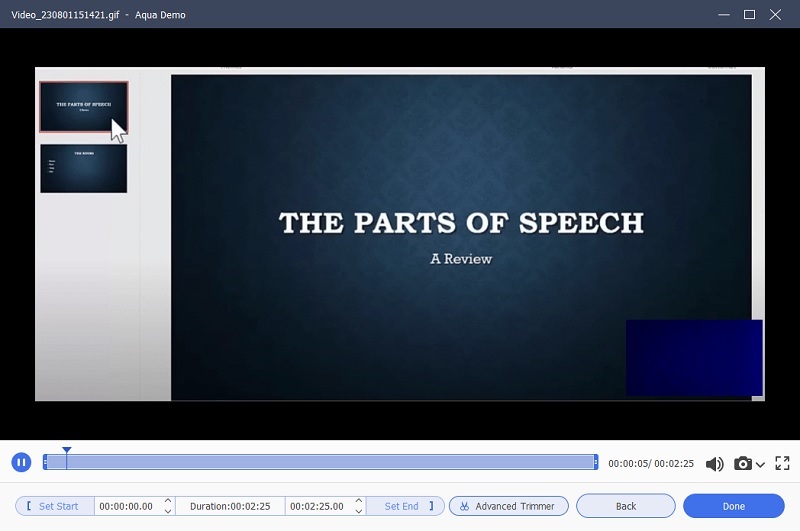
Post-Production for the Video Recording
The editing stage is critical in the video lesson-producing process. It is the stage at which you transform your recorded content into a polished, engaging tutorial. Begin by importing your film into a video editing program like AceThinker Wind Cut. You can trim and arrange your clips here and erase any errors or uncomfortable pauses to ensure the flow of your tutorial is seamless and logical. To improve viewer understanding and engagement, consider adding visual components such as filters, graphics, text or drawing overlays, or animations. If your video includes voice-over and background music, guarantee the audio matches the graphics exactly.
Try it for Free
Free Download
Windows 8/10/11
Secure Download
Free Download
Mac OS X 10.15 and above
Secure Download
Step 1 Save the Editing Tool
You can also download the tool by visiting the tool's website or utilizing the button provided above. Then, run the file installer and follow the prompt to install it on your computer. You can access the tool after that.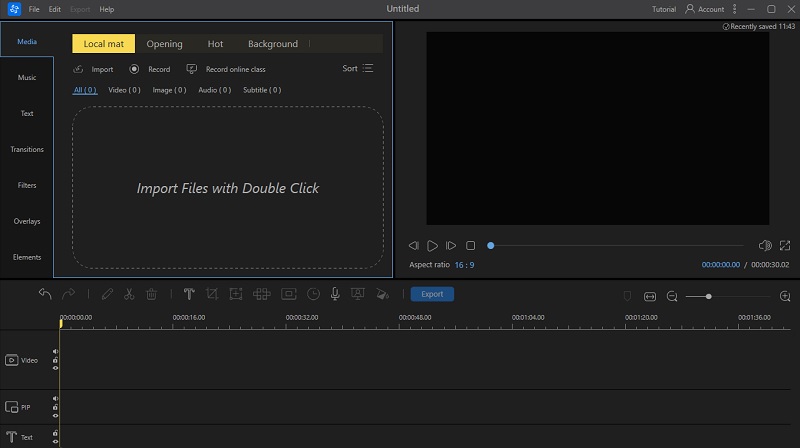
Step 2 Import and Edit the Instructional Video
Select the "New Project" option on the tool's interface. Then, locate the instructional video you have recorded on your computer, then import it by double-clicking the "Import Files" button on the tool's interface or just drag and drop the video. On the left panel of the tool, click "Music," select background music and click the small plus size beside it. You can also include text, transitions, and other effects to enhance your instructional video.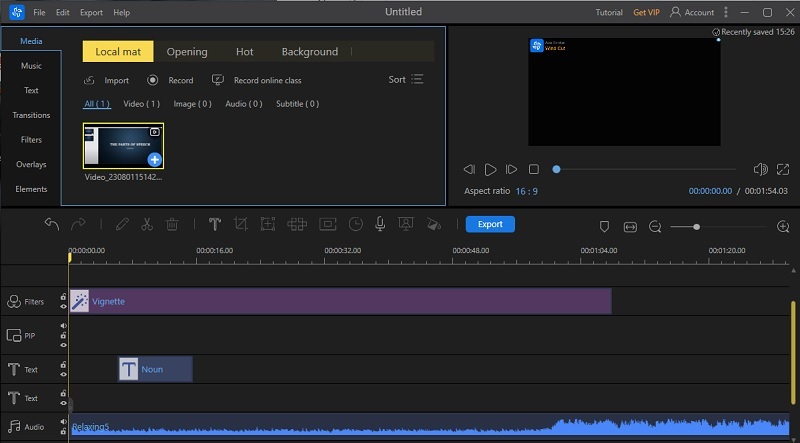
Step 3 Export and Check the Instructional Video
When you finalize editing, click the "Export" button on the middle part of the tool. Then another window appears where you can choose the format of the instructional video. Lastly, hit the "Export" button to keep the instructional video. Once the exporting process is done, click play to check the how-to video.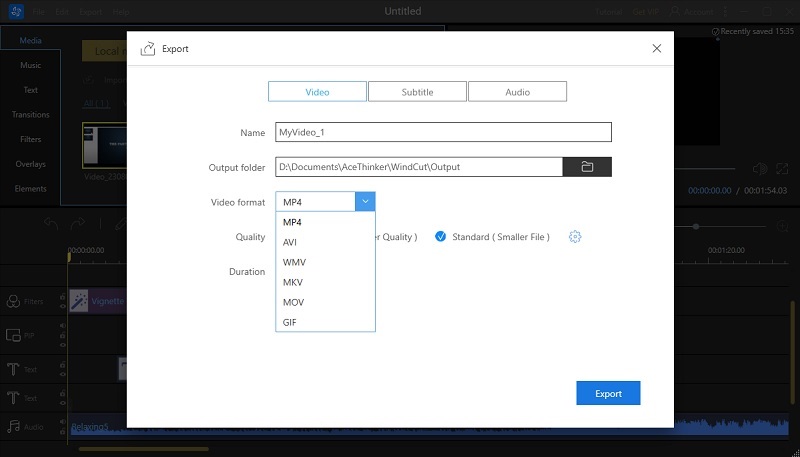
Video Optimization for Various Platforms
It's important to optimize it for different platforms to secure maximum engagement and reach. Other platforms have diverse requirements and specifications, so it's important to understand them in order to create content that performs well. For example, Instagram requires videos to be square, while YouTube supports a wide range of aspect ratios. If you want to learn how to record YouTube videos with audio, you can check out this link. Additionally, each platform has its preferred video format and resolution. By understanding these requirements and optimizing your videos accordingly, you can ensure that your content looks great on every platform and reaches the widest possible audience.