
- Install the Acer screen recorder on your laptop.
- Capture the desired scene on your Acer laptop.
- Stop the recording and check the video playback.

In our generation, where visual content reigns supreme, the ability to capture what's happening on your laptop screen has become an essential tool for communication, education, and entertainment. Acer, a trailblazer in technology, equips its laptops with robust features, including a built-in screen recording function that empowers users to capture, share, and preserve moments of digital significance. Imagine effortlessly recording tutorials to aid colleagues or students, preserving memorable gaming achievements for posterity, or documenting software bugs for troubleshooting purposes—all with the simple click of a button. This guide delves into how users can record on Acer laptops, providing step-by-step instructions, insightful tips, and practical advice to maximize your recording experience. In addition, we will explore one of the best alternative screen recorders you can use if this function is unavailable. Whether you're a seasoned, skilled, or tech enthusiast eager to analyze new horizons, join us as we dig in on how to screen record on an Acer laptop.
Things to Consider Before Screen Recording
Ensuring your system meets the requirements before diving into screen recording on your Acer laptop is necessary. Here's a rundown of the essential prerequisites:
- Webcam and Microphone: Verify that your Acer laptop has a functioning webcam and microphone. These components are pivotal for capturing video and audio elements during your screen recordings, ensuring a comprehensive multimedia experience.
- RAM (Random Access Memory): Aim for a minimum of 8GB of RAM on your Acer laptop. Sufficient RAM ensures smooth operation and adequate performance while recording your screen, preventing lags or interruptions that could detract from the quality of your recordings.
- Storage Space: Allocate at least 1GB of free storage space on your Acer laptop. This ample storage capacity is essential for storing recorded video efficiently. Adequate space ensures that you can capture and retain a multitude of screen recordings without encountering storage constraints.
- Operating System: Confirm that your Acer laptop runs on the Windows 10 operating system. Screen recording functionalities vary across different operating systems, so ensuring compatibility with Windows 10 guarantees optimal performance and seamless integration with your device's hardware and software.

Record on Acer Laptop using Windows 10 Game Bar
Xbox Game Bar is seamlessly integrated into Windows 10, making it readily available on your Acer laptop Windows without downloading or installing additional software. This native integration ensures compatibility and ease of use, allowing you to start recording your laptop or computer screen quickly and efficiently. Besides, this screen recorder for Acer laptop has minimal impact on system performance, making the screen recording smooth and lag-free even while running resource-intensive applications or games. This enables you to capture high-quality videos without sacrificing your device's performance. Another noteworthy feature of the Xbox Game Bar application is that it enhances the gaming and overall computing experience, allowing you to record PS5 gameplay and other games. These include the options for capturing screenshots, monitoring system performance, recording audio sources, and even broadcasting gameplay to platforms like Mixer. Follow these simple steps on how to screen record on Acer laptop using the built-in feature of Windows:
Step 1. Access Game Bar
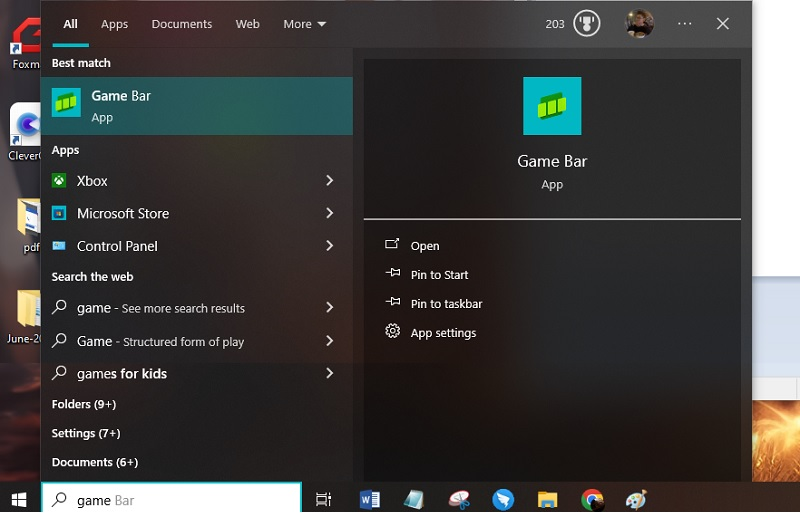
To begin recording on your Acer laptop, press "Windows Key" and "G" on your keyboard simultaneously to launch the Game Bar. Alternatively, you can manually open the Xbox Game Bar by searching for "Game Bar" in the Windows search bar and choosing the app from the search results.
Step 2: Start Recording
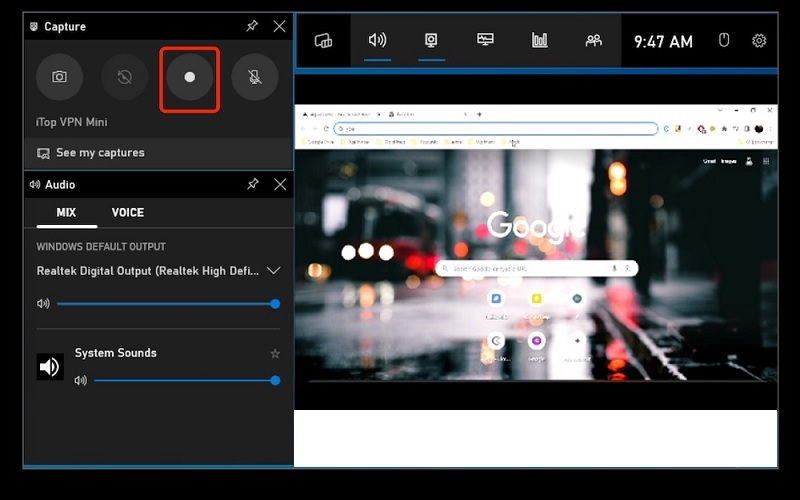
Upon opening the Windows Game Bar, ensure the screen recording is enabled. Then, navigate to the content you wish to record on your Acer laptop screen. After that, click on the red "Record" icon or smash the "Windows Key" + "ALT" + "R" on your Acer keyboard.
Step 3. End and Check the Recording Videos
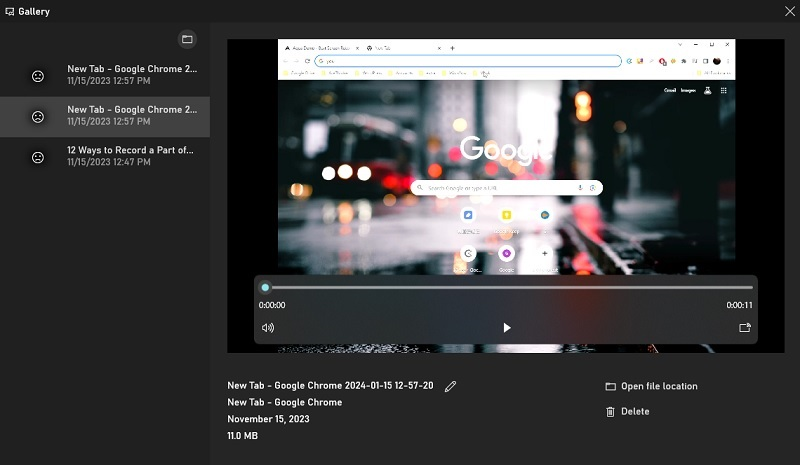
Once you have screen captured the videos you need on your Acer laptop, hit on the square "Stop" button or press "Windows key" + "ALT" + "R" again. When you stop the recording, Game Bar will automatically keep the recorded video in your designated folder. Double-clicking the file will play it on the media player.
How to Screen Capture Acer Laptop with the Best Screen Recorder
Indeed, the Xbox Game Bar is a convenient tool to screen record games on Acer. However, if you need a more advanced screen recorder or want to record different activities happening on your screen, you can use the Aqua Demo. This screen recording software is feature-rich and serves as a compelling alternative to Xbox Game Bar, offering a plethora of functionalities to meet the diverse needs of content creators, gamers, and more. What sets this screen recorder apart from the Xbox Game Bar is its extensive feature set, including advanced customization and optimization options. From adjustable frame rates and resolutions to customizable hotkeys and audio settings. Moreover, it also goes beyond basic screen recording by offering multiple recording modes, as users can record the entire screen, a window, or a custom region. Whether it's real-time annotation, video editing capabilities, or a built-in sharing option, this Acer screen recorder provides the necessary tools to elevate your recordings and engage your audience effectively. Below are the steps you can heed on how to do screen recording on Acer laptop.
Key Features:
- This screen recorder has a straightforward process recording, as the interface is user-friendly.
- Users can record screens with crisp and clear video footage up to 4K.
- Edit and enhance your recordings with its built-in editing tools, allowing users to trim, cut, merge, and more.
- Set up scheduled screen recording with its "Task Scheduler."
- It will enable users to capture system audio, microphone input, or both, giving you full control over the audio source.
- Export the videos in different file formats, including MOV, MP4, WMV, and more.
- Users can record any screen activities without a time limit.
Acquire it for Free
Step 1: Install the Acer Screen Recorder
The initial process is to save this third-party application on your Acer computer or laptop. You can go to the main page of the screen recorder and click the "Free Download" button on the main page. Or you can utilize the download above to acquire the screen recorder. Then, observe the on-screen instructions to install it on your Acer laptop.
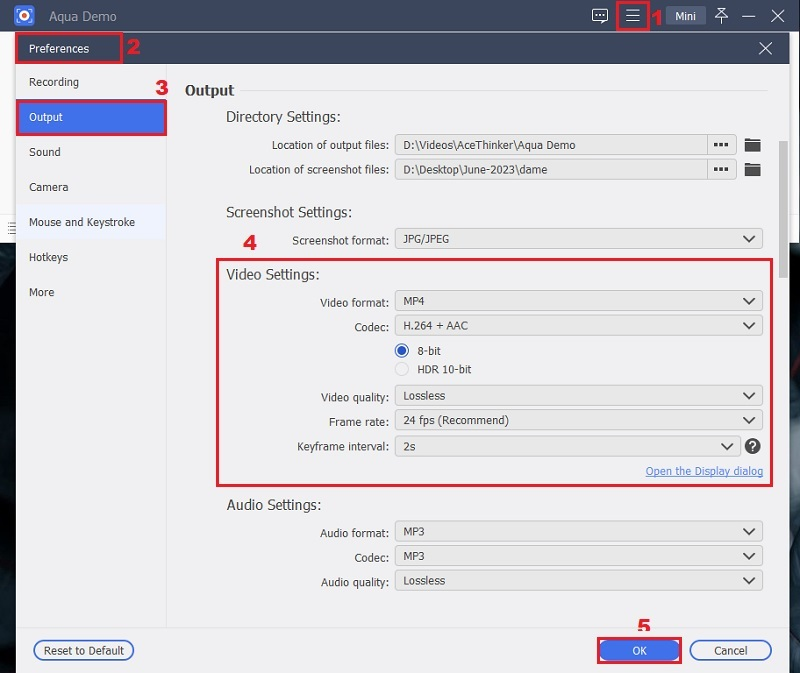
Step 2: Modify the Recording Settings
Once the screen recorder is installed on your Acer laptop, click the "Hamburger" button on the upper right of the tool's main interface. Then, navigate to the "Preferences" tab, and you can tweak all the settings you prefer. You can alter the output format, FPS, and more.
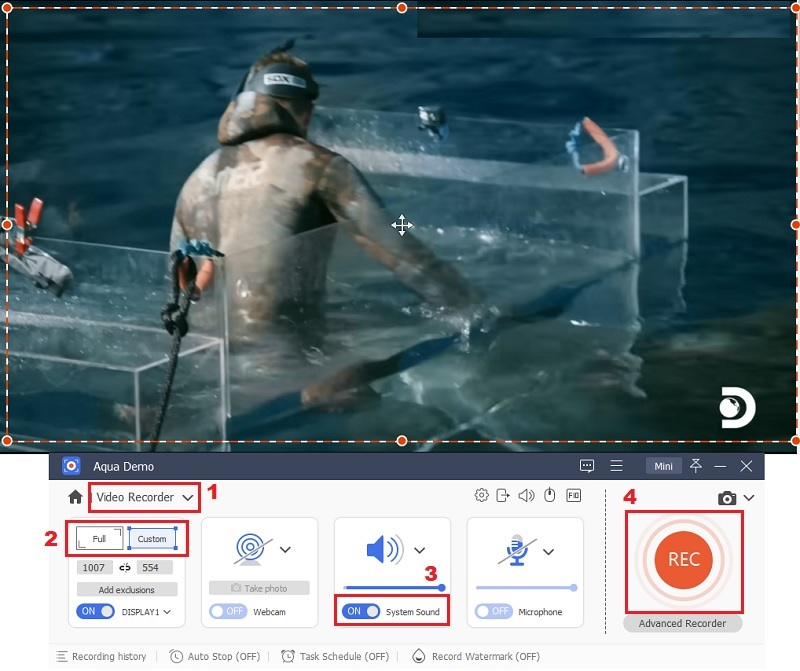
Step 3. Start Recording
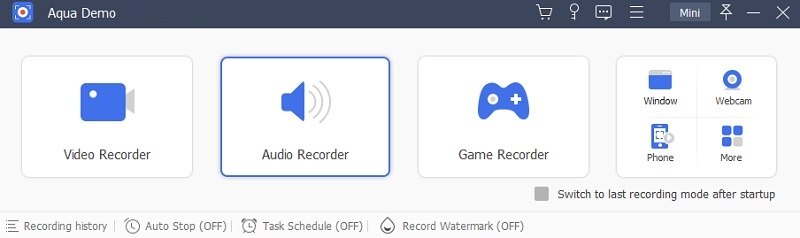
Select the recording area; you can record in full screen or a specific region. Then, toggle the system sound, webcam, and microphone if you need to include them in your recordings. Once everything is all set, click the "REC" button to commence the screen recording.
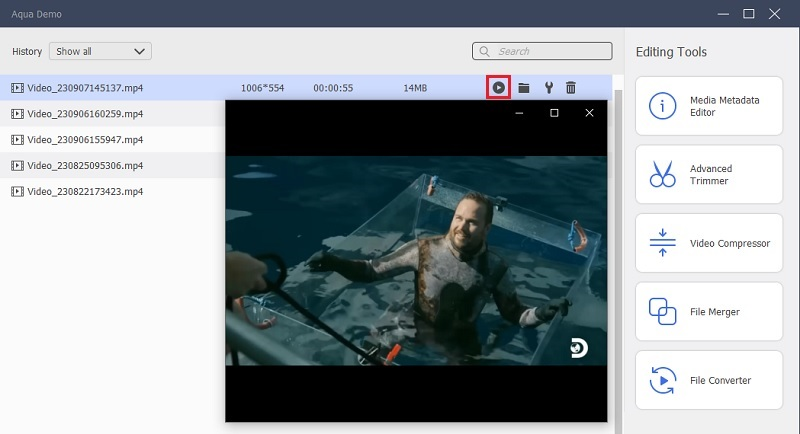
Step 4. Save and Play the Recording
You can stop recording by smashing the stop icon represented with a small red square. The screen recording software will display a preview window, then click the "Done" button to save it. Then, you will be moved to the video library, where you can access all the recorded videos, audio, and photos. You can double-click the file or click the play icon to open it on your media player.
Alternative Solution on How to Record Screen on Acer Laptop
Another third-party tool you can use to screen record on Acer is the OBS Studio. One of the most significant advantages of OBS is its cross-platform compatibility, with support for Windows, macOS, and Linux operating systems. This versatility ensures users can access OBS on their preferred platform without restrictions. This screen recorder allows users to create custom scenes and sources, enabling them to design unique layouts for their recordings and streams. Whether showcasing gameplay, delivering presentations, or hosting interviews, OBS offers unparalleled flexibility in arranging and organizing your content. Additionally, it leverages industry-standard encoding technologies such as x264 and NVENC to deliver high-quality video encoding with minimal performance impact. Here is a simple guide on how to record on a Acer laptop.
User Guide:
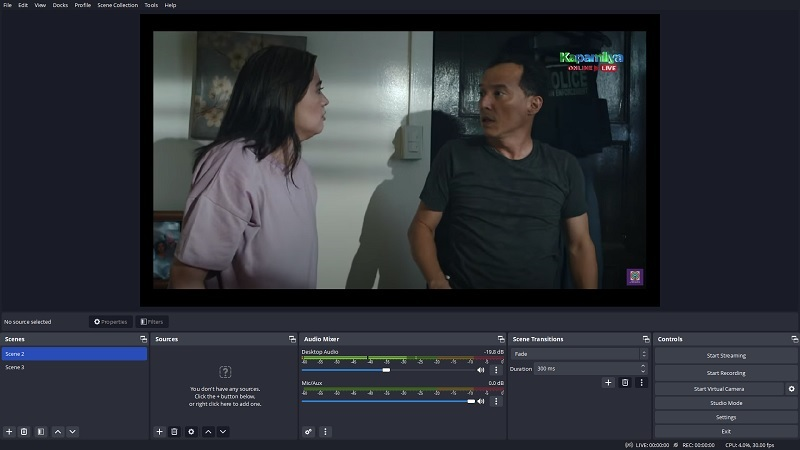
- Launch OBS Studio and navigate to the "File" menu, then select "Settings" to access the video options.
- Return to the main interface, locate the "Scenes" box, and either click the "+" icon or right-click within the box and select "Add." Choose "Display Capture" from the options to capture the entire screen.
- Upon selecting "Display Capture," a window will prompt you to confirm your selection. Click "OK" to proceed and create a new source. To initiate the recording process, navigate to the "Controls" panel and click on the "Start Recording" button.
Final Thoughts
In conclusion, the ability to screen record on Acer laptops opens up a world of possibilities for communication, education, and entertainment. Whether you choose the seamless integration of Xbox Game Bar or the advanced features of Aqua Demo or OBS Studio, capturing and sharing your digital experiences has never been easier. With these screen recorders for Acer laptops at your disposal, you can elevate your content creation and gameplay and engage your audience in new and exciting ways.
Frequently Asked Questions
1. How to record screen on Acer laptop on Windows 7?
To initiate screen recording on your Acer laptop running Windows 7, you can leverage the native tool called "Problem Steps Recorder." This feature delivers a simple yet effective way to capture a series of screenshots along with corresponding annotations and descriptions, allowing you to document and troubleshoot issues encountered on your system.
2. Is there any time limit when recording on Acer laptop?
The available storage space on your Acer laptop primarily limits the length of your recording. If your device has ample storage capacity, you can record for an extended duration without encountering storage constraints. Conversely, if your laptop has limited storage, you may need to manage your recordings carefully or consider freeing up space by deleting unneeded files.