
 Do you know how to record video on Mac with external Camera? If not, following this post will make it simple for you to try. Suppose a user wants to record video on their computer, but their built-in Camera isn't operating properly. In that case, they can turn to an external web camera. The concern is usually suggested by connecting an external camera using a USB cable to enable the Mac computer to capture faces on screen. Additionally, most Mac users employ a variety of powerful applications to deal with this problem, which makes it straightforward to record their screen. If you want an easy and quick way to use an external camera to capture video on a Mac, then this article is for you! Keep reading to find out how to record video on Mac with external camera.
How to Record Video on Mac with External Webcam
1. Record Video on Mac with External Camera Using Aqua Demo
Distinctive Feature: This software provides functional features like “Task Scheduler,” which allows you to set an automatic screen recording to create a live video based on a predefined schedule.
Output Format: MP4, MOV, AVI, FLV, WMV, and more.
AceThinker Aqua Demo is the most suggested tool if you like to record your screen and yourself using an external camera. This tool is a reliable screen recorder containing the most functional and useful recording features. It supports a lossless quality of video recording that enables web cameras to utilize it. Accessing an external webcam is not a big concern using this tool. After your Mac computer recognizes an external web camera, this tool will easily employ it on your recording. It also supports audio sources that can simultaneously capture system sounds and microphones. To acquire access to the tool, follow the detailed steps below to record video on Mac with external Camera.
Get it for Free
Step 1 Download and Launch Video Recorder on Mac
To access AceThinker Screen Grabber Premium on your Mac computer, click the available “Download” button suitable for your computer OS. Then, run the installer after you download the file. Furthermore, follow the instructions for installation carefully until it launches successfully on your computer. Once done, open the tool and access its main interface to initiate the recording on Mac.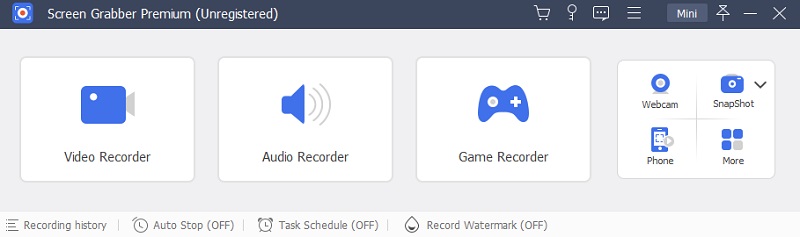
Step 2 Setup External camera and recording settings
Connect the External Camera on your computer using a USB cable. Once it works, the tools automatically recognize it and support a webcam for your recording. You can enable its function by ticking the toggle button provided. On the other hand, navigate to the recording setting to modify output settings, including the video format, quality, frame rate, and the file location you want.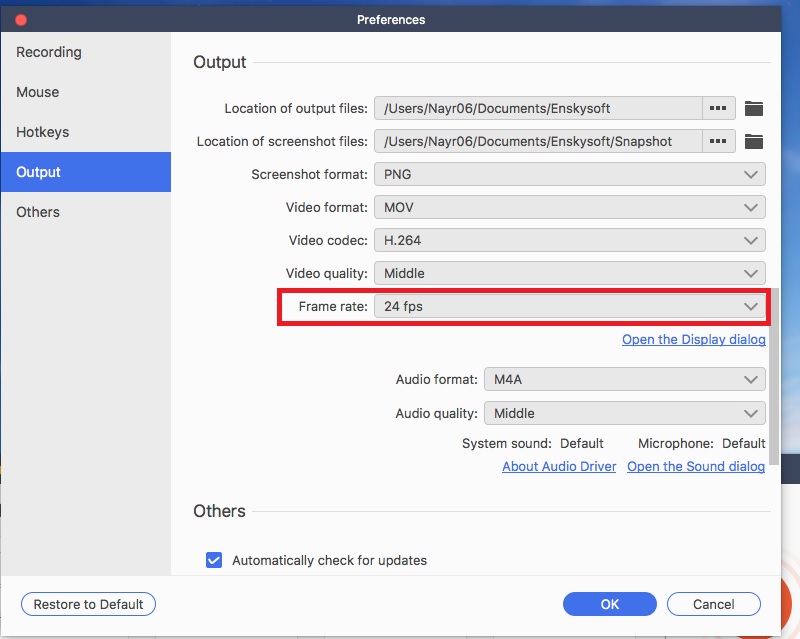
Step 3 Start Recording with External Camera
On the tools’ Video Recorder, select the screen mode you want for your recording. Choose full-screen to capture the entire screen of your computer, or select custom mode to capture a specific area on your screen. Make sure you enable the Webcam supported by an external camera. After that, pick the audio source you need. You can enable system sound to get sounds from your computer or turn on Microphone if you like to record external sounds like voice recording. Enabling both audio sources is possible. Finally, press the “REC” button to start the recording.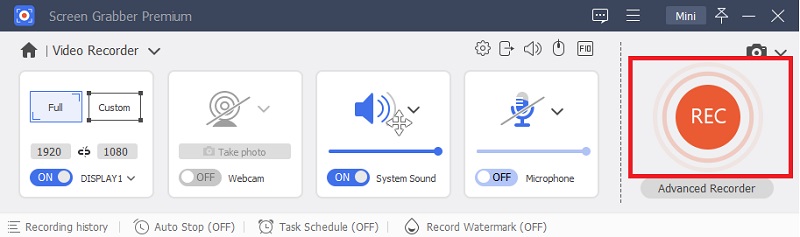
Step 4 Create Annotation
While on-screen recording, you can customize your video using the tool to edit your video. Click the “Edit” icon on the upper right corner of the recording toolbar. Select the tools you want to start a real-time drawing on your screen. It offers annotation features like adding text, rectangles, ellipses, and callouts. Additionally, you can pause and end the recording anytime you want.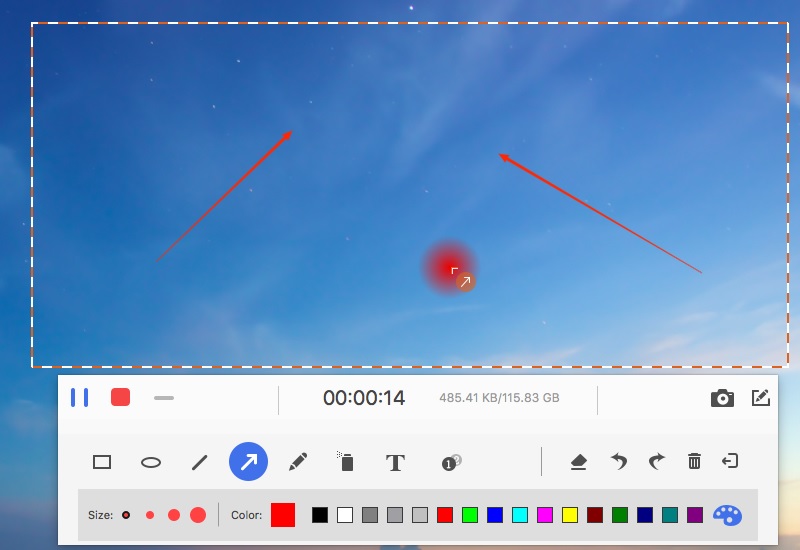
Step 5 Share and Upload your File
After you end the recording, the playback screen will automatically appear. You can view your recorded file and trim an excessive part if needed. Then, hit the export button on the bottom right corner of the Preview Page. It will direct you to the history panel, where your recorded file is included on the list. Select your previous file and right-click on it. Choose the “Share” option and select the online platform where you want to share and upload your file.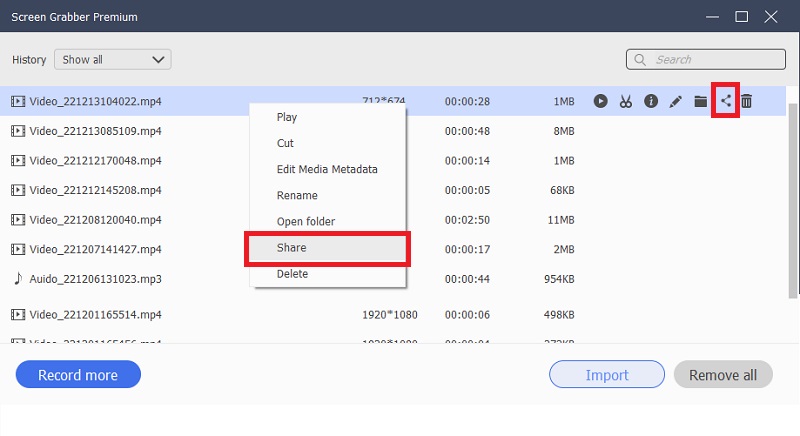
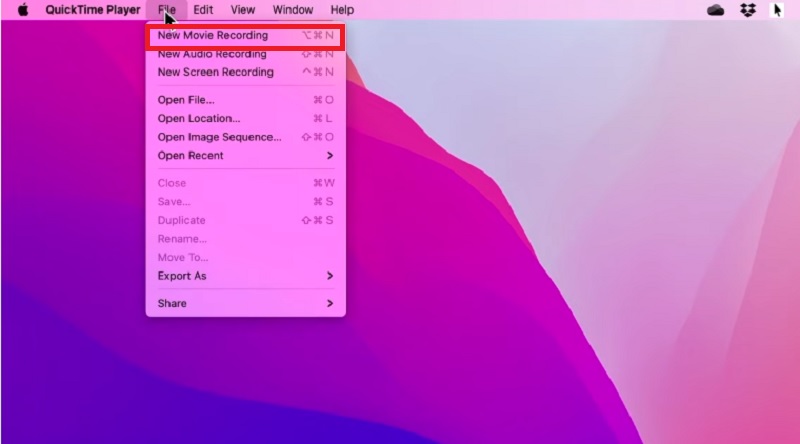
2. How to Record Video on Mac with External Webcam Using Quicktime Player
Distinctive Feature: This tool has a clear and straightforward user interface with a functional feature of Trimming and flipping a video clip.
Output Format: MP4 and MOV.
Using Quicktime Player is another solution to record from an external camera mac. This pre-installed and popular multimedia player on Mac has the functional capability to create a screen recording. You can access the recording feature of this tool in just simple steps to follow. Aside from that, you can use this tool as a video editor, which lets users trim, rotate, split, and merge recorded videos. Recording yourself is possible using the built-in Camera or even from an external webcam. It allows users to record their screens while using a webcam to create good video content.
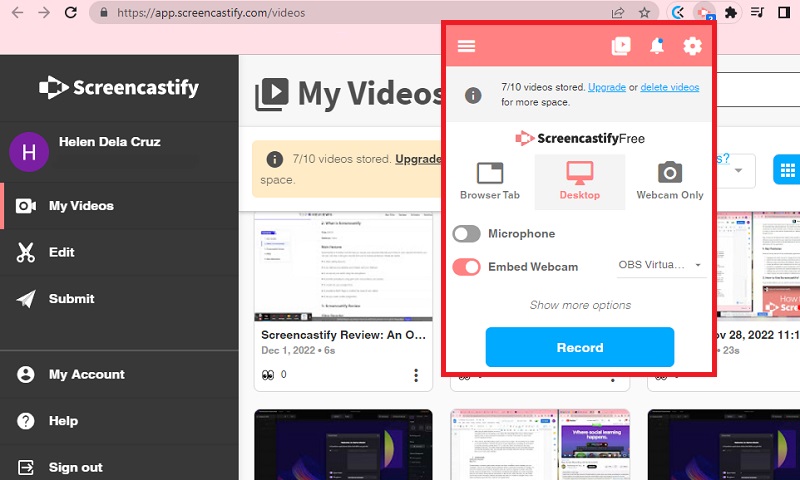
3. How to Record Video on Mac with External Webcam Using Screencastify
Distinctive Feature: This software is a web-based program with the functional feature of recording multiple screen modes with the option to embed a Webcam.
Output Format: WEBM and MP4
Screen recording while using an external webcam online is another solution if you prefer not to download and install a program on your Mac Computer. Screencastify is a Chrome Extension tool that is accessible and available on the google browser. You can use this tool right away to use an external webcam and record your screen simultaneously . It is one of the most effective online webcam recorders that supports numerous features to add to your screen. Using the tool, you can add text, emojis, shapes, and more. You can easily customize your recordings' content using this tool's various features. You can record drawings on screen and take numerous recordings to share your recorded videos directly on Social Media.
4. How to Record Video on Mac with External Webcam Using Vmaker
Distinctive Feature: It has the prominent feature of recording computer screens, Webcam, or both with functional tools to edit videos.
Output Format: WEBM and MP4.
Vmaker] is a straightforward software that offers screen and webcam recording. Its user interface is clear and quite simple, which beginner users can work on. Furthermore, unlimited recordings are possible using the tool. It also contains multiple recording modes to use. You can record using a Webcam or capture your screen at the same time. There are options to use full-screen recording, select a specific window, or drag your preferred custom screen dimension. This tool also offers an annotation feature and a tool to highlight the mouse cursor. All your recorded files can be easily shared online directly to Youtube, Twitter, Facebook, and even your LinkedIn account. With this, this tool only highlights a few clicks on how to record video on Mac with external Webcam successfully.

Comparison Chart for Screen Recorders
| Tools | Price | Task Scheduler | Time Limitation |
|---|---|---|---|
| AceThinker Aqua Demo | $19.95/month | Available | No Time Limit |
| QuickTime Player | $29.99/pro version | Not Available | No Time Limit |
| ScreenCastify | $49/year | Not Available | 30 minute |
| Vmaker | $10/month | Available | 7 minutes |