
- Save and install Aqua Demo on your laptop.
- Capture your laptop screen.
- Save the screenshot on your laptop.
In today's fast-paced digital world, multiple developers are engaged in new gadgets that could give users better access to computer files on a simple device. Due to their computer-like capabilities and accessibility from anywhere, laptops eventually gained popularity. In that line, the HP Envy x360 is a powerhouse device that combines exceptional performance with remarkable flexibility. Its sleek design, superior functionality, and innovative features make it an ideal companion for professionals, students, and creatives alike. Among its many impressive capabilities, the ability to capture screenshots effortlessly stands out as a valuable asset. Screenshots are valuable for capturing and preserving information, troubleshooting issues, sharing visual content, and enhancing productivity. They serve as visual references that can be easily shared or stored for future use. In this article, we delve into how to take screenshot in HP Envy x360, exploring the various ways this remarkable device empowers users to capture and customize their digital experiences.
Screenshot Using Print Screen Command
The Print Screen key is a common method for taking screenshots on many Windows-based laptops, including the HP Envy x360. With the HP Envy x360's keyboard, the Print Screen key is on the "Shift" key with the code "Prt Sc." This can confuse some because, on some Windows computers, the Print Screen function is presented in PrtScn, Prtsc Sysrq, or full phrase Print Screen. Discover the keyboard shortcuts we can utilize with this key. You can check this link for know-how if you are using another laptop like Dell and want to screenshot something on your screen.
- Option 1: On your HP Envy x360 laptop, press the keys "FN" and "Shift" since the "Prt Sc" is embedded on it. This will capture your entire screen and can be saved on your Windows clipboard.
- Option 2: You can use or press the "Prt Sc" and "Alt" keys to snap your current application on your laptop and save it to your clipboard.
- Option 3: If you want to save the screenshot in PNG format, you can also utilize the keys "Prt Sc" and "Windows."
- Option 4: This shortcut also saves your screenshot in PNG format, but this only captures the current application you are using.

Capture Screen via Snipping Tool
Windows operating systems also provide a built-in tool called the Snipping Tool, which offers more flexibility in capturing screenshots. It allows users to capture screenshots of any portion of their screen and save them as an image file. It offers various options to take screenshots, such as rectangular, free-form, window, and full-screen capture. Further, snip images can be annotated using your mouse and can store or save as an image file or MHTML file, or you can directly email it. This tool is very useful for creating tutorials, presentations and sharing information with others. Let's learn how you can take a screenshot using the Snipping Tool.
- To access the tool, you can search it on your search bar near the Start button; alternately, you can press Windows+Shift+ S keys. When you open this tool, you can see the bar on your screen with four screenshot options.
- Click the mode you want to use, for instance, you choose the rectangular snip mode. After that, you can take the screenshot on HP Envy x360, your snip will be saved on the clipboard. You can edit it on your "Paint" application by pressing "Ctrl+V" and then save it on your laptop's local file.

Use a Professional Tool
In addition to the above HP Envy x360 screenshot options, you can also use dedicated screenshot software. One such easy-to-use tool is Aqua Demo. This is specifically designed to screen record and take screenshots and offers multiple options to customize your captures. Thus, it delivers a range of functionality, making it an excellent choice for capturing screenshots on your HP laptop. With this tool, you can screenshot PDF, presentations, Google Maps, and more that can be saved in multiple formats such as JPG, PNG, BMP, and GIF. It supports customized recording that allows you to capture specific screen areas and even a scrolling window. Additionally, you can make your screenshot informative by adding shapes, arrows, text, and lines. Learn how to take a screenshot on HP Envy x360 effectively.
Try it for Free
Free Download
Windows 8/10/11
Secure Download
Free Download
Mac OS X 10.15 and above
Secure Download
Step 1 Download the Capturing Tool
Save the capturing tool on your computer by clicking any buttons provided above. Once the installer file is downloaded, right-click on the file and hit the "Open" option. Then, the installer file will run, and you have to finish the prompt to save it on your computer.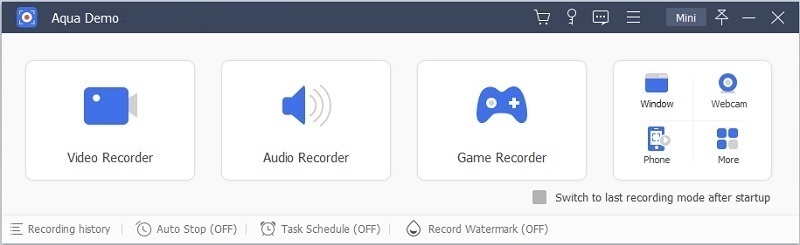
Step 2 Take the Screenshot on your HP Laptop
Launch the capturing tool and click on the "Video Recorder" option. On the right panel of the tool, you can locate the "Camera" icon, click on it and choose the area of the screenshot you need. Subsequently, you can annotate your screenshot and see other options on the right panel of the toolbar, where you can capture a scrolling window and more.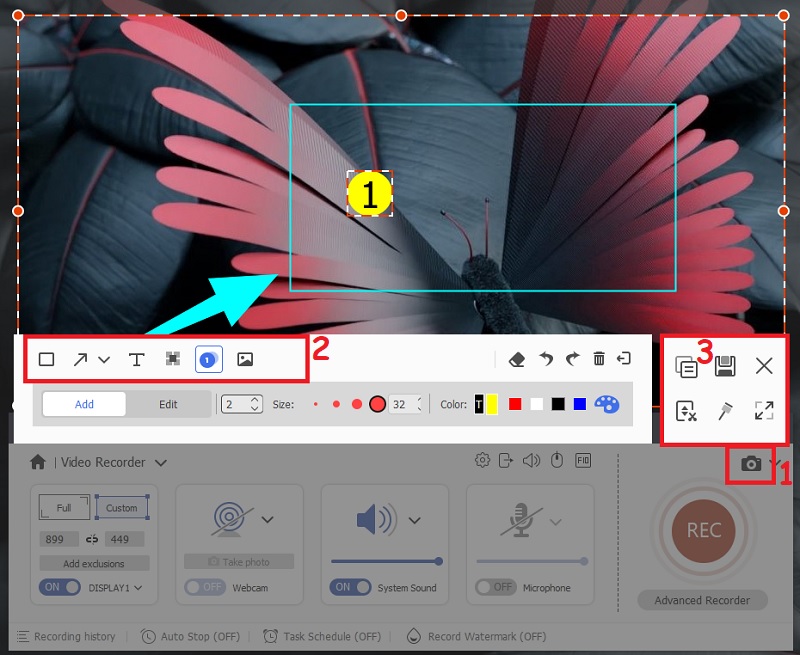
Step 3 Save the Screenshot
When you're done, click the "Save" icon on the right panel of the tool. Then, a window will show where you can choose where to store the screenshot, rename it, and what format you want to save the file. Finally, click the "Save" button to keep it.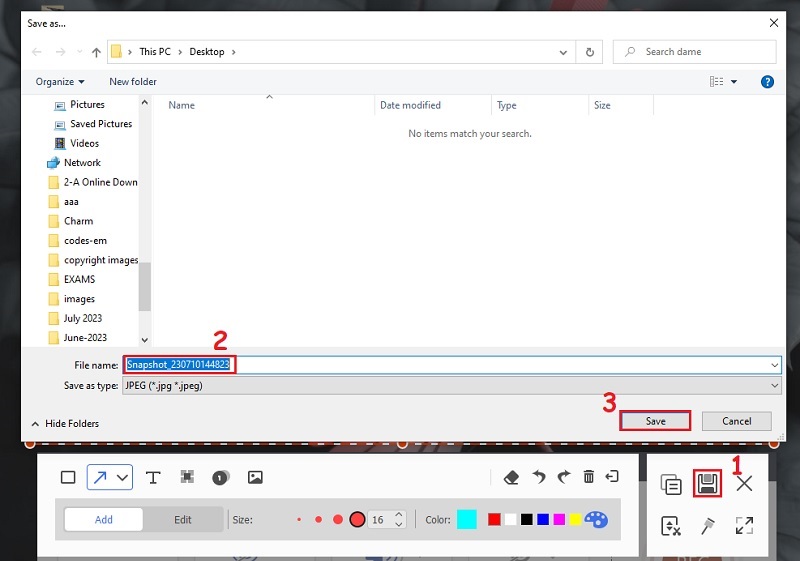
Conclusion
In conclusion, we've explored three different methods for taking screenshots on your HP Envy x360. These methods include using the Print Screen (Prt Sc) key for capturing the entire screen, utilizing the Snipping Tool to capture specific areas, and taking advantage of the Aqua Demo feature for quick touch-based screenshots. Screenshots are incredibly convenient and useful in various situations. They authorize you to capture and preserve important information and share content with others. With these different methods at your disposal, exploring and utilizing the one that suits your needs is important. Consider the specific content you want to capture, your preferred level of control, and your interaction preferences (keyboard or touch-based). Experiment with these methods and find the most comfortable and efficient for you.