Record Videos on Twitch with Aqua Demo
When looking for the best Twitch recorder, AceThinker Aqua Demo is the right solution for you. With the help of this, you can easily record Twitch broadcasts and streams and save them into famous file formats like AVI, MP4, WMV, MOV, and more. Besides, you can edit your recorder by adding annotations, shapes, and more by using its editing features. Itis one of the notable tool you can use to record gameplay on Mac and Windows PC. So with that, we'll show you the simple process of how to screen record on Twitch using this excellent tool.
Try it for Free
Step 1 Save the Twitch Screen Recorder on Your Computer
The first thing that you can do to use Aqua Demo is to install it on your computer. Hit one of the "Download" buttons provided above, and then an installation wizard will appear. After that, follow it to save the recorder on your PC completely.Step 2 Configure the Settings of the Tool
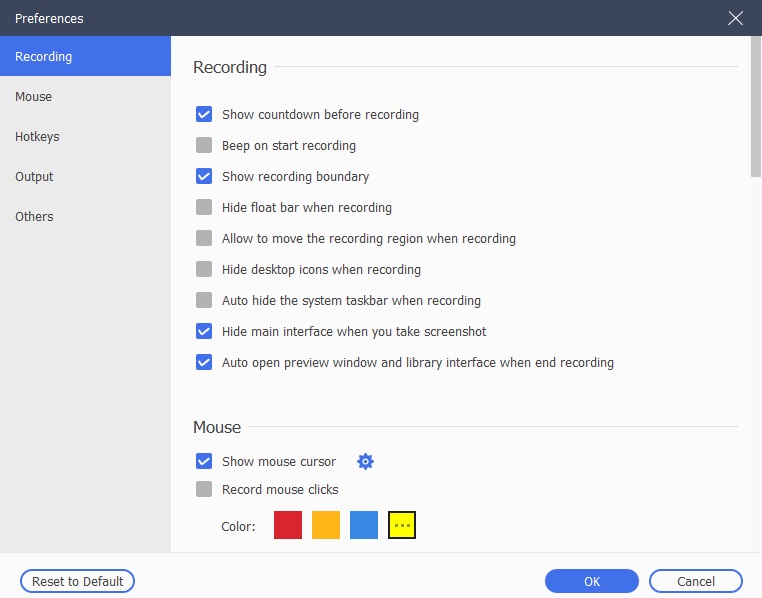
Once the tool is installed on your computer, you can configure its settings by clicking the "Settings" icon at the upper part of the interface. You can see the recording settings you wish to change from here. After that, click "OK" to save the changes.Step 3 Record Stream on Twitch
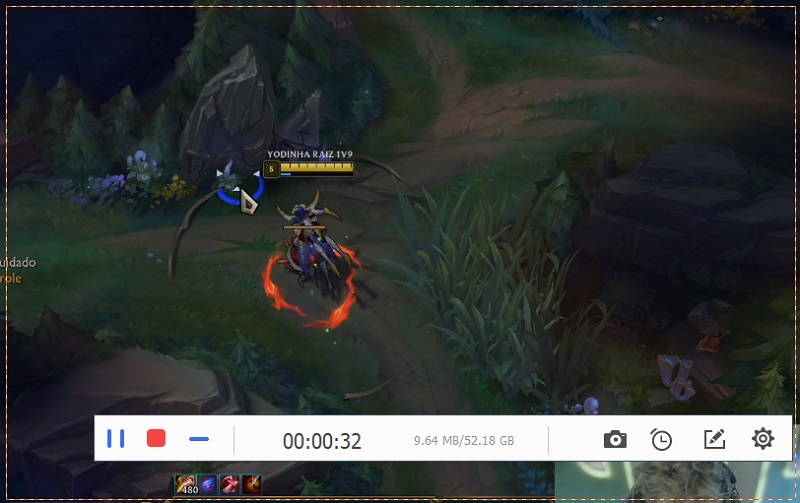
Next, open a Twitch stream that you want to record on your PC. Launch the Aqua Demo and hit the "Video Recorder" button. From its main interface then hit the "Rec" button located at the right corner of the interface. After that, a countdown will appear and record Twitch video.Step 4 End the Recording Process
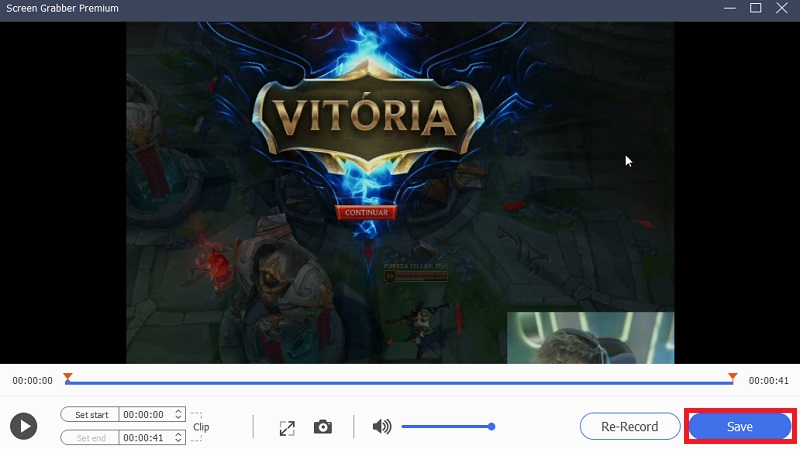
Once you decide, click the "Stop" button from the floating toolbar to stop the recording. After that, a window will appear that contains the recorded video. Hit the "Save" button that you can see from the lower right portion of the interface to save the recorded Twitch streams.Other Tools to Capture Twitch Stream for Offline Watching
1. OBS Studio
OBS Studio is an open-sourced desktop Twitch video recorder that is widely used across the globe. The reason is that it is free to download and use. It is one factor why it is one of the top choices among screen-recording applications. The reason is that OBS Studio has a preset that is suitable to record live Twitch. Where it provides optimum performance for a smooth experience while gaming. Another feature of OBS Studio is its direct stream recording, which is excellent for people who are on Twitch. OBS Studio is also equipped with other recording presets that fit different recording situations. The videos captured using OBS are stored in the default folder created by the tool. Still, they can be configured from the "Settings" panel.
2. VLC Media Player
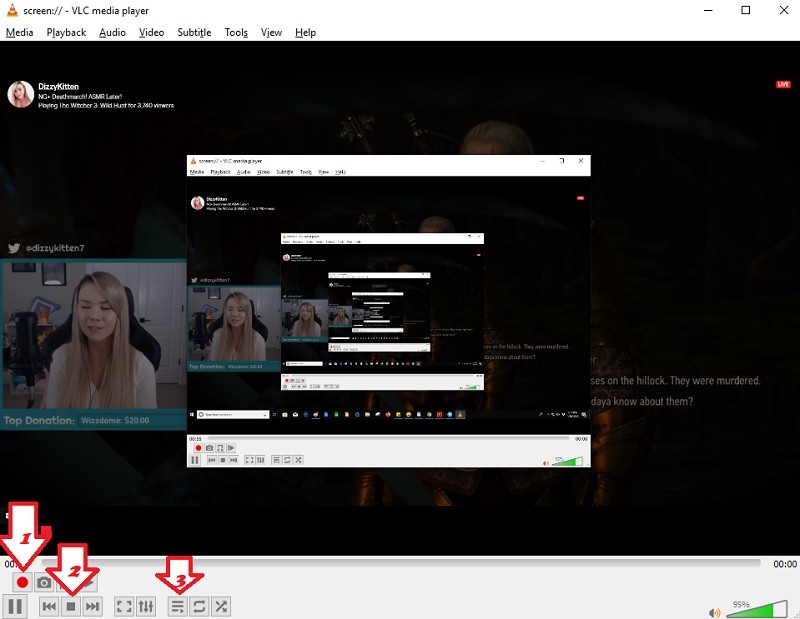
VLC Media Player is a tool that's available on desktop and mobile devices. Aside from being a great media player, VLC Media Player can also record desktop and TV screens that can record and download Twitch videos. However, we will focus on the desktop screen recording and leave the smart TV for a different time. Yes, you can record desktop screen activity with a hidden recording feature of the VLC Media Player. VLC Media Player goes through a long process before accessing its recorder. Once you have access to the recording feature, you will use it to capture Twitch live stream and watch it offline.
3. Screencast-O-Matic
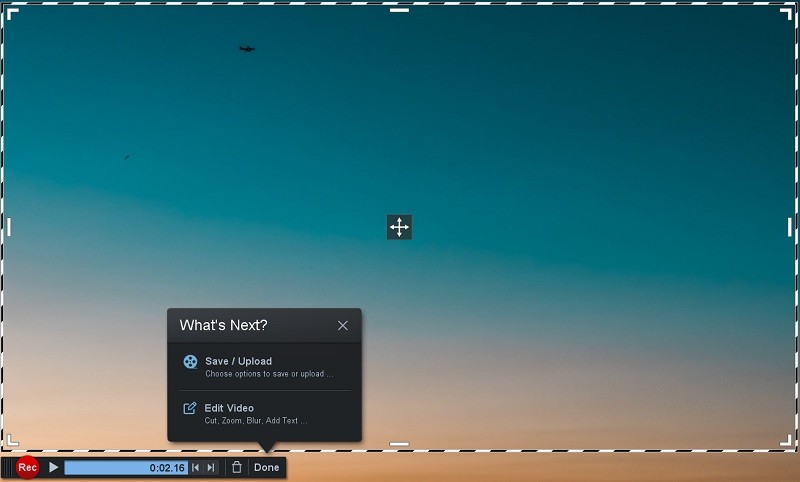
Next, we have Screencast-O-Matic as one of the great ways to record Twitch live-stream. Screencast-O-Matic is a web-based application that can capture video with audio. Making it perfect for recording live-stream from Twitch. The tool is free to use but also has a premium version that provides various benefits. Such benefits include unlimited recording time. The free version can only record a maximum of 15 minutes of video per recording. Additionally, the premium version unlocks the tool's video editing feature. Which can be used to enhance videos after recording them. Screencast-O-Matic is simple and provides excellent videos every time you use it. Whether it's under the free version or premium, it is highly recommended for recording Twitch live-stream videos.
4. Xsplit Broadcaster
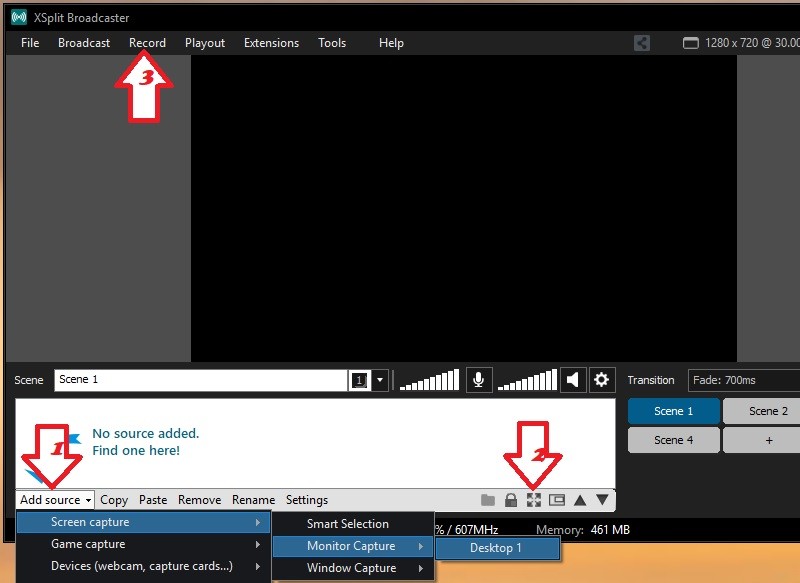
Xsplit Broadcaster is another best recording software for Twitch. This tool is directly affiliated with Twitch, which is why many streamers use it. Aside from being an excellent broadcasting software, the tool is also a decent screen recorder. You can use it to record anything that comes up on your desktop screen. The software is an excellent choice for recording live streams because it captures good quality videos with audio. Also, Xsplit Broadcaster has a video editing option, perfect if you want to upload your videos online. The tool may look intimidating at first, but it's not. Xsplit Broadcaster is easy to use, and you will be able to get the hang of using it and record live Twitch stream right away.
Tips to Save with VOD on Twitch
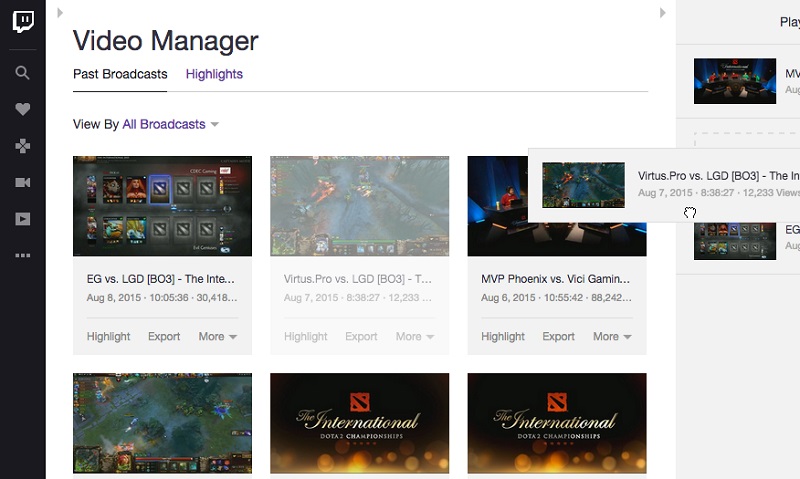
VOD, also known as Video On Demand, is a Twitch option that allows streamers to store their videos in its cloud storage. They can keep their videos and access them later on for easy viewing. The streamers and uploaders can access videos in VOD and the fans that follow them. VOD is a great help if the streamers want their live streams into long-term videos. To know how to do VOD, you can check the listed steps below. In addition, click this web page to know how you can record yourself playing video games on Twitch and store them accordingly.
User guide
- To use VOD, log in to your Twitch account and go to the "Creator Dashboard."
- After that, click the "Preferences" and go to "Channel."
- Next, click the icon of your Profile, and choose "Settings" then "Channel and Videos."
- Within the Stream Key and Preferences, find the "Store Past Broadcasts" option and enable it.
- Once done, click the "Three-line" button and press the "Content" then the "Video Producer." Lastly, click the "Three-Dots Lines" and select to download the video to your computer.
Conclusion
You see, it's quite easy to do the Twitch recording as long as you have the best screen recorder for Twitch. If you need to record Twitch several times, the free online one may be the right choice as it doesn't cost a penny. The functions are enough to fulfill your needs. Suppose you want to record Twitch videos and record Amazon Prime video, or capture Facebook Live. In that case, it's recommended that you get Aqua Demo as the desktop one is more stable and even allows you to schedule recording. I hope this article will be helpful to you. If you know any other ways to record streams from Twitch easily with high quality, please share them with us by dropping a comment.

