In the realm of digital audio, where precision and clarity are prominent, the WAV format stands as a cornerstone for delivering uncompromising sound quality. The world of technology has witnessed a remarkable evolution in audio recording techniques. And, amidst the diverse formats available, WAV has emerged as the gold standard for capturing audio. Additionally, the WAV format stands out as a prime choice when it comes to preserving the utmost quality of audio recordings. This article delves into the significance of the WAV format in the realm of high-quality audio, emphasizing its pivotal role in ensuring professional-grade sound reproduction. Continue reading to explore how to record in WAV format.
What is WAV Audio File Format?
WAV (Waveform Audio File Format), a digital audio format, is known for being uncompressed and lossless. It is favored by sound engineers, music industry professionals, and audiophiles alike because of its well-known capacity to record audio in its most pure form. WAV files store audio data without any quality degradation, unlike compressed formats like MP3 or AAC, providing a faithful representation of the original sound source. WAV recording offers a wide range of benefits, making it a popular option for people and industries that prioritize uncompromised audio quality.
- Uncompressed Fidelity: WAV files capture audio without any loss of quality, ensuring that the listener hears the audio exactly as it was recorded.
- Editing Flexibility: WAV files offer ample room for post-production editing, manipulation, and processing without introducing artifacts commonly associated with compressed formats.
- Professional Standards: In professional audio production, WAV remains a benchmark for high-quality recording, meeting the stringent requirements of studios, broadcast, and film industries.
- Archival Quality: WAV's lossless nature makes it an excellent choice for archival purposes, ensuring the original audio quality is preserved over time.
- Compatibility: WAV files can be easily played on a variety of devices, software, and platforms, ensuring accessibility for both creators and consumers.
Different Ways to Record WAV File Format
1. How to Record WAV File Windows 10 or MAC
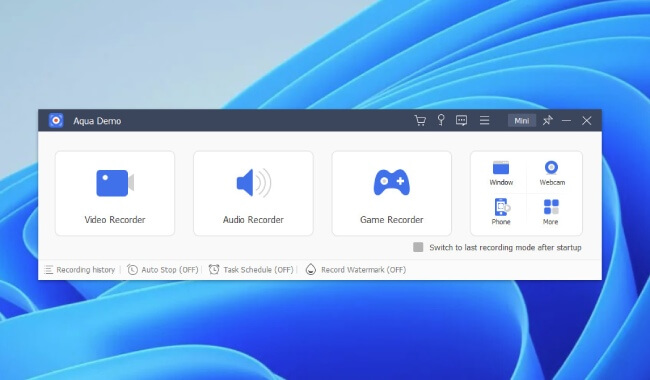
Aqua Sound is considered one of the best audio recording tools; with this tool, you can record any internal or external audio. This software lets you record Voicemail greetings, music, video calls, and more. Apart from that, you can also record live streaming audio from different popular streaming platforms like iTunes Radio, iHeartRadio, MixCloud, SoundCloud, and more. Besides, you can capture voice from your microphone to create podcasts or add voice narration to your videos. This audio recorder is compatible with Windows and Mac, so you don't have to worry which OS you use.
Try it for Free
Free Download
Windows 8/10/11
Secure Download
Free Download
Mac OS X 10.15 and above
Secure Download
Step 1 Install the Audio Recorder
The first step you have to do is to get the file installer of the tool. To do this, you can use the buttons provided above or visit the Aqua Sound page and click the Free Download. After downloading the file installer, run the setup wizard and follow the installation instructions. Then, you will see the clean interface of the tool.Step 2 Record the Audio You Need
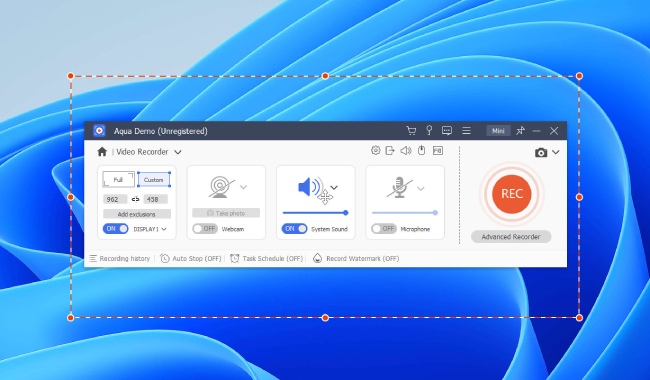
On your computer, access the audio file you want to record. Then, go back to Aqua Sound, and you can toggle the system sound and microphone if you want to record both. When you are set, click the "REC'' button.Step 3 Save the Audio File
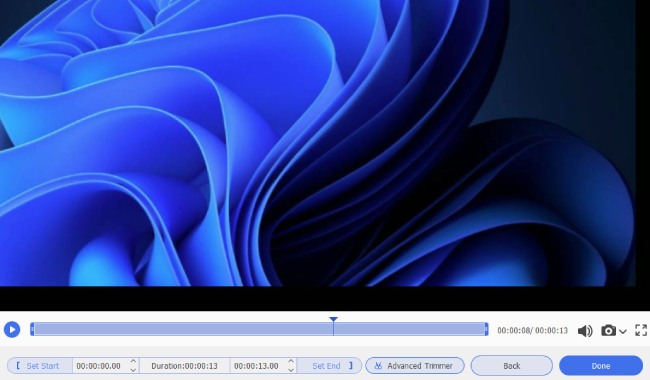
Once you are satisfied with the recording, click the "Stop" icon. Then a preview window will appear where you can set the recording duration. Hit the "Save" button to store the audio file in your default folder. You can also access the audio recording on the tool audio library. Right-click the audio you have recorded and hit play to check it.Tips: Convert Any Audio in WAV
Since Aqua Sound does not support the audio file format WAV, it is recommended to use a converter. AceThinker VidElement is a flexible video and audio converter and compressor, as it provides assistance to transform different media files into accessible formats. With this, users can easily achieve the file format they want. This converter supports a variety of audio formats, including WAV, MP3, AAC, FLAC, OGG, and more. Here are the steps to transform your audio into WAV using Video Master.
- First, download and install AceThinker VidElement on your computer. Once installed, you can familiarize yourself with the interface of the tool.
- Next, access the audio you have recorded using Aqua Sound and drag and drop the file on Video Master. After that, click the Profile options and select the WAV audio format.
- Lastly, hit the "Convert" button on the bottom right part of the tool's interface. When the conversion process is done, you will be moved to the file folder, and double-clicking the audio file will play on your media player.
2. How to Record WAV File Android
One of the tools you can use to record WAV files on your Android is WaveEditor. WaveEditor is a powerful Android application designed for recording and editing high-quality WAV sound files. Whether you're capturing interviews, musical performances, or ambient sounds, this WAV sound recorder provides the tools you need to achieve professional-level audio recordings. Its simple interface, and comprehensive features make it an indispensable application for both novice and experienced users in audio recording and editing. Moreover, with this tool, you can easily record any audio from your microphone, camcorder, Bluetooth, and others. A simple guide on how to record WAV is given below.
- On your Android device, access Google Play Store, search for WaveEditor, and click the "Install" button. Launch the app once the installation is complete.
- Toggle the WAV format on the bottom left part of the application. Play the audio you want to record and press the "Record" button to commence the recording process. If you need to pause the recording temporarily, tap the "Pause" button, and to resume, tap the "Resume" button.
- Once you've captured the desired audio, tap the "Stop" button to conclude the recording session. Then, you'll be prompted to provide a name for your recording. Tap the "Save" button to store the recording in WAV format. You can listen to it in your File Folder.
3. How to Record WAV File on iPhone
Hokusai Audio Recorder is an iOS application that allows you to record WAV using your iPhone device. With its reflexive interface and advanced features, Hokusai Audio Recorder ensures you can effortlessly capture every sound detail around you. Whether you're a musician, journalist, podcaster, or simply looking to record important moments, this application is your go-to solution for top-notch WAV sound recording. Furthermore, this WAV sound recorder provides essential editing tools, enabling you to trim, cut, copy, paste, and delete sections of your recording. This functionality ensures that you can refine your audio to perfection.
- On the App Store, search for Hokusai Audio Recorder and download the app to your iPhone. Then, access the tool from your home screen or app drawer.
- Choose "WAV" as your preferred recording format from the app's settings. Then, place your iPhone's microphone toward the sound source you want to record and tap the "Record" button to start capturing audio in WAV format.
- Press the "Stop" button to conclude the recording session, and then trim, cut, copy, paste, and edit your recording using the intuitive waveform editor. Once satisfied, press the folder setting near the project name, then tap the "Share" button to save it in your desired file folder. You can listen to or check the recording in your chosen file folder.
Frequently Asked Questions
What is the advantage of recording in WAV format?
Recording in WAV format offers a distinct advantage due to its uncompressed and lossless nature. WAV files capture audio without compromising quality, preserving the full range of frequencies, dynamics, and nuances of the original sound source. This makes WAV an ideal choice for professionals and enthusiasts who prioritize audio fidelity.
Can I convert other formats to WAV after recording?
Yes, you can certainly convert audio recordings in other formats to the WAV format post-recording. Various audio conversion software tools are available that allow you to convert formats like MP3, AAC, or FLAC to WAV. However, it's important to note that while conversion can provide the WAV format, it won't restore any lost audio quality from the original compressed format.
How to improve the sound quality of my WAV recording?
Enhancing the sound quality of your WAV recording begins with optimal recording practices. Invest in high-quality recording equipment, such as microphones and audio interfaces, and choose a suitable recording environment with minimal background noise. Proper microphone placement, a balanced audio signal, and an excellent WAV recorder Windows 10 are also essential. Audio editing software like Video Master and WindCut can further refine your WAV recording, allowing for adjustments to EQ, dynamics, and other parameters to enhance the final result.
Can I edit my WAV recording after saving it?
Yes, WAV recordings are highly versatile and editable. You can use various audio editing software, ranging from professional digital audio workstations (DAWs) to simpler audio editing tools, to edit your saved WAV recordings. These edits include trimming, adjusting volume levels, applying effects, and more. The advantage of editing WAV files is that you can make changes without sacrificing audio quality, as no compression or data loss occurs during editing.