
- Install the AcePDF on your Mac
- Launch the tool and upload your PDF
- Save the converted JPG file
PDF files are everywhere and used for everything from e-books to official forms. It can store text files with graphics and images in large sizes. However, sharing PDFs on other platforms can be challenging due to compatibility issues. Not all websites or software support PDFs, making it difficult to post them online. This is where converting PDFs to JPG files became very useful. JPG is a flexible format supported by various software and devices. It is an ideal choice for sharing and editing images on a Mac. Converting PDFs to JPGs on a Mac is a simple process that can be done using online or offline tools. The benefits of converting PDFs to JPGs include improved compatibility, ease of use, and flexibility. This article post will unclose some leading solutions to convert PDF to JPG Mac. Let us unlock the full potential of your digital documents.
How to Convert PDF to JPG with Built-in Tool on Mac
The Preview app on Mac is a versatile program that can handle various file formats, including PDFs. It comes pre-installed on all Mac devices and can be utilized for viewing, editing, and annotating PDF files. Aside from the said features, people are fond of its pdf-to-image conversion. The tool supports multiple image formats, including JPG, PNG, TIFF, and OpenEXR. The app's key features include crop, rotating, resizing images, and adding text and shapes to the converted images. Users can add tags to save their JPG files. This default PDF viewer for Mac is the best choice for users who need a hassle-free process on how to convert PDF to JPG on Mac and print them in HD format.
Step 1 Open the PDF file in Preview
Foremost, launch the Preview app on your Mac computer. Then, double-click on the PDF file to open it in the tool. Alternatively, right-click on the file, select "Open With," and then choose Preview.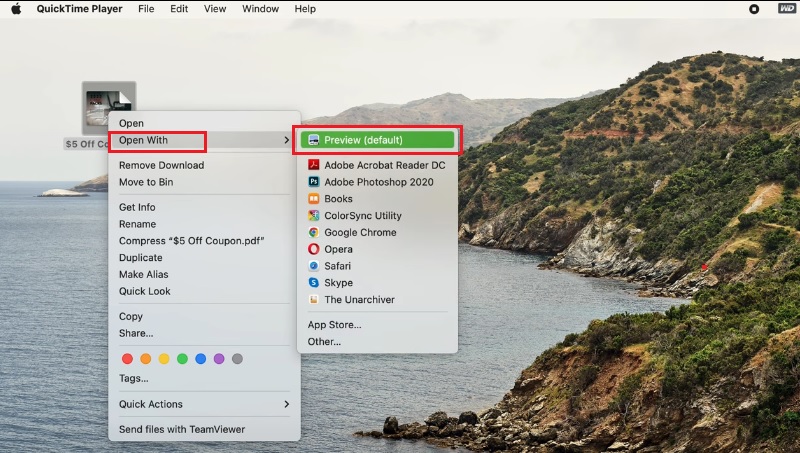
Step 2 Export the PDF file as a JPEG
To export PDF to JPG Mac, access "File" in the top menu bar and hit "Export." In the Export window, choose "JPEG" as the format and adjust the quality per your preference. You can also add the tag and pick the location where you need to save the JPG file.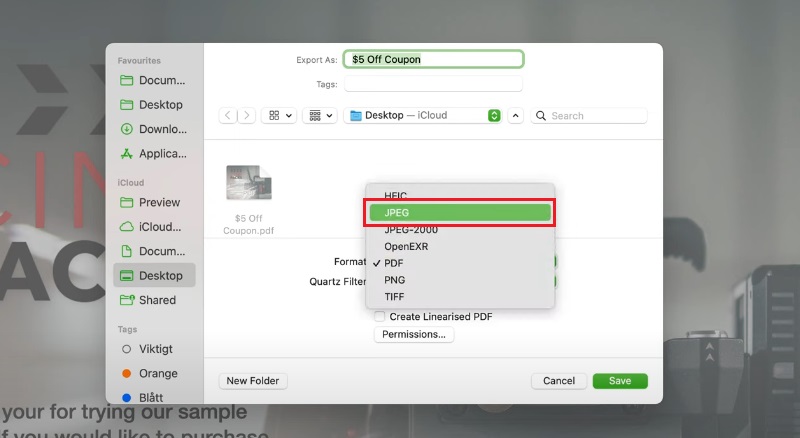
Step 3 Save the JPG File
After choosing JPG as your preferred format, click the "Save" button. It will initiate the process of how to make a PDF a JPG on Mac. The newly converted JPG file will be saved in the directory you placed in the previous step. This will allow you to share and post the JPG file wherever possible.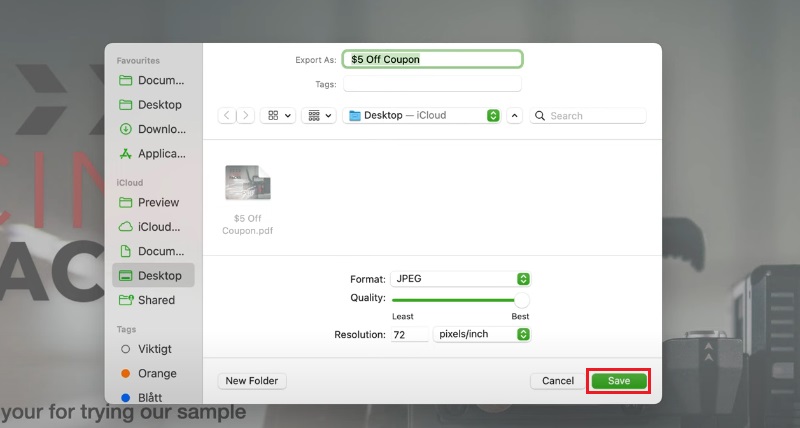
Convert PDFs to JPG with Reliable Third Party Tool
AcePDF is a versatile solution on how to turn PDF into JPG on Mac. Its dedicated PDF converter feature ensures a smooth and safe PDF-to-image conversion process. It can transform any number of PDF files at once to JPG without any errors, regardless of the file number and size. The best part is that this tool can transform your PDFs without losing their quality and won't rearrange the sequence of the pages. Unlike other PDF converters, AcePDF keeps the converted images in a zip file to locate and organize files easily in one folder. In addition to JPG, you can choose PNG as the output image format or convert it to other document formats such as HTML, Word, Excel, and PowerPoint. You can modify your PDF files before converting them to JPG by adding text, watermarks, and background or cropping the image as needed. This will help you achieve the desired high-quality image result. If you need to batch convert PDF to JPG, AcePDF makes this process easier. Follow the detailed steps below to familiarize yourself with the PDF to JPG conversion process using AcePDF.
Try it for Free
Step 1 Get the PDF to JPG Converter
To get started, you need to install AcePDF on your computer. Click on the "Download" button above and obtain the Mac installer. Then, adhere to the prompted installation guide to install the software on your computer. Once the installation is complete, you will see the software on your screen.
Step 2 Import the PDF File to Convert
Firstly, click on the "Batch Process" option on the left side of the menu to access the software's various features. Then, click the "Convert from.." button and import the PDF documents you want to convert to JPG format by clicking the "Folder" icon. Alternatively, you can smoothly drag and drop the files to import them quickly.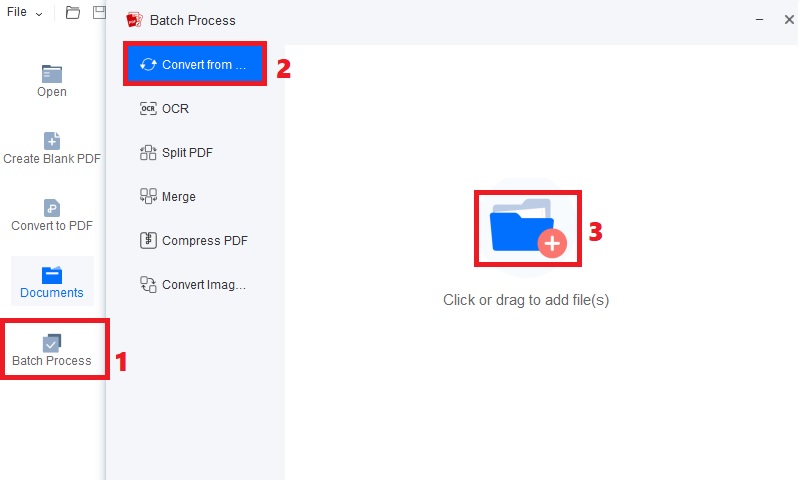
Step 3 Begin the PDF to JPG Conversion
Tick on the "+Add file(s)" button to add additional PDF files you want to convert simultaneously. Once you have added all the files, select the "Image (.jpg)" format option from the dropdown menu below. Next, choose the output folder where you want the converted JPG files to be saved by clicking the "Output folder" button. Lastly, hit the "Convert" button to initiate converting from PDF to JPG.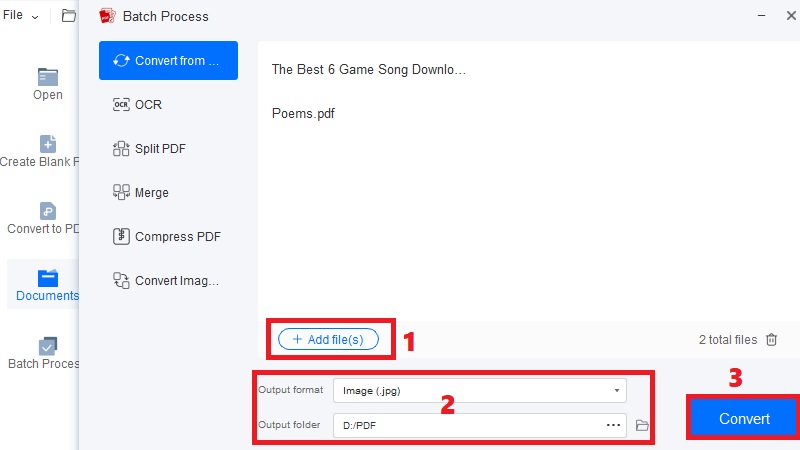
Step 4 Review the Converted JPG Files
Navigate to the output folder that you have selected previously. You will find that each PDF file that has been converted to JPG is saved separately in a zip file. To access the JPG files, click on the zip file. Once done, you can click on any images to view the converted JPG file on a Mac image viewer.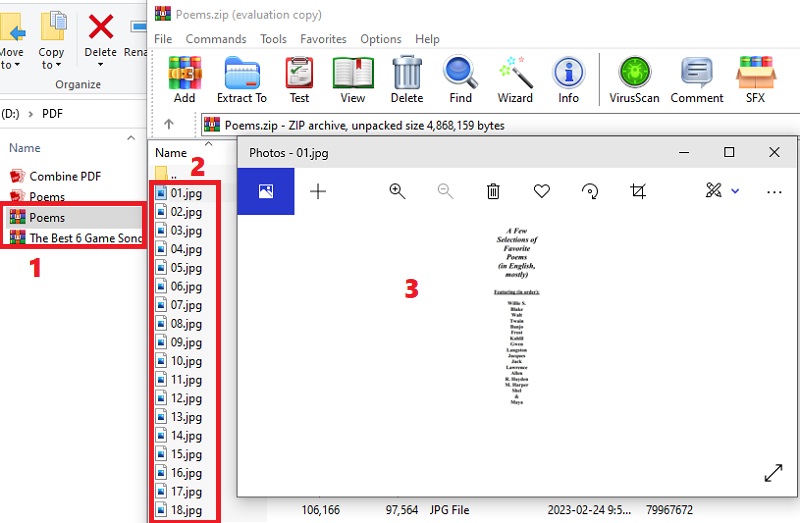
Transform PDF to JPG Online using iLovePDF
iLovePDF is a popular online tool for converting PDF files that can be accessed through any available browser on a Mac. The user-friendly platform offers many features, including compressing, merging, and splitting PDF files. One of its key features is the PDF-to-JPG converter function. It allows users to convert and rotate image in PDF file to high-quality JPG format quickly and easily. You can access PDF files from your computer, Google Drive, and Dropbox. Additionally, you can use the free PDF to JPG converter to convert multiple PDF files, with the option to convert them using standard or high-quality conversion. After conversion, the tool can save your converted file to your cloud storage. Adhere to the steps provided below on how to change PDF to JPG on Mac.
Step 1 Upload the PDF File Online
Visit the iLovePDF website and click the "PDF to JPG" menu. Upload the PDF file you need to transform by dragging and dropping PDF onto the upload area, clicking the "Select PDF file" button, and choosing the file from your Mac. You may also import your file from Google Drive or Dropbox if that's more convenient for you.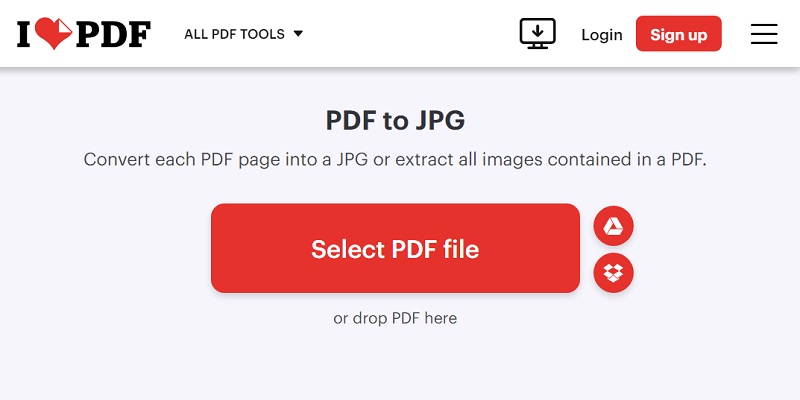
Step 2 Customize the Conversion Settings
Once the PDF file is displayed in the tool, you can customize the conversion settings to meet your requirements. You can select the desired image quality, select the pages you need to change, and even rotate the image if needed.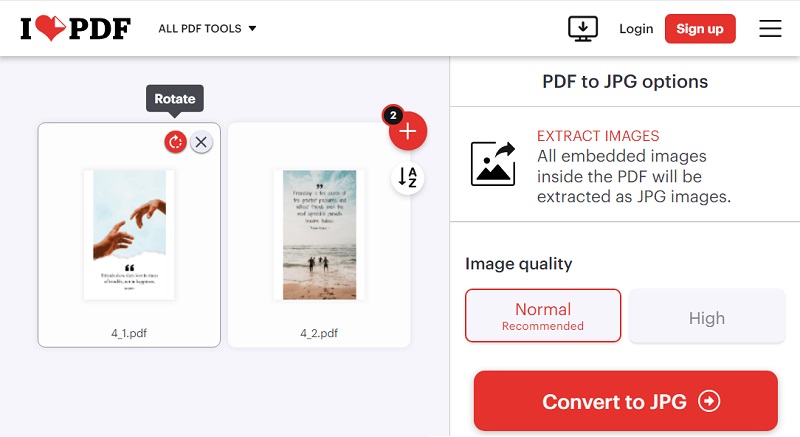
Step 3 Convert and Download the JPG File
Once you have customized the settings, click the "Convert to JPG" button. The iLovePDF platform will convert the PDF file to a high-quality JPG image. You can then download the JPG file to your Mac by clicking the "Download JPG images" button.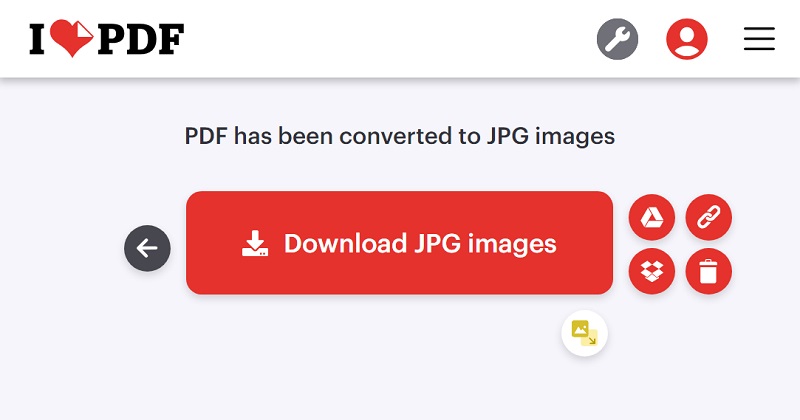
Best Tips for High-Quality PDF to JPG Conversion
Saving PDF to JPG on a Mac is valuable for image processing, graphics, and design. With the right settings, you can achieve high-quality results. Here are some tips to help you get started.
Consider Image Resolution and Quality Settings: When converting PDF to JPG, it's important to consider the image resolution and quality settings. Higher-resolution images can be useful for printing or detailed graphics. However, they can also be larger in file size. On the other hand, lower-resolution images can be useful for web graphics or smaller file sizes, but they may not be suitable for printing.
Ensure Color Accuracy during Conversion: The process of how to turn a PDF into a JPEG on Mac sometimes results in color inaccuracies. To ensure color accuracy, ensure your color settings are set to the appropriate profile. Additionally, you can use color management tools to ensure that the colors in your JPG files match the colors in your PDF files.
Check the Converted JPG files for Accuracy and Visual Appeal: Once you have converted your PDF files to JPG, it's important to check them for accuracy and visual appeal. Ensure that all the PDF elements are present in the JPG file and that the image quality is consistent. Additionally, check the visual appeal of the images to ensure that they look good and meet your needs.
Conclusion
To sum up, converting PDF files to JPG format on a Mac has several benefits. Firstly, sharing images and graphics with others is simpler since JPG is a widely supported file format across different devices and platforms. Secondly, it can reduce the size of large PDF files, making storing and transferring them easier. The process of converting PDF to JPG on a Mac is remarkably simple and can be achieved using various methods such as Preview, reliable third-party software, and online converters. Each method has its advantages, so choosing the one that suits your needs and preferences the most is important. Overall, the versatility of these methods on Mac makes it straightforward for users to convert PDF to JPG and enjoy the benefits of this conversion.
