- Link iOS device and PC using lightning wire.
- Install AceThinker iOS System Recovery on your PC.
- Download a firmware to downgrade your iOS device.
Every iOS update version has numerous limitations and a few changes on the iPhone and iPad that the users must be aware of. Due to these restrictions, users are becoming more dissatisfied and unwilling to utilize the new iOS version on their phones. Even worse, most customers don't want to use iTunes since they also dislike it. According to Apple, it is only possible to downgrade the iOS software with iTunes. Luckily, this post is ideal if you want to downgrade iOS to an earlier version. Also, this post will thoroughly cover the most excellent and popular methods for downgrading iOS. Also, the readers will learn directly from sources how to downgrade iOS using the latest technologies. It is possible to downgrade iOS without iTunes, and this tutorial proves it in full.
AceThinker iOS System Recovery - iOS Downgrader (No Data Loss)
Supported Devices: iPhone 14 Pro Max, iPhone SE, iPhone 1 Pro Max, and more
Hard Disk Requirement: Need free space of more than 200 MB.
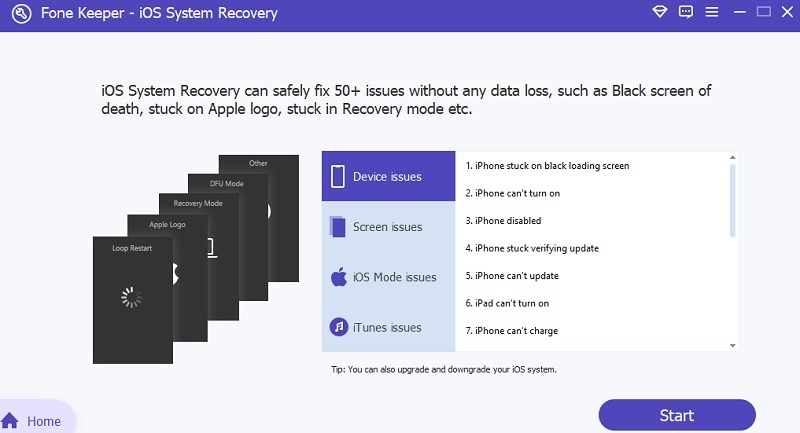
The best way and most efficient software to downgrade iOS version without iTunes that we provide to you is AceThinker iOS System Recovery. This tool can upgrade and downgrade your iOS device with its two modes. The first Mode is the Standard Mode; in this Mode, you can downgrade and upgrade your iOS device and can fix common problems such as a disabled screen, can’t update the device, being stuck in recovery mode, etc. Also, in this Mode, resolve all the listed issues without losing data. The second Mode is the Advanced Mode, and this Mode can also fix iOS problems that are more severe and can also upgrade and downgrade your iOS device. However, ensure that before using this Mode, you back up all your data first because it will wipe all your data files from your device.
Get it for Free
Step 1 Download and Install the Software
Download the AceThinker iOS System Recovery on your computer/laptop by choosing an installer above. For a successful installation, you need to pass through all the prompts. After installation, run the program and explore it first.
Step 2 Connect your iOS Device
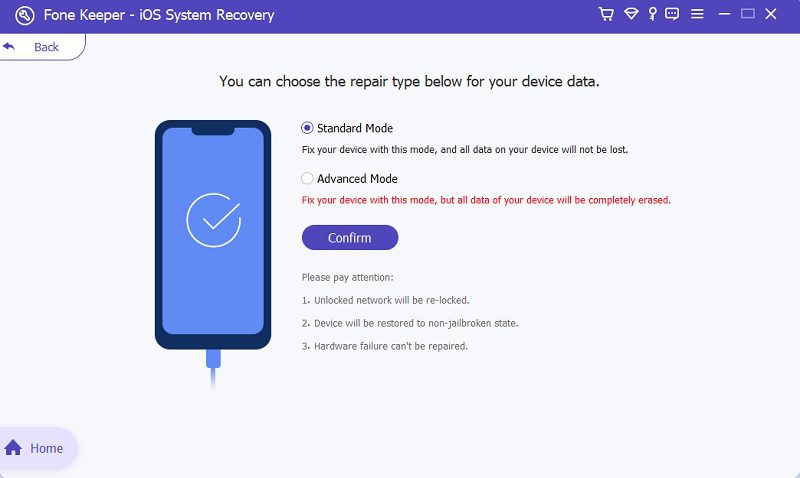
Connect your iOS device to your computer/laptop using a USB cable. Once the program reads your device, you can see the information on its interface. Kindly click the “Fix” button, and choose “Standard Mode.” lastly, hit the “Confirm” button.
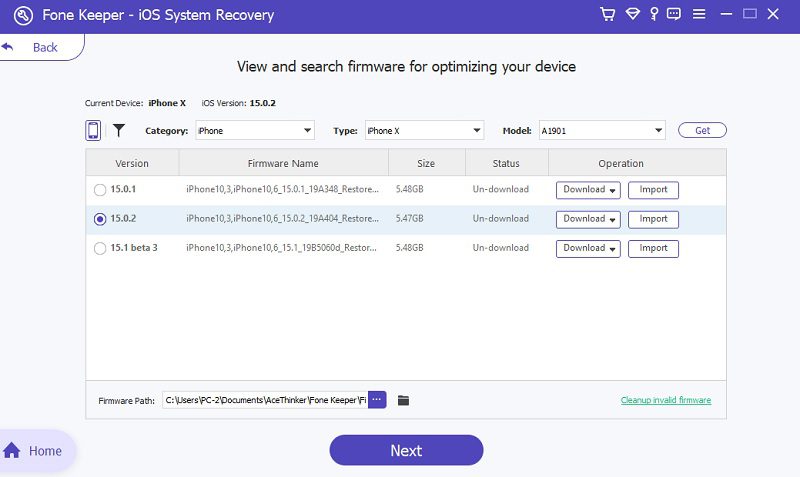
Step 3 Download the Firmware
Next, on your screen, you can see the available downloadable firmware. To downgrade your iOS device, choose the available firmware with a lower version than your current iPhone version. Then click the “Download” button and hit the “Next” button.
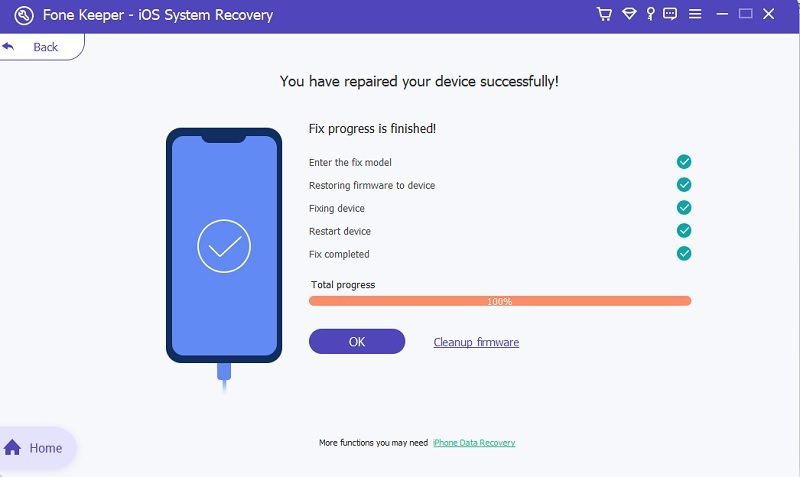
Step 4 Finish the Process
Clicking the next button can start fixing your device. Wait until the fixing progress finishes in a few minutes. Once the progress is done, click the “OK” button. Lastly, restart your phone and see if the downgrading process is successful.
Downgrade iPhone without iTunes via Finder
Finder is Apple's file manager for iOS devices like iPhone, iPad, and iPod Touch. It allows you to easily manage files and folders by creating and moving folders, deleting, and viewing files in several different modes. Many features of Finder make it worthwhile for users of all experience levels. However, you can also use this to downgrade iOS without iTunes. Apple devices running iOS 10 or later can use "Finder." This post will help you learn how to use Finder to downgrade iOS software without iTunes.
User Guide:
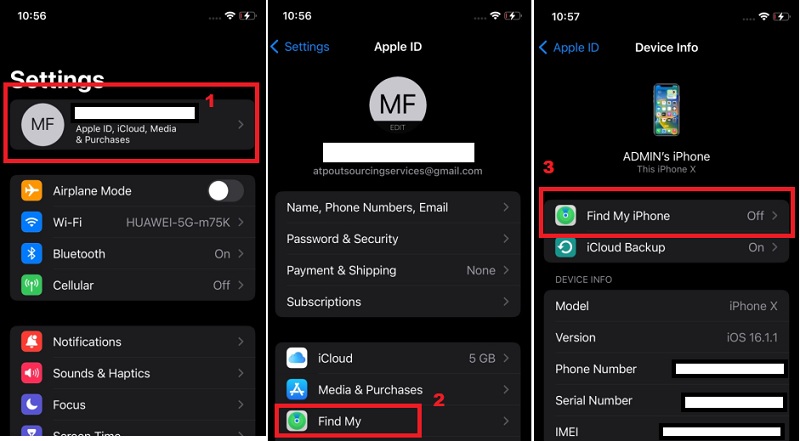
- First, on your iPhone, go to "Settings" and tap on your Apple ID. Then, click "Find My Location" and turn it off. But you must first enter your Apple ID password before it turns off. Once done, connect your device to your Mac using a USB cable and run the "Finder" app if it's not automatically open.
- Next, click your iOS device name on its interface under the "Location" tab. Afterward, a prompt will appear on your iPhone. Tap on "Trust" and enter your device's passcode to grant access to your computer. Ensure you are in the "General" screen and scroll until you find the "Check for Update" option.
- Clicking the check for update option can start downgrading your iPhone with all your data intact. However, you may encounter some problems soon because of downgrading your iPhone to an iOS version incompatible with some features on your device.
TinyUmbrella - Alternative Tool
TinyUmbrella is an application developed by developers at Echeatix and UbiCollab that allows users to upgrade and downgrade the firmware of devices running the iOS or Android operating system. It can undo iPhone update and allow the device to successfully install the previous vcersion. Also, it removes the risks often associated with jailbreaking the iOS device by saving the firmware in a remote server so that it can always be restored
User Guide:
- The first step to downgrade iOS version without iTunes is to download and install the TinyUmbrella on your computer/laptop. Ensure you also have java and iTunes installed on your computer because it doesn’t work if one isn’t on your computer.
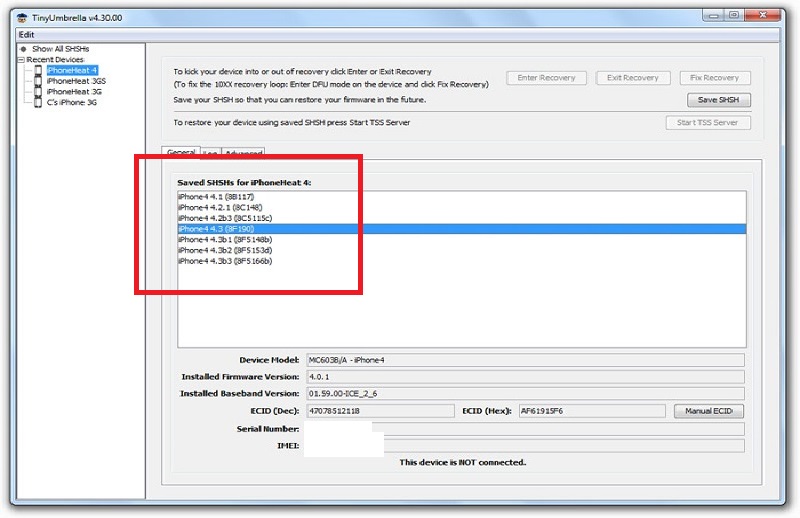
- Next, connect your iPhone using a USB cable to your computer and run the program. Then, click “Save SHSH,” followed by “Start TSS Server.” In the sidebar, right-click your iOS device and select “Exit Recovery” to get your device out of the mode.
- Afterward, go to the “Advanced” tab and disable the “Set Host to Cydia” from the “Exit Option.” Click the “Save SHSH” again to start the iOS downgrade process. Once the process is finished, restart your device and see if the process works.
Extra Tip: AceThinker iOS Backup & Restore
Supported Devices: iPhone 14 Pro Max, iPhone SE, iPhone 1 Pro Max, up to older version
Hard Disk Requirement: Need 200+ MB free space
To ensure all your data is safe before downgrading your iOS devices, we suggest backing up all your data using AceThinker iOS Backup & Restore. This software supports all modes of iPhone, iPad, and iPod Touch. Moreover, regarding its supported data types, you can back up/restore contacts, messages, notes, photos, and all kinds of attachments of social networking apps. Furthermore, this is the best tool to back up all your data because besides from 100% safe, it can enable you to back up data with no limitations on the backup process you made, and the new backup files don’t replace the old ones. Here’s the tutorial on how to use it.
Try it for Free
Step 1 Run the Program
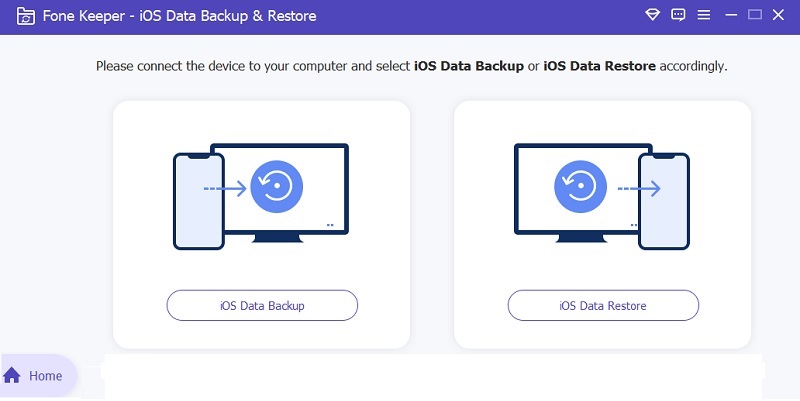
Download the AceThinker iOS Backup & Restore on its official website to avoid malware and viruses. After downloading, pass through all the prompts to have a successful installation. Then, launch the tool after installing it and click “iOS Data Backup.” Afterward, connect your device to your computer.
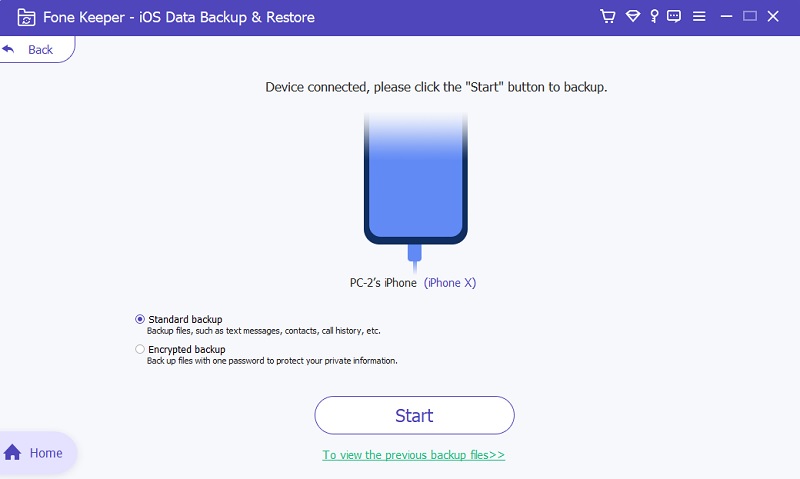
Step 2 Select a Backup Mode
Once the device is connected, you can see the two backup modes. One is the “Standard Backup,” the normal backup process where you can back up your selected data in just one click. The other one is the “Encrypted Backup,” choose this mode if you want privacy because it asks you to create a password before the backup process.
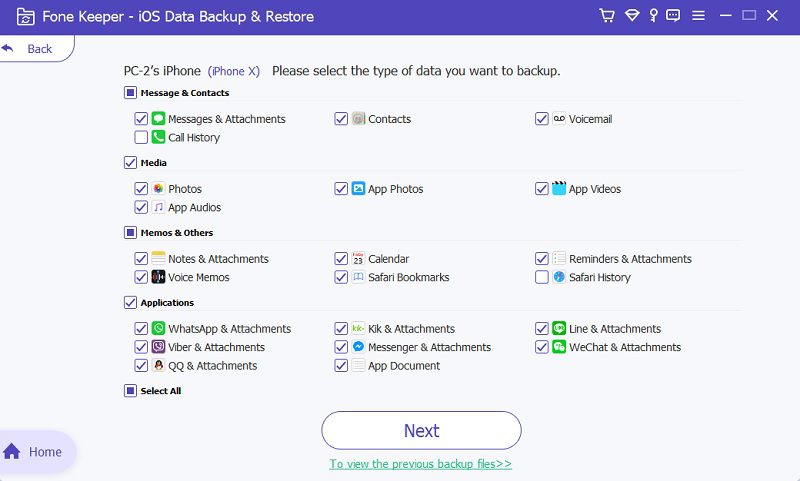
Step 3 Select the Type of Data
After choosing a backup mode, click the “Start” button. On the next screen, you can see all your files on your device. Please tick all the boxes or select some you want to back up. Afterward, hit the “Next” button.
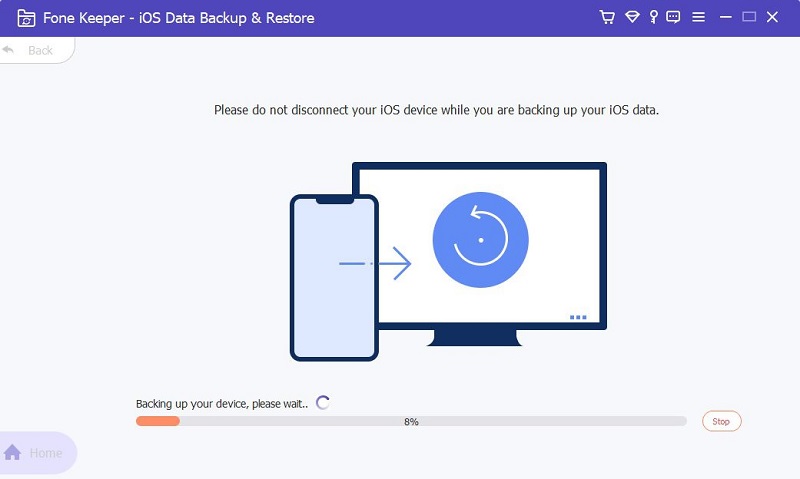
Step 4 Finish Backed Up Process
Once you click the next button, it will start the backup process. Ensure your device can’t be disconnected while the backing process is ongoing. Wait a few minutes for the process can be finished. You can also view the backup files on the software.