
- Connect your iPhone device to your laptop or PC using your charging cable.
- Install iOS System Recovery by AceThinker to access and launch the tool.
- Analyze your iPhone device and select a recovery method to fix it.

Have you ever turned on your iPhone and suddenly saw a screen with a cable pointing to a computer or iTunes logo? That means your iPhone is in recovery mode. It's a special state that helps fix system issues or prepare the device for an update or restore. People often use recovery mode when their iPhone is frozen, won't update properly, or is stuck on the Apple logo. It can also happen after a failed iOS update, software crash, or when something goes wrong during a reset. While recovery mode can help solve problems, getting stuck in it is frustrating, especially if you're unsure what to do next. So, in this article, we'll show you simple and safe ways to get iPhone out of recovery mode, whether you're using iTunes, Finder, or no computer.
Fix various iOS system errors back to normal status.
Why My iPhone Can't Get Out of Recovery Mode?
Sometimes, your iPhone gets stuck in recovery mode and won’t return to the home screen, no matter what you try. This is stressful, especially if you don’t know what caused it. Below are the most common reasons why your iPhone won’t exit recovery mode, and most of them can be fixed.
- The update didn’t finish or failed midway.
- iTunes or Finder couldn’t complete a restore process.
- Software glitches are stopping your iPhone from booting up normally.
- A failed jailbreak attempt can leave your phone stuck.
- Issues with your iPhone’s battery, cable, or motherboard.
- Poor connection during update or restore.
- There is not enough space to complete an update or boot normally.

How to Get iPhone Out of Recovery Mode Without iTunes
Distinctive Feature: The recovery tool is designed with two modes of recovery, the Standard and Advanced mode. With these two methods, you can upgrade, downgrade, and fix the iOS system of your iPhone.
What makes it unique?: It is unique in troubleshooting as it can fix iOS systems without needing a verification code, accessing its side buttons, or tapping any function on the iPhone settings.
How to get iPhone out of recovery mode without losing data? A proper tool is what you need. AceThinker iOS System Recovery is a well-praised iOS utility program dedicated to resolving not only your iPhone device but also your iPod touch and iPad. It has two recovery modes that can ease and help your device optimize its system. These methodologies are the Standard and Advanced recovery mode. The Standard way is designed to upgrade and fix your iOS system while retaining the entire data files of your device. It only sleeps on your iOS system and discovers the bugs and glitches that may cause your device harm. The latter functions like a factory reset but in a safer way. It provides resolution for fixing your iOS device while removing the entire data of your iPhone. Besides, it is favorable for scenarios where your device is infected with malware or virus software. It can remove the fundamental cause of the error together with your data files. Therefore, it is necessary to back up your files and restore the safe ones.
Try it for Free
Free Download
Windows 8/10/11
Secure Download
Free Download
Mac OS X 10.15 and above
Secure Download
Option1: Use the Advanced Mode
Step 1 Install the Recovery Tool For iOS
The initial guide on fixing iOS devices and exiting your iPhone's recovery mode is installing the AceThinker iOS System Recovery on your PC. We gathered the download link above to acquire its file installer easily. Click on it and access your download folder to run the file on your computer.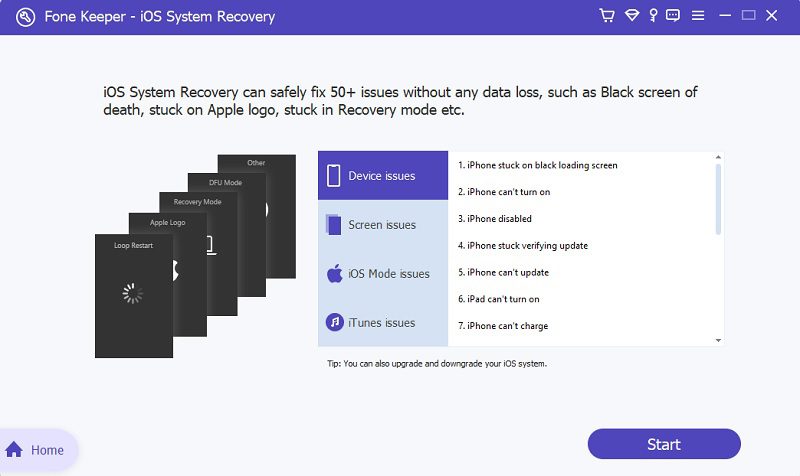
Step 2 Connect Your iPhone
The following walkthrough is to connect your iPhone to your computer with your lightning cable. When your device is connected, the tool will present information on its interface. Then, hit the Fix option to push through to the next phase of the process.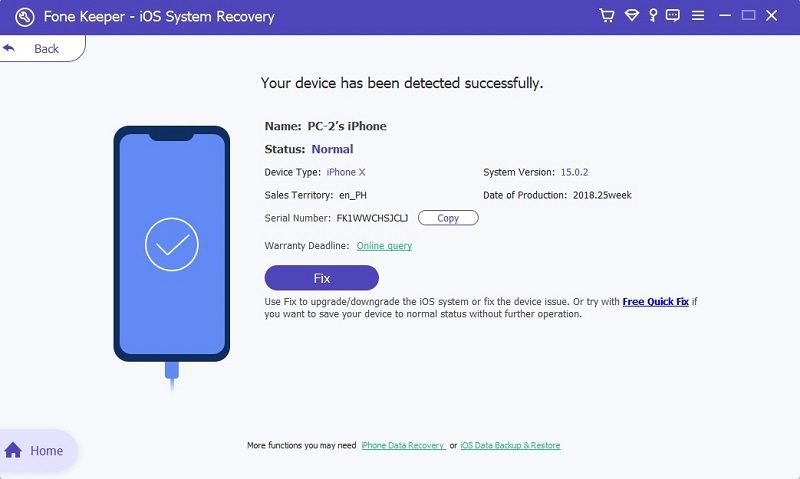
Step 3 Select Advanced Mode
The subsequent stage is to select the mode of recovery. If you want to remove the entire data of your files since you have already performed the recovery mode, then choose the Advanced method. Highlight its button and hit the Confirm option at the lower part of the page.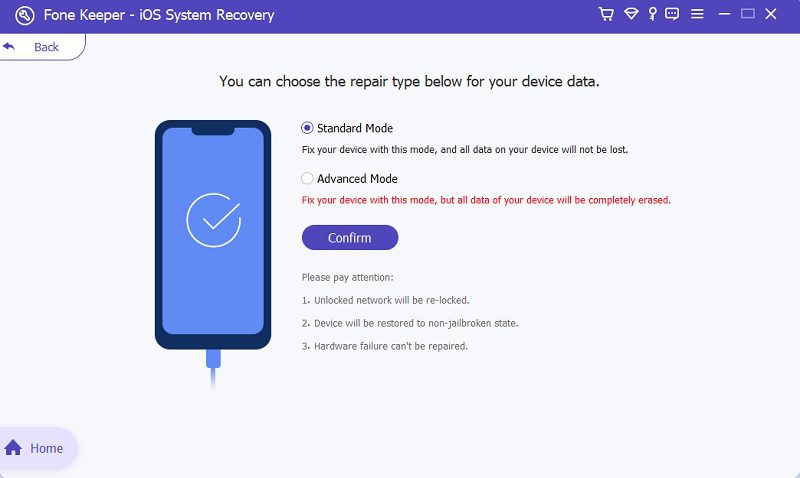
Step 4 Select Firmware For Your Device
The final stage to exit the recovery mode is to choose firmware for your iPhone. You can select the latest firmware that contains updated iOS patches. Tap the download button and hit the Next option to push through.
Option 2: Use the Standard Mode to Exit Recovery Mode
When your device suddenly sets its system in recovery mode, and you need to preserve the files while fixing the error, then the Standard way is what you need. We collected a detailed guide as well on how to use it.
Step 1 Connect Your iPhone Device
We have already provided the perfect ways to download the tool on your device. What you need is to connect your iPhone. If it is already connected to your computer, maintain its connection well-established. Then, hit the Fix option to continue with the process.
Step 2 Choose the Standard Mode
Next, a new page will appear on your computer. You can choose between the two recovery modes. Select the Standard mode to retain your iPhone files while exiting the recovery mode.
Step 3 Download Firmware
Then, a list of firmware will be presented on your computer screen. These files are dedicated to fixing your iPhone device while preserving your data. They will not remove all your files since they only analyze your iPhone system.
Step 4 Finalize the Process
The final stage is to download the firmware by hitting the download button. Then, tap the Next icon to analyze and install the updates. A last page will prompt on your screen, which will indicate the progress of the process.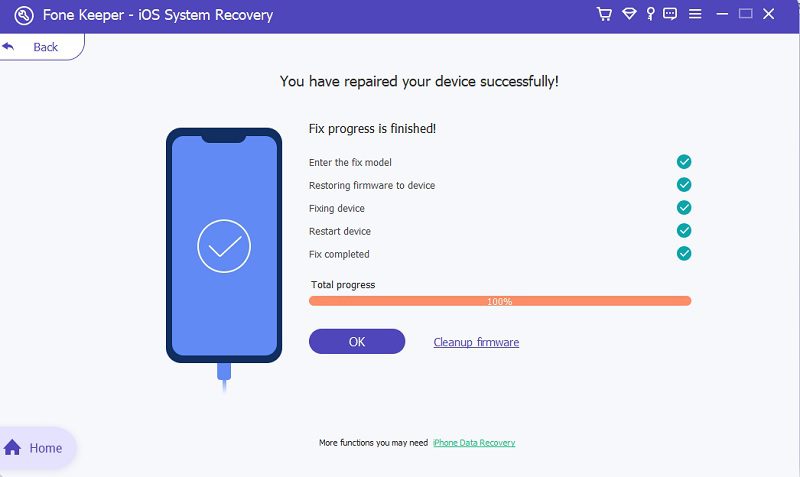
2. How to Get iPhone Out of Recovery Mode Without Computer
We have better optimal troubleshooting on how to exit the recovery mode on your iPhone. Since your iPhone screen no longer allows you to access the settings, we will need to use its side buttons. This process of exiting the recovery mode is usually done quickly. It can also exit other errors that appear on your screen, including iPhone stuck on emergency SOS, iPhone stuck in DFU mode, and iPhone stuck in Apple ID. If you need to know the basic process of how to use this method, follow the guide below.
- On your iPhone, locate the side buttons of your device. The left side rack is for the Volume buttons. On the other hand, the rightmost part of your device is the power button.
- Then, quickly press and continue to hold the Volume Up button and release it. Please do the same process on the Volume Down button and release it. Afterward, press and hold the Power button on your device.
- It would help if you continually held the Power button until the Apple logo appeared on your screen. Once it appears on your screen, release the button. Please wait for your device to restart and relaunch.

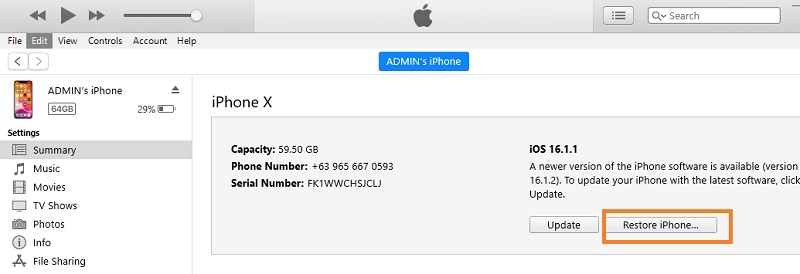
Exit Recovery Mode Using iTunes or Finder
An alternative way to exit your device on recovery mode is to use iTunes or Finder. The iTunes application is an iOS utility tool for Apple devices. It helps users achieve different options that iPhone can’t perform on its system. With this device, you can organize your files, check your purchase history, and perform various functions that the iPhone can’t do now. This computer application can run on different operating systems of computers, including macOS and Windows. It also has built-in players that users can use to play and preview multimedia files, including photos, videos, and music files. However, the most valuable feature it contains for iPhone users is its ability to restore the device to its original state. When your iPhone is stuck in any process, including the iPhone and iPad is stuck in recovery mode, factory resetting your device with this tool is possible. What you need to perform is to connect your device and trust your computer to analyze the software components of your device. It will then remove the error and let your device reboot as it should, exiting the recovery mode.
How to Get iPhone Out of Recovery Mode Using DFU Mode
When you are having an issue that your device is stuck in recovery mode, it undoubtedly is caused by some software issues. The final solution that you can use to fix this error is to use DFU mode. The iPhone Device Firmware Update (DFU) makes changes to the iPhone software that is currently running on your device. Thai solution is recommended when your device is running on a corrupted iOS update or beta version or you perform jailbreaking. These processes and scenarios mentioned can harm your iOS device, leading to being stuck in a boot loop, recovery mode, and more. Furthermore, enabling the DFU mode on your device can make your iOS system downgrade to its previous OS version. However, this might also cause harm to your device, which can lose your entire data files. Therefore, before doing this process, you must back up your files on your computer. You can check this written article for the best methods to back up your iPhone files. Nevertheless, you can use this process to fix your device's error.

Frequently Asked Questions About Recovery Mode
- Your device needs to be recognized on your computer.
- When your screen is stuck on the Apple logo for a few minutes, and there is no progress on its status.
- When your device suddenly prompts the recovery screen.
Conclusion
When your device is stuck in or suddenly prompted the recovery mode, it is inconvenient to experience. It will hinder you from using your device. But, what we learned in this article is that the process of fixing this error is surprisingly easy. With proper instruction and precise methods that need to be done, you can quickly exit this error in a blink of an eye. We aim to help you quickly fix and exit your iPhone's recovery mode. If you have other suggestions on performing this troubleshooting that might help our fellow iPhone users feel free to use the comment box below.
Free Download