
- Download and open the application on your computer.
- Attach your device on your computer and select your preferred unlocker option.
- Wait for the firmware to be download to successfully unlock the iPhone.

Keeping your iPhone's software up-to-date is like giving it a vitamin boost. These software updates may include security patches, bug fixes, and performance improvements. But sometimes, an update can go astray, leaving your iPhone stuck on attempting Data Recovery. The truth is that updates can occasionally be the reason for bugs and problems like this one. It can be frustrating, but don't worry! This article is your guide to getting your iPhone back on track. We'll explore why updates are important and how unexpected issues like this can arise. More importantly, we'll use several easy-to-follow methods to revive your iPhone. Whether you're a tech-savvy or casual user, we'll have you navigate these steps confidently and without data loss. So, let's get started and get your iPhone feeling healthy again!
Knowing Why iPhone Stuck At Attempting Data Recovery
When your iPhone Stuck At Attempting Data Recovery, the software encounters an issue during an update or restoration process. It's trying to fix itself automatically, but something went wrong, and it's stuck in a loop. However, Apple still has no reason for this problem occurring on iOS devices. Also, the probable cause is insufficient storage on your device that can’t cater to the software.
- Interrupted update: Your iPhone may have lost connection to Wi-Fi during the update, or the download itself became corrupted.
- Software bug: There might be a glitch in the update itself causing problems.
- Hardware issue: In rare cases, a hardware problem with your iPhone's storage could prevent the update from completing.
While frustrating, it's usually not a sign of permanent damage. The good news is there are ways to get your iPhone unstuck and back to normal.

Fixing iPhone Attempting Data Recovery Loop
Method 1. AceThinker iOS System Recovery
Is your iPhone stubbornly stuck on "attempting data recovery"? AceThinker iOS System Recovery is a powerful tool capable of tackling this frustrating issue. This software boasts a comprehensive repair weapon designed to diagnose and fix various iOS system problems, including the dreaded data recovery loop. Imagine the relief of bypassing the endless cycle and getting your iPhone back to normal functionality. While official methods from Apple will be explored later, AceThinker iOS System Recovery offers a potentially faster and more streamlined solution. It focuses on AceThinker iOS System Recovery because it can be a lifesaver if you want to revive your iPhone. Furthermore, we'll also cover alternative methods to ensure you have all the options.
Try it for Free
Step 1 Discover and Download
To start fixing your iOS device, install the needed tool first. Hit the Download button above, and the installer will be directly downloaded. If the process is already done, open the file and install it on your computer.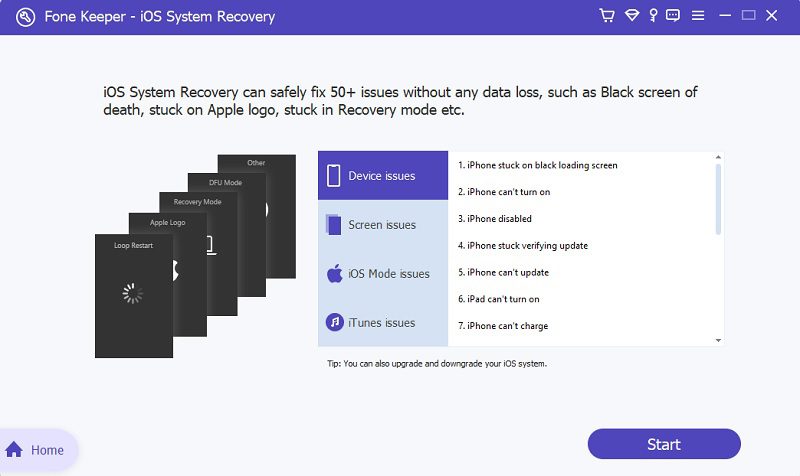
Step 2 Attach Your iOS Device
Once the first step is completed, you can connect your device to your computer. You can use your iPhone cable to attach it to the computer. After that, wait a moment to let the computer detect the device.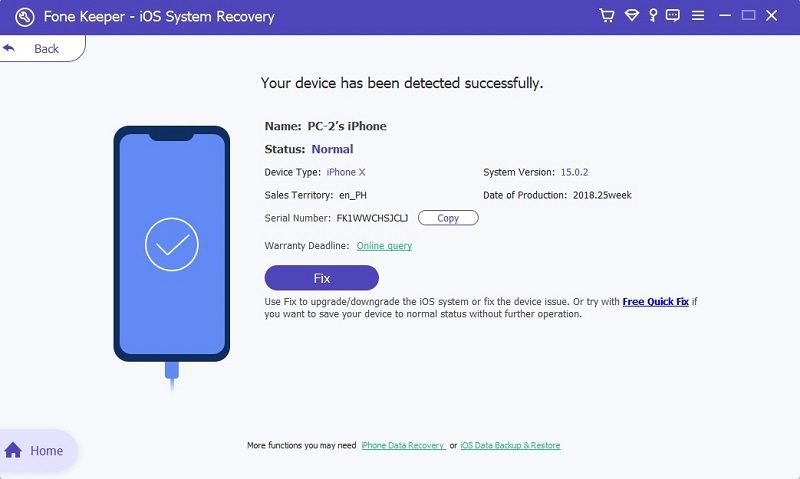
Step 3 Select Repair Mode Type
This tool offers two types of recovery: Standard Mode and Advance Mode. Standard Mode is recommended because it allows you to recover your system while keeping the data on your device. Advance Mode is for more complex issues, which will erase all the data on your device.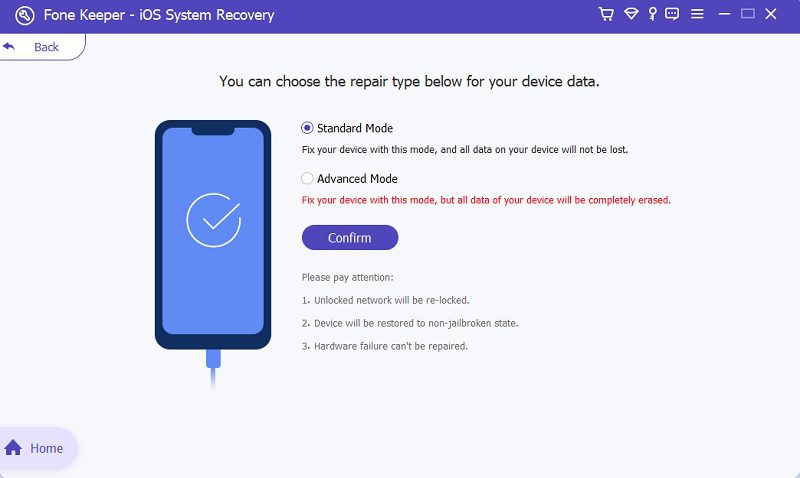
Step 4 Install Your Prefer Firmware
Once you proceed here, you can see the packages you can install on your device. Then select the newest version available because this is more accurate. Finally, if you’re sure about your decision, download it and wait for it to finish.
Method 2. Recovering System Using iTunes
This method is for you if you need more confidence about using third-party software! Apple provides its trusted solution through iTunes that can fix iPhone data recovery failed loop. This method offers a sense of security as you're utilizing an official Apple tool. While it might require a few more steps compared to other tools, it can be just as effective in getting your iPhone back on track. Let's explore how to use iTunes to restore iPhone from previous backup.
Step 1 Open Your iTunes
Launch the iTunes application on your computer: iTunes is compatible with Windows and Mac. Check first if your iTunes is up-to-date for more accurate restoration. Go to the Files tab to see your device once connected.
Step 2 Connect Your Device
The second step is to link your device to the computer using a USB cable. If properly connected, you will see your device information on the screen. Ensure you click your device's Trust button to establish the connection properly.
Step 3 Restore Your iPhone
Other iPhone options are available on the Summary menu. Click Restore iPhone right under the iOS version. It will take a while, but remember to be patient and avoid any interruptions during the process.
Method 3. Retrieve iPhone data via iCloud
Before we delve into methods to revive your iPhone itself, let's address a crucial concern: your data. If your iPhone was stuck mid-update, your precious photos, messages, and contacts might be at risk. Here's where iCloud comes in as a potential knight in shining armor. This method focuses on retrieving your data from iCloud, assuming you have a backup enabled. You can check last backup on iPhone on iCloud before restoring for your reference. If you have not set up a backup beforehand, this method won't help restore your iPhone to its previous state. However, it can be a lifesaver in salvaging important information.
User Guide:
- Ensure your iPhone’s iCloud is already set to back data to iCloud. Join a stable Wi-Fi network for your iPhone to have a smooth restoration. Restoring from an iCloud backup cannot be performed over cellular data.
- If you need to retrieve data from iCloud, you can do so during the setup process of a new iPhone or by resetting your current iPhone. When setting up a new iPhone or performing a factory reset, you'll be prompted to choose a backup to restore from. Select "Restore from iCloud Backup" and sign in with your Apple ID. Select the most appropriate backup from the list presented.
- If you want to restore data to your existing iPhone without resetting it, go to Settings application. Within Settings, find for General menu and then Reset after that click for Erase All Content and Settings. After erasing, set up your iPhone again and choose "Restore from iCloud Backup" during the setup process. Select the most appropriate backup from the list provided once you've decided to restore from an iCloud backup.

Recover iPhone Data after Attempting Data Recovery Failed
Suppose the iCloud method wasn't an option, or you want to explore all avenues for data recovery. In that case, AceThinker iPhone Data Recovery is a powerful alternative. Remember, we mentioned this tool earlier as a method for fixing the entire system. However, its true versatility shines here. It can also delve into your iPhone's storage and retrieve lost data, even if stuck. This method is particularly helpful if you still need to enable an iCloud backup or if the backup itself is corrupted. While data recovery success depends on the severity of the issue, offers a fighting chance to salvage your precious photos, messages, and contacts. Let's explore how AceThinker iPhone Data Recovery can become your data hero.
Try it for Free
Step 1 Install the Software
Use the button provided above to download the AceThinker iPhone Data Recovery. Once you click the button, it will be downloaded immediately. Open the file and follow the installation process.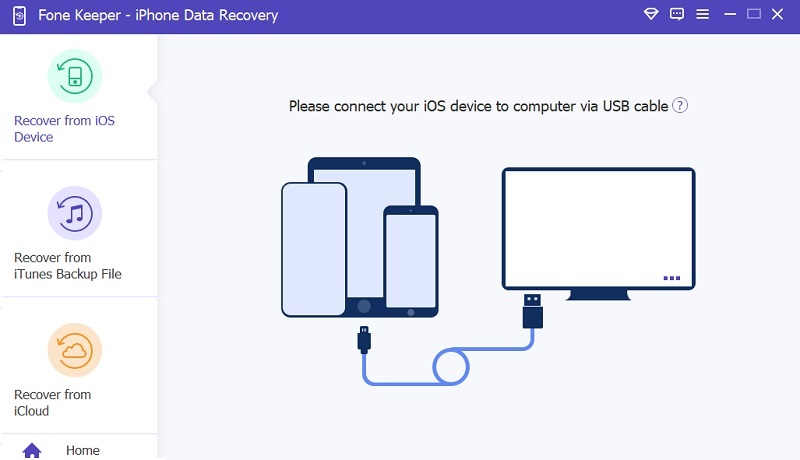
Step 2 Connect The Device
The next step is to connect the device to the computer. You can use the iPhone cable to establish a connection to your computer. You may scan the files you can retrieve if you are already done.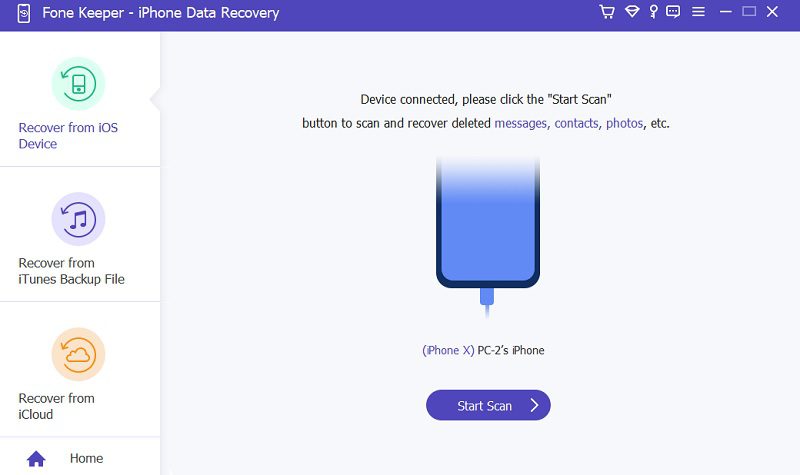
Step 3 Select Your Files
After the scan, you will see all the files the tool detects. You can retrieve the following: Messages, Calls, Photos, Contacts, Videos, and more. Select the files you want to recover on your device.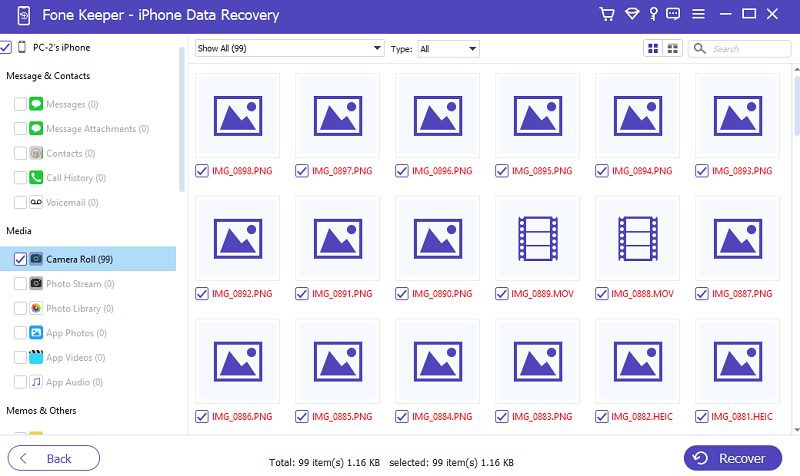
Step 4 Restore Files on Device
If you have selected all the files you want to restore, click the Recover button in the lower right corner. Then, select the path where you want to store them. Wait for the process to finish before disconnecting your device on the computer.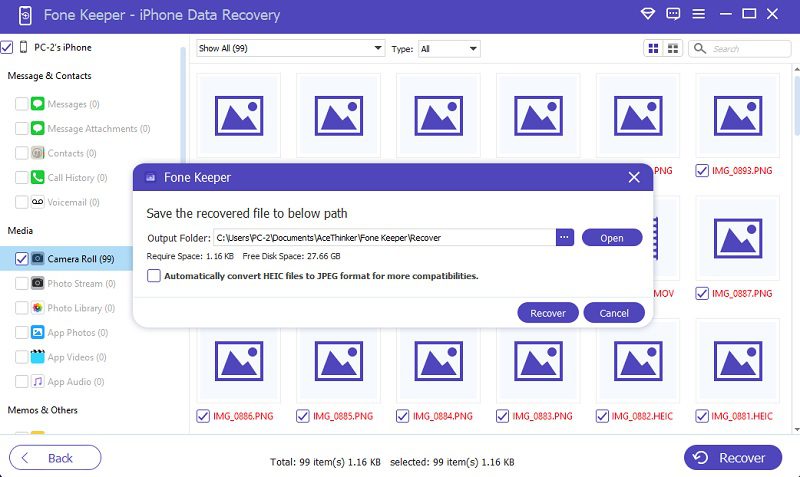
Conclusion
We explored why your device is stuck at “iPhone attempting data recovery failed loop” and how to potentially get it back on track. We started with a powerful third-party option, AceThinker iOS System Recovery, then dived into official methods like iTunes. If data recovery is your priority, iCloud was presented as potential solutions. However, if iCloud backup not showing up, AceThinker iPhone Data Recovery has your back to retrieve all data. Feel free to experiment with the methods that best suit your situation. If you encounter difficulties, remember professional help is always an option. With a little troubleshooting, you should be well on your way to a healthy and functioning iPhone again.