 Video presentations become more appealing and cool-looking when there is a reversed clip in them. Reversed videos have been widely used for food videos, especially in sports, for a clearer view of fast-paced movements. Most of the time, reversed clips are added to show emphasis on fast-moving objects within a video. That is why it is essential to know how to play video backward. Reverse and play a video backward is relatively easy if you've got the right video editing tool. In this article, we will discuss the best five programs you can use to play video in reverse.
AceThinker Video Editor
AceThinker Video Editor is the first on the list of excellent tools to edit and play video backward. This application is a basic yet powerful video editor that offers a wide range of editing options for free, including crop, trim, merge, reverse, and more. It also includes 50 dynamic transitions to ensure that video and picture presentations go smoothly. In addition, there are three aspect ratios: 9x16 for portrait, 16x9 for widescreen, and 4x3 for conventional. Finally, this program can convert video clips to AVI, MP4, MPEG, and other video formats.
Try It Free
Step 1 Install The Video Editor to Play Video in Reverse
Grab the tool by clicking one of the download buttons above. Make sure to get the right installer based on your computer OS. Once downloaded, install the software and launch it right after.
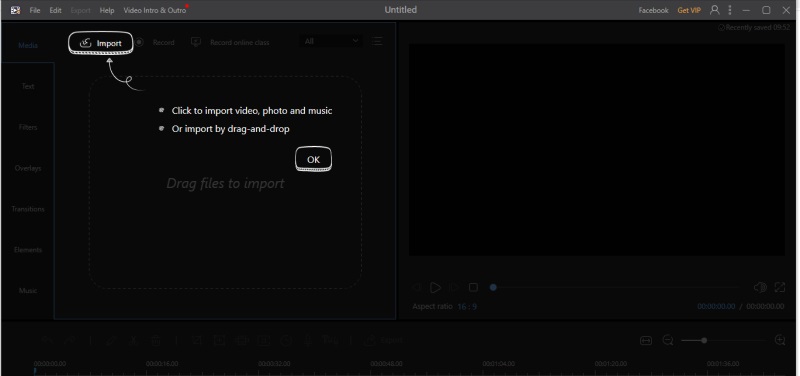
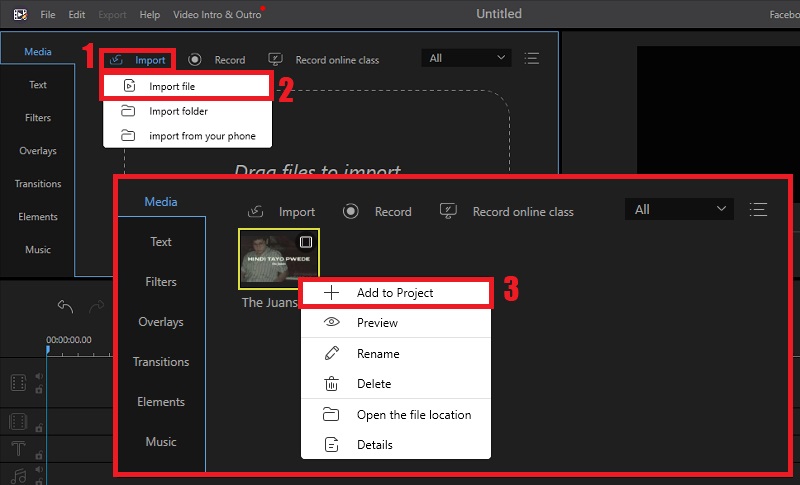
Step 2 Import to Make Video Play Backwards
From the tool's main interface, click on the "Import" tab and then select "Import file." Here, locate the video you want to reverse using the tool. Once the video has been added, right-click on it and select "Add to Project."
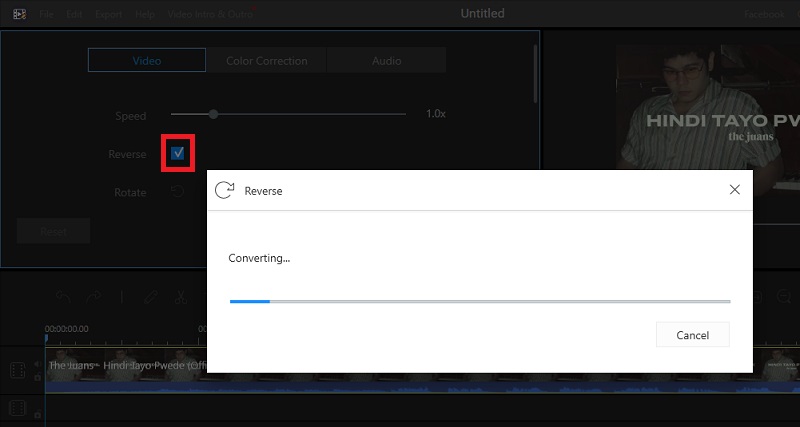
Step 3 Start Reversing the Video
From here, double-click on the video and tick on the white box beside the "Reverse" option. The tool will begin reversing the video and, after a while, click "OK" to confirm.
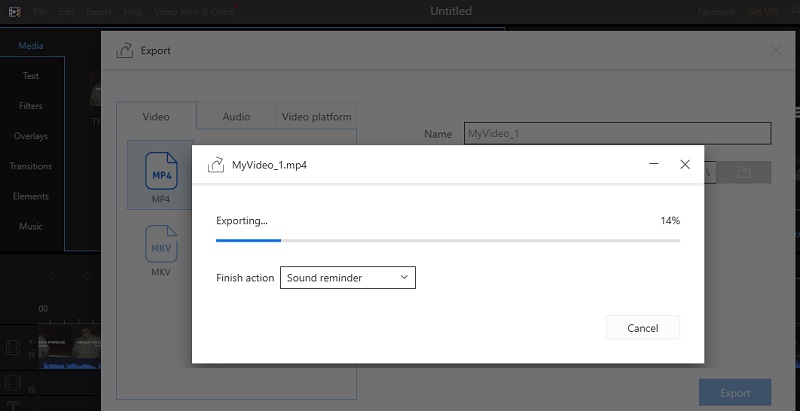
Step 4 Export The Reverse Video
Finally, after the video has completely reversed, you can now click on the "Export" button. Once clicked, the tool will give you options on what video file format you want to save your reversed video. Please choose what you prefer and proceed with exporting it.
Kapwing
Another tool that you can use to play videos backwards is Kapwing Reverse Video Editor Online . The tool is a web-based application that specializes in reversing video playback. The tool is free to use, which is why it is popular among users of online tools. For those in the know, Kapwing Reverse Video Editor Online is the first tool to use when it comes to reversing videos. This is because the process is so simple that anyone can do it without requiring much experience. To learn how to use Kapwing Reverse Video Editor Online, follow the steps below.
Step 1 Launch Kapwing Reverse Video Editor Online
Launch the tool by visiting the official website of Kapwing from a web browser and look for Reverse Video Editor. Next, click the "Upload" button from the homepage and select the video to play backward.

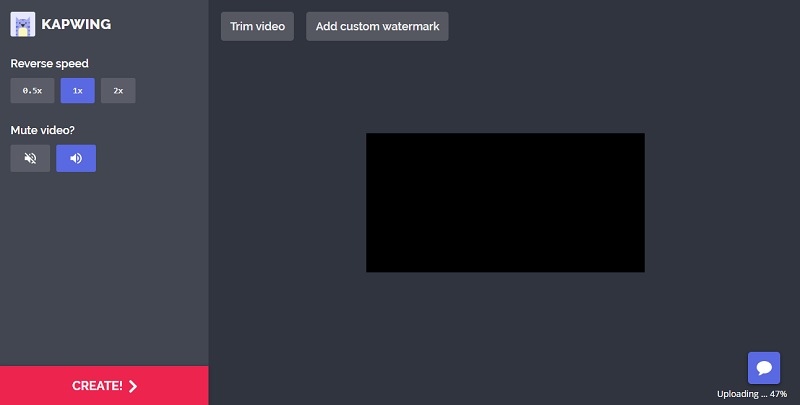
Step 2 Create the Video
The video is being reversed while it is being uploaded. Once the process reaches one hundred percent, the "Create" button will be enabled. Click the said button and then select where to save the newly reversed video from the PC and then download it.
Filmora
Another tool that can be used to play video backward is Filmora. This is a premium tool priced at $39.99 for a whole year subscription. The tool is packed with many essential video editing features, like cropping, trimming, speeding up, and slowing down the video. All these and more are included in the basic version of the tool. To learn more about Filmora and how to use it reverse video playback, follow these steps.
Step 1 Install Filmora and Use it
Download and install Filmora and then launch it. From the main interface, upload the video to the timeline. Right-click on the video and then select "Speed and Duration" and then tick the "Reverse" checkbox and click "OK."
Step 2 Export the Video
Once all initial settings are done, play the video to check if it works. Then, select the format to which the video will be saved, and then permanently apply the changes made to the video by clicking the "Export" button.
Fastreel Online Video Reverser
Reverse video online without downloading any software or even an extension with Fastreel Online Video Reverser. Besides, this tool is an excellent choice for a free application as it grants users to reverse videos in different formats such as MOV, MP4, AVI, and more. It has a straightforward interface so users can save any videos in reverse with just a few clicks. Additionally, users do not need to worry about the videos they upload, as the application provides complete security. However, when you use this free version, the saved video will have a watermark. Below is the guide you can follow so you can quickly reverse a video:
Step 1 Import the Video to Fastreel
rom your web browser, visit the Fastreel Online Video Reverser. After that, tap the "Add your File" button to upload the video you want to reverse.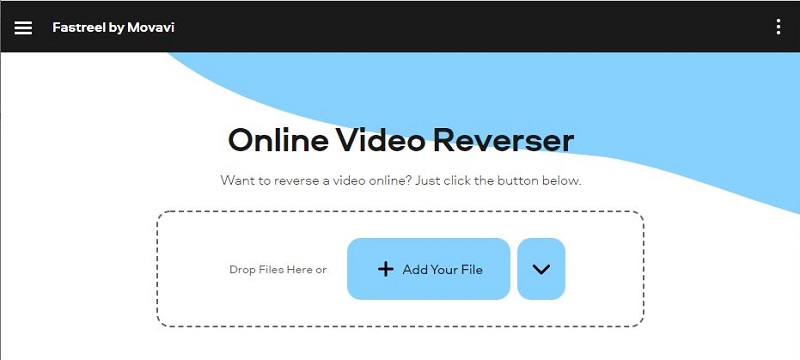
Step 2 Download the Video
Once you are done uploading, the application will automatically add the reverse effect to the video and its audio track. Then click the "Download with Watermark" to save the video.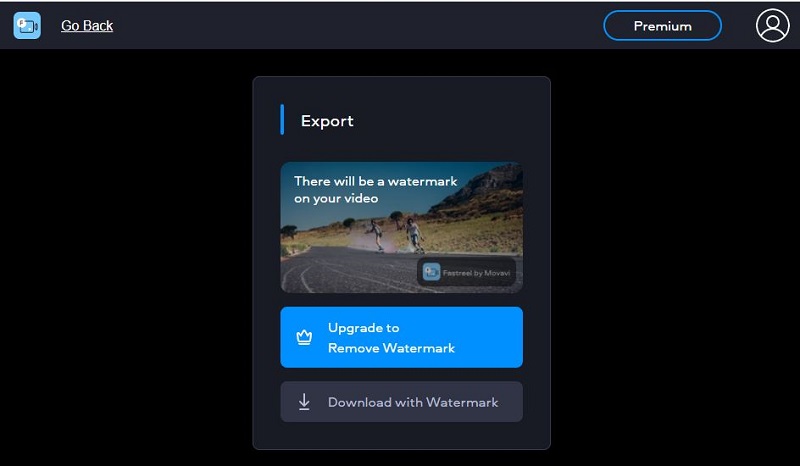
Adobe Premiere
Perhaps the most popular name when it comes to video editing software is Adobe Premiere. It is a powerful video editing software that can produce professional videos in minutes. It is a powerful video editing software that can produce professional videos in minutes. It is a tool widely used by professionals in the video editing industry, making it so popular worldwide. It has advanced editing features that only advanced can utilize. The tool is a lot more complicated because of its complex build, so it is not advisable for amateurs. On the other hand, Adobe Premiere can do the job for those who have a knack for video editing and want to play videos backward. To learn more about the steps to reverse video backward, follow the steps below.
Step 1 Import the video to Adobe Premiere
Launch Adobe Premiere and import the video by clicking the "File" tab, selecting "Open," and then looking for the video. Once the video is uploaded to Adobe Premiere, right-click on the video clip and select "Speed/Duration."
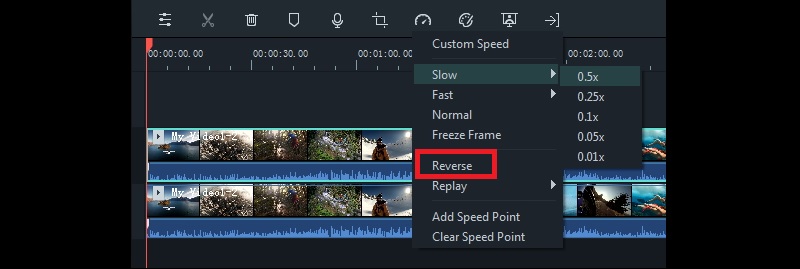
Step 2 Enable the Reverse Speed option
From the new window that will appear, tick the "Reverse Speed" checkbox and then click "OK" to apply the changes. Next is to play the video and see if the changes have been made. Once done, apply the changes by saving the video to the PC by clicking the "File" tab and then selecting "Save."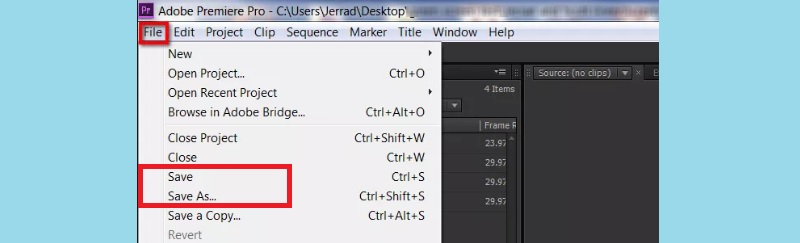
Windows Movie Maker
Windows Movie Maker is a Windows exclusive application that turns plain video clips into a movie of some sort. Aside from that, it is a great photo slideshow creator, which is popular. The latest update of Windows Movie Maker can play videos backward and can be done even when offline. However, Windows Movie Maker does not have an advanced video editing option since it is a drag and drop type of tool, so it is not advisable for a heavy-duty editing job. On the other hand, for simple tasks like reversing video playback, then it would be enough. To learn how to use Windows Movie Maker to play video backward, then follow the steps below.
Step 1 Open the Video on Windows Movie Maker
Launch Windows Movie Maker from the search bar. Then, click the "Add Clip" button and search for the video to edit and load it to the editor. Once the video is uploaded, click the "More tools" option and select "Edit."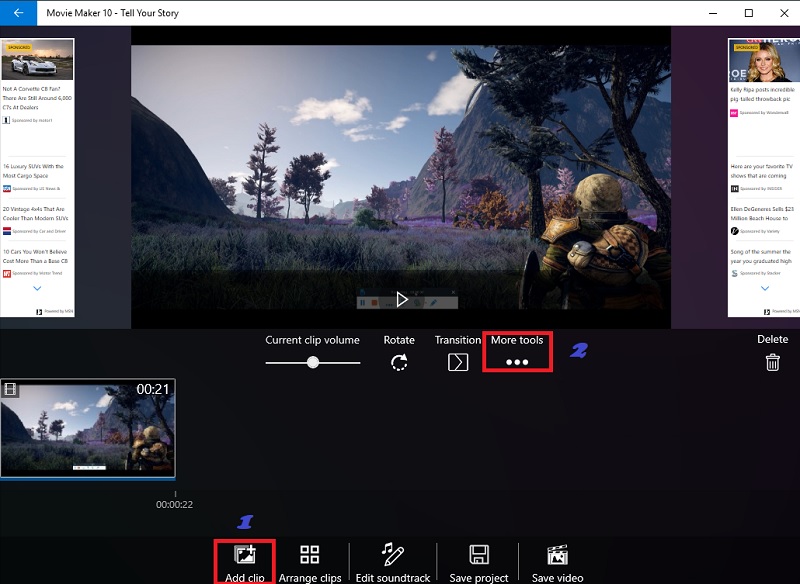
Step 2 Take a Screenshot of the Scenes
Next, play the video and take a screenshot of each scene part of the reversed clip. Make sure to list down the time-stamp of each screenshot to avoid confusion later on. After taking the screenshots, arrange them on the tool by starting with the last screenshot. Play the reversed video to check if all are arranged as they should be and save it if so.
iMovie
Mac users have the option to edit videos without installing any third-party application because they have iMovie on their Mac devices. iMovie is the built-in video editor for Mac devices, similar to the Windows Movie Maker for Windows devices. Using iMovie is not that complicated as using other video editing software. The good thing about it is that it's got the essential video editing feature like the reverse video backward feature. Here are the steps on how to use iMovie to play video backward.
Step 1 Import the Video on iMovie
Launch iMovie from the Mac device and then import the video by clicking the "Import" button from the left screen window above the timeline. Once the video is uploaded, press the "Command + R" keys, and the Speed Slide will appear.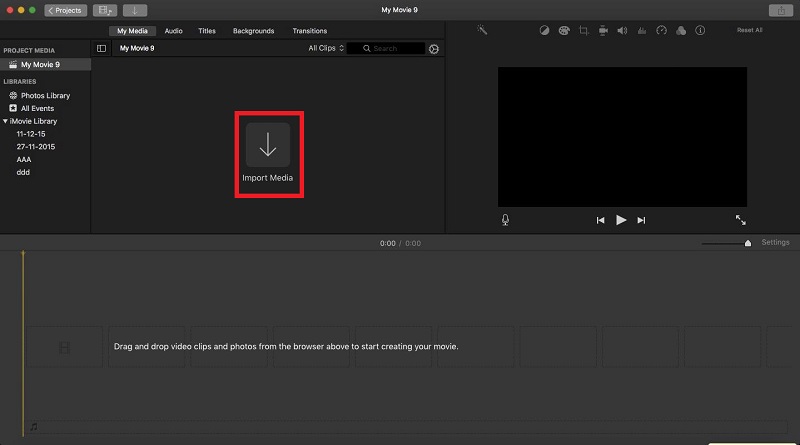
Step 2 Enable the Reverse Clip Option
Double-click on the Speed slider, and then from the set of options that will appear. Then, to reverse video in iMovie, click the box for "Reverse." This action will reverse the play-sequence of the video.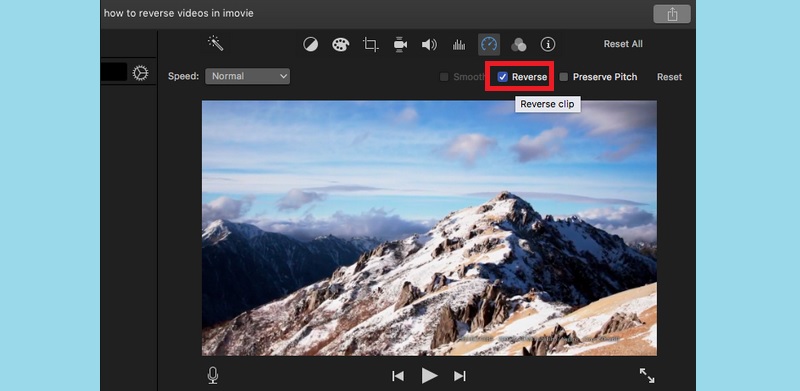
Conclusion
Learning how to play video backward is an easy task with the right tools. As they say, a demanding job becomes easier if there is reliable support, in this case, tools to rely on. On that note, the tools mentioned above can efficiently reverse video backward without affecting its quality. Also, each tool is designed to optimize the user experience and won't give users a hard time learning how to use them.