
 Large photo files, as we all know, can quickly fill up your iPhone's storage and slow down image uploading and sharing. As photos become higher in quality, they also take up more space. Fortunately, this problem can be resolved by reducing the photo size. By making images smaller, you can free up storage, send pictures faster, and upload them easily to websites or social media. Moreover, it ensures your device runs smoothly without constant storage warnings. Thankfully, iPhones provide several ways to reduce photo size without needing complicated tools. You can use built-in settings, third-party apps, or simple editing techniques to make your photos lighter and more manageable. In this article, you'll learn different methods to reduce photo size on iPhone, from adjusting settings to using helpful apps. Let's begin!
How to Reduce Photo File Size on iPhone in Different Ways
| Methods | Key Advantage | Best For |
|---|---|---|
| Modify Camera Settings on iPhone | Saves space while keeping good photo quality | Everyday photo capturing |
| Cropping Method | Reduces file size and improves photo focus. | Adjusting photo composition |
| Export via Mail App | Compresses images automatically for faster sending | Quick sharing through email |
| Using Photo Resizer App | Offers flexibility and direct sharing options via email | Advanced control over file size |
Method 1. Modify Camera Settings on iPhone
One of the easiest ways to reduce your photo file size is to modify the Photos settings on your iPhone. By default, your camera setting is set to the “Most Compatible” option, which has larger JPEG files that quickly consume storage space. To save space, you can switch to the “High Efficiency” option, which uses advanced compression to maintain clear photos while reducing their file size. This format saves images as HEIF files instead of JPEGs, which allows you to store more pictures without compromising quality. Moreover, the High Efficiency setting offers additional options, including HEIF Max (up to 48 MP), ProRAW 12 MP, and ProRAW Max (also up to 48 MP). Each of these options allows you to balance photo quality and file size according to your needs. For everyday use, HEIF Max is a great choice because it provides excellent detail with smaller files.
Guide on how to make iPhone pictures smaller file size in iPhone settings.
Step 1 Go to iPhone Settings
First, locate the Settings app on your iPhone's home screen. Once you’ve found it, tap to open it, and you’ll see a list of options that let you customize your iPhone’s features. Then, scroll down and look for the “Camera” option, then tap it to access your camera preferences.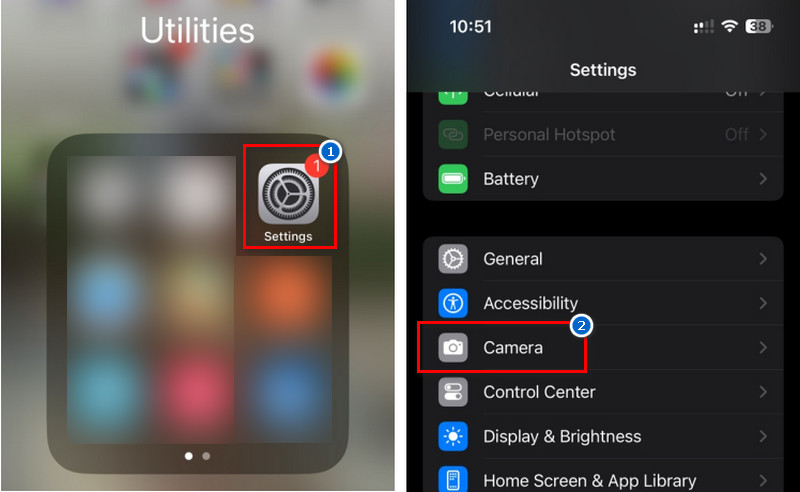
Step 2 Choose High Efficiency Option
From the Camera settings, find the “Formats” option in the list. Inside, you will see two options: High Efficiency and Most Compatible. Next, select the “High Efficiency” option to automatically save your photos in the HEIF format.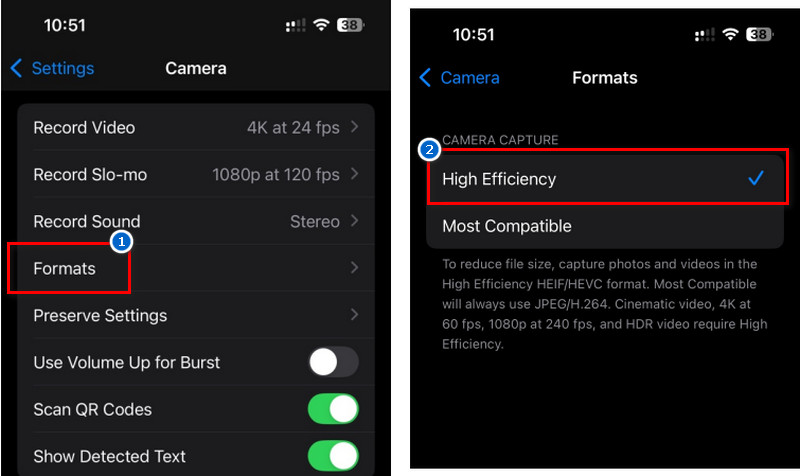
Step 3 Select HEIF Max on Pro Default
After that, navigate to the “Photo Capture” section, where you can see the “Pro Default” option. Here, select the “HEIF Max (up to 48 MP)” option. Then, every time you take a photo, it will limit the file size to 5 MB.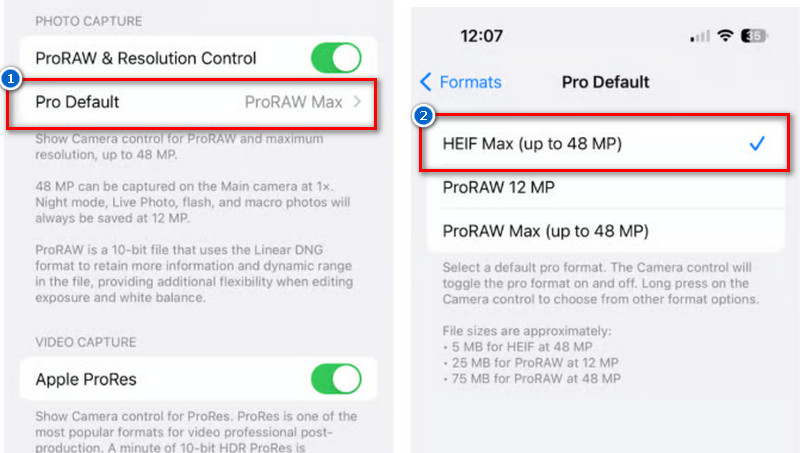
The main advantage that HEIF has over JPEG is its improved compression. HEIF uses advanced data compression methods like HEVC (High Efficiency Video Coding).
Method 2. Reduce Photo Size on Photos App
Cropping Method
Another way on how to make a photo smaller on iPhone is by cropping it. The Photos app offers different ways to crop your picture. These are freeform, square, 9:16, 4:5, etc., crop dimensions. Moreover, when you crop a person out of a photo, it improves the photo composition. It brings more attention to the main subject. As a result, the overall pixel dimensions of the picture become smaller. Since fewer pixels are left, the file size also decreases, which helps save storage space on your iPhone. However, since the photo is cropped, some details around the edges will be lost since those parts are permanently removed from the image.
Refer to the steps below to learn how to crop a photo on an iPhone.
Step 1 Find a Photo
Start by finding the picture you want to crop. Simply open the Photos app on your iPhone and scroll through your photos. When you find the image, click on it and tap the "Edit" option from the upper-right corner. On the other iPhone models, you can see the "Edit" icon at the bottom.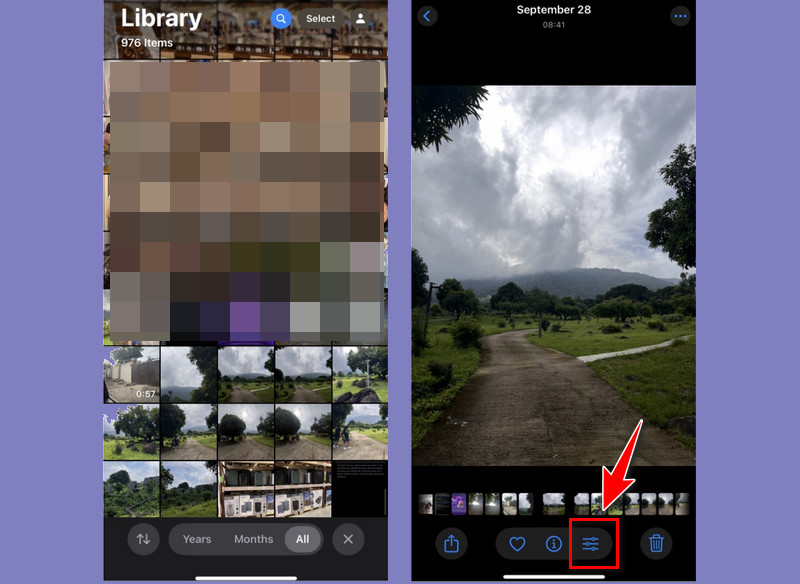
Step 2 Access the Crop Editing Option
Next, a new menu will appear at the bottom of your iPhone screen with the various editing tools. Tap on the “Crop” icon and the gray square icon in the upper right of the next page. Then, you will see the different crop dimensions below.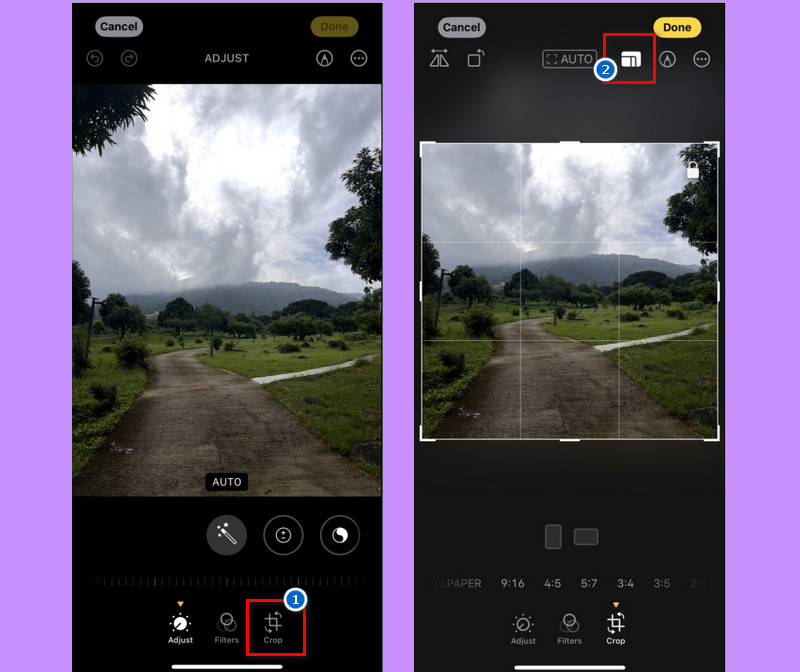
Step 3 Start Cropping the Photo
Afterward, choose what size or portion of the photo you want to keep by dragging the edges of the frame to adjust which parts remain visible. Then, if you prefer a specific aspect ratio, such as square, 9:16, or 4:5, select it from the options below to crop more precisely. Finally, once you’re satisfied, tap the “Done” in the bottom-right corner to save your changes and reduce the photo size.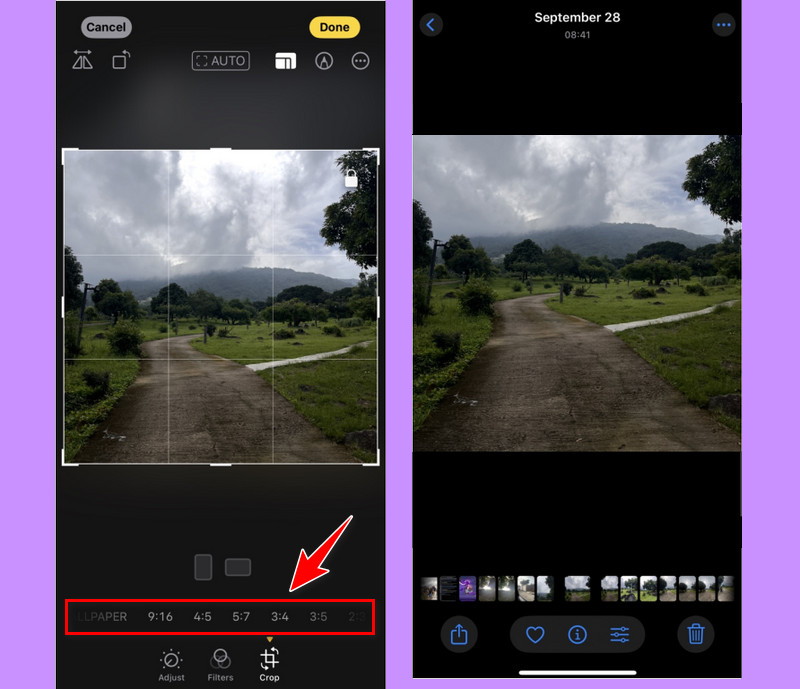
Export Photo via Mail App
Imagine how big an 8x10 photo can be when you try to send it through email; it may take too long to upload or fail to send. But did you know that the Mail app on iPhone can reduce your file size before sending it? Yes, before you send the photo via Mail app, it will ask you if you want to send it in small, medium, or its actual size. You can also see how much storage each option will take. However, since the smaller size will compress the original image, expect the quality of the photo sent via email to be slightly reduced. As a result, the picture may appear less sharp or detailed compared to the original version, especially when viewed on larger screens. Still, the difference is often minimal and hardly noticeable for regular sharing or online use.
Steps on how to compress a photo on iPhone via the Mail app.
Step 1 Locate the Image
To begin, open the Photos application on your iPhone. Next, scroll through your photos until you find the image you want to resize. When you see it, tap on the picture as well as the “Share” icon in the lower-left corner.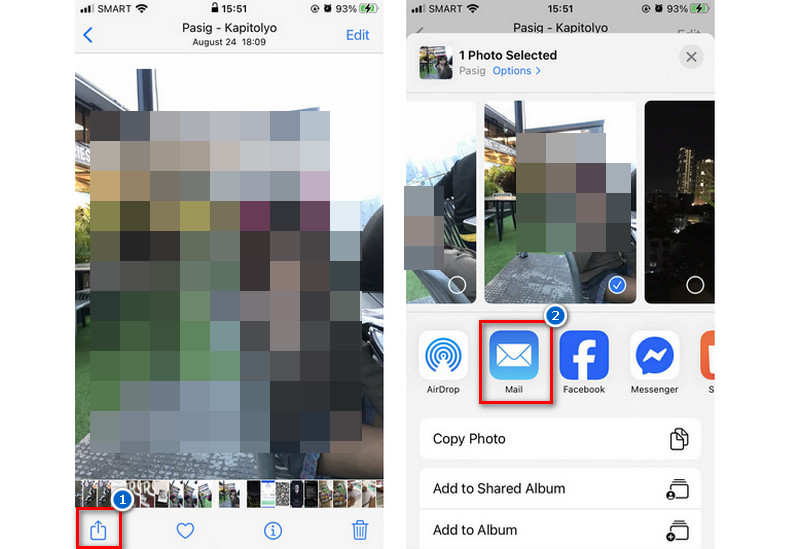
Step 2 Compose an Email
From the pop-up menu that appears after you tap the Share icon, locate the “Mail” app and tap on it. Then, enter your own email address into the recipient box and tap the “Send” arrow afterward. A new window will open on your screen, displaying the size of the image you want to select.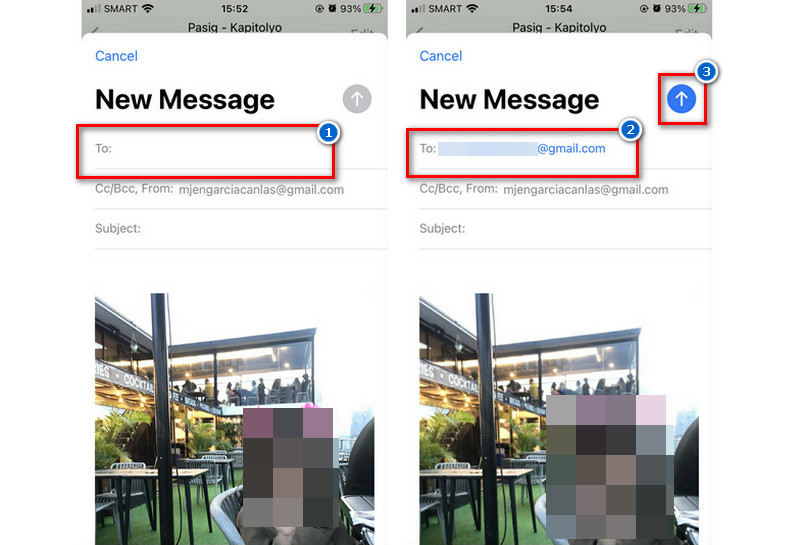
Step 3 Download the Sent Image
Select the “Small” option from the pop-up menu, and it will be automatically sent to your email address. Once you receive the photo, open the email and click on the picture. Finally, download the image from the email, and save it to your photo library with its new file size.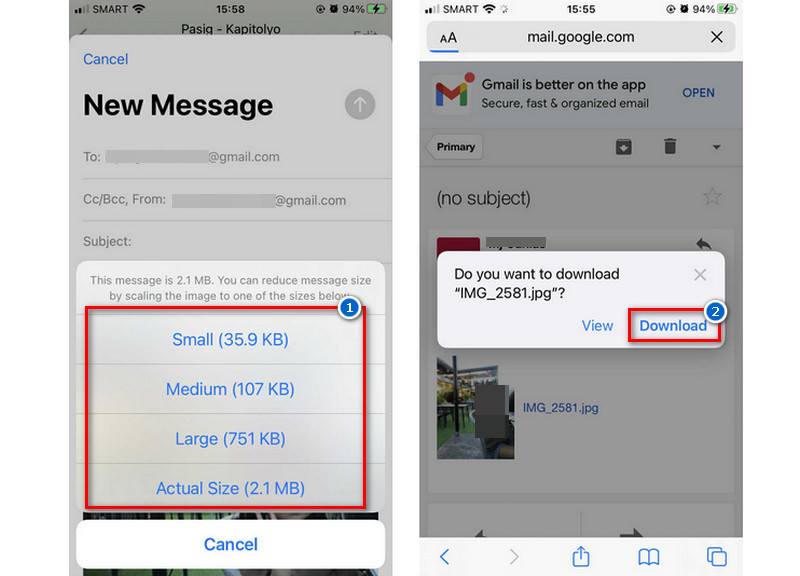
Method 3. Reduce Photo Size on iPhone Using a Third-Party App
If you want an easier way to resize your photos, try using a third-party app like Photo Resizer: Resize Image. This app helps you quickly adjust your photo’s resolution and reduce its file size without losing too much quality by resizing the image. Additionally, you can change the width x height dimensions of your image using the available sizes or crop the photo according to your preferences. Besides that, the app also compresses the image data so that the file takes up less storage space. As a result, it becomes faster to upload or share without occupying much space on your device. Moreover, Photo Resizer allows you to send your resized image directly via Email from within the app. This saves time since you don’t need to switch to your Mail app to attach the photo.
Steps on how to shrink a photo on iPhone using the Photo Resizer app.
Step 1 Get the Photo Resizer App
Start by installing the Photo Resizer app from the App Store by searching for it. When you find it, tap the "Get" button and wait for the application to be installed on your iPhone. Once installed, locate the application on your home screen and open it.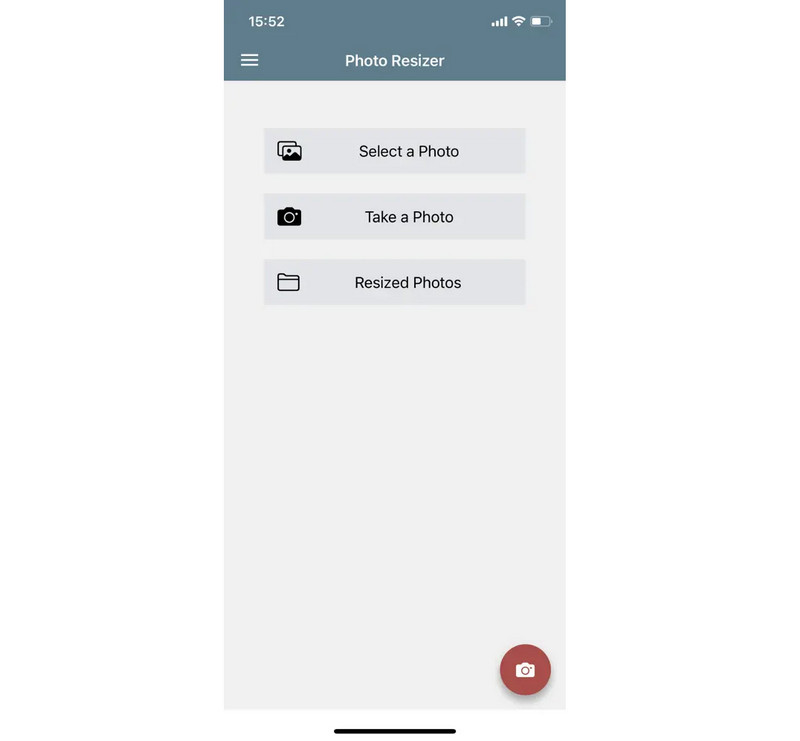
Step 2 Upload the Photo
On the main interface, tap the "Continue" button in the pop-up window to continue. Then, tap the "Select Photos" option to upload an image. Once uploaded, click the "Crop" or "Resize" options and select the desired dimension or size for the output from the next screen.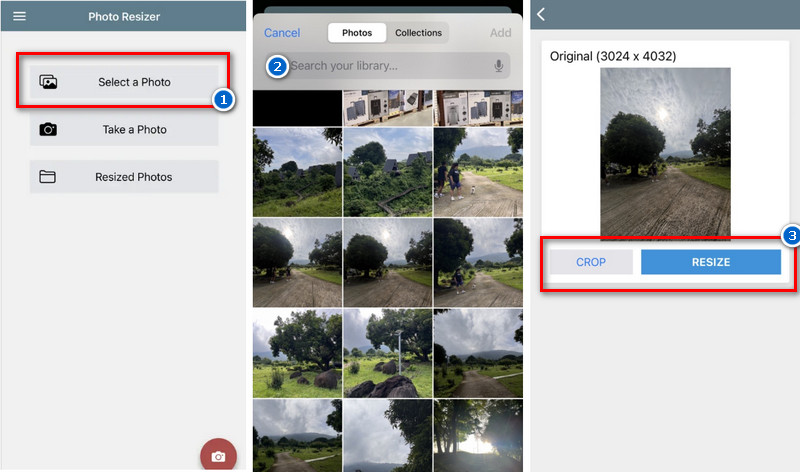
Step 3 Save the Output Image
Afterward, the app will begin adjusting the original photo according to the selected dimension. Then, after a few minutes, you can see the result of the original photo below. Finally, tap the "Save" icon to download the output image to your photo library.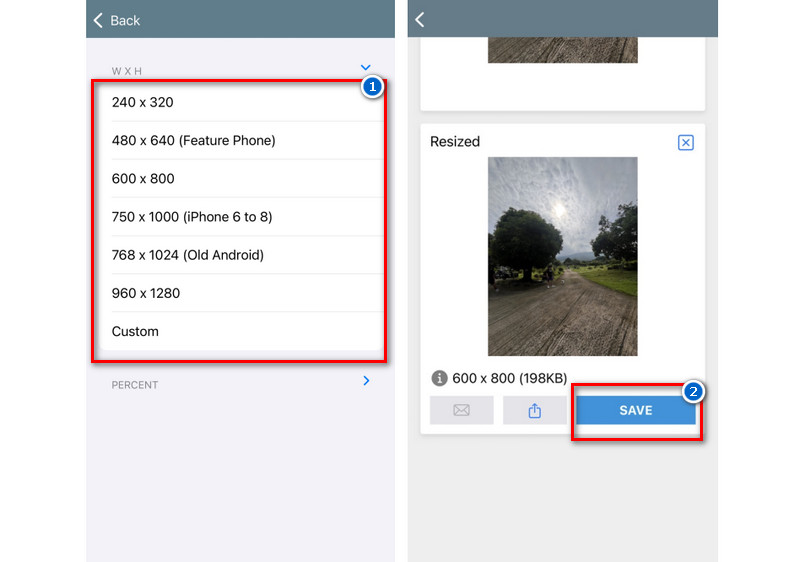
Bonus Tip: Enhance Your Image Using Online Photo Editor
One of the best tools we introduced to you is the AceThinker AI Image Generator and Editor. It is a browser-based image editing tool and an AI generator that offers robust features that help you enhance your photos. In fact, since this tool works online, you can access it on your mobile phones, such as iPhone and Android, as well as on Windows and Mac. Below are two image enhancement tools from AceThinker that can help you easily resize and enhance your photo files.
Image Compressor
This function helps you reduce the file size of an image by lowering its resolution or compressing data. The tool allows you to adjust the compression quality between low and high, depending on your preferences, using a percentage slider. Additionally, it supports different image formats, including JPG, WEBP, and PNG. Furthermore, you can upload photos up to 10 MB in size, which is great for larger images. Once the picture is uploaded, the tool automatically reduces the file size, and you will get the result in a few minutes. Moreover, suppose you want to increase JPEG resolution after compression. In that case, you can use its image upscaler to restore or enhance image clarity.
Refer to the guide below on how to use this online tool.
Step 1 Access the Online Photo Editor
First, go to your iPhone browser and search for AceThinker AI Image Generator and Editor. Then, please navigate to the accurate site within the search result and click on it. After that, sign up using your email address.
Step 2 Open the Compress Image Option
Once you access the main homepage of the photo editor, click the "More" section in the left corner to access more image editing tools. Here, find the "Compress Image" tool from the options and open it.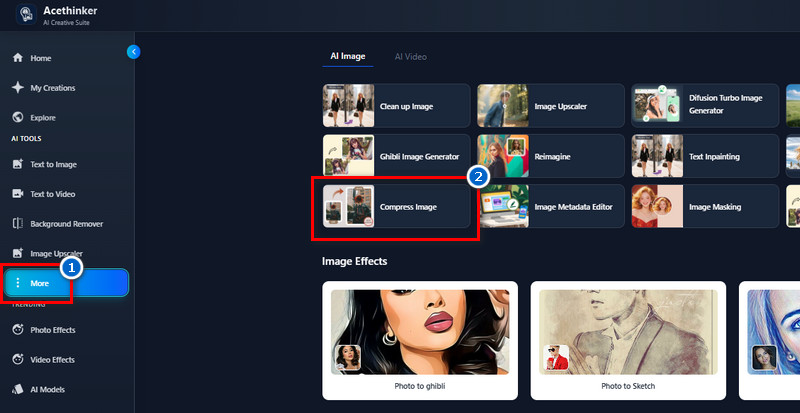
Step 3 Start to Compress the Image
From the next page, drop the image into the "Drop your image here" option to upload the file. Then, once uploaded, the tool will automatically start the compression process. Once done, download the output photo by clicking the "Download" button and save it to your local storage.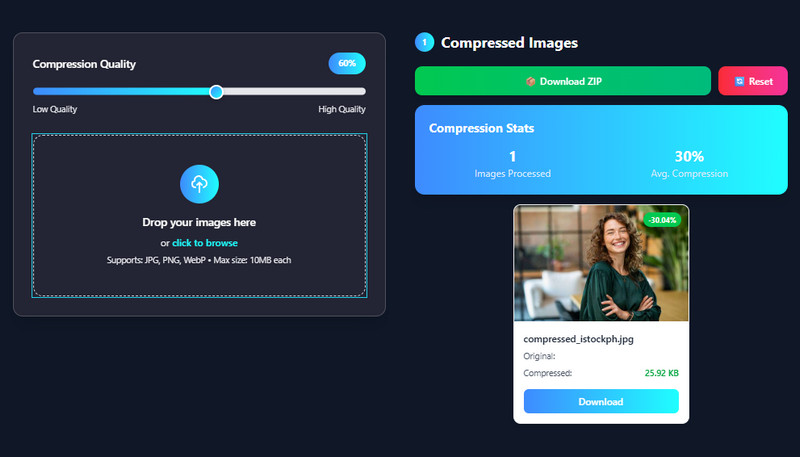
Photo Effects
Another feature of AceThinker AI Generator and Editor you can enjoy is its photo Effects. It allows you to enhance your pictures with various pre-made styles such as 3D, anime, cinematic, comic, and more. These creative filters can instantly transform a plain image into something more artistic and eye-catching. Moreover, it supports both PNG and JPG formats, making it compatible with most photo types. Additionally, you can upload images up to 10 MB in size, which is ideal for high-quality photos. Therefore, this feature is an easy and fun way to add personality and style to your pictures.
Follow the guide below to add effects to your photo.
Step 1 Upload Your Photo
Since you already have an account on the tool, all you need to do is access the Photo Effects feature. You can see it at the bottom of the listed features in the left corner. When you are on the Photo Effects interface, upload your picture in the “Upload Image” section.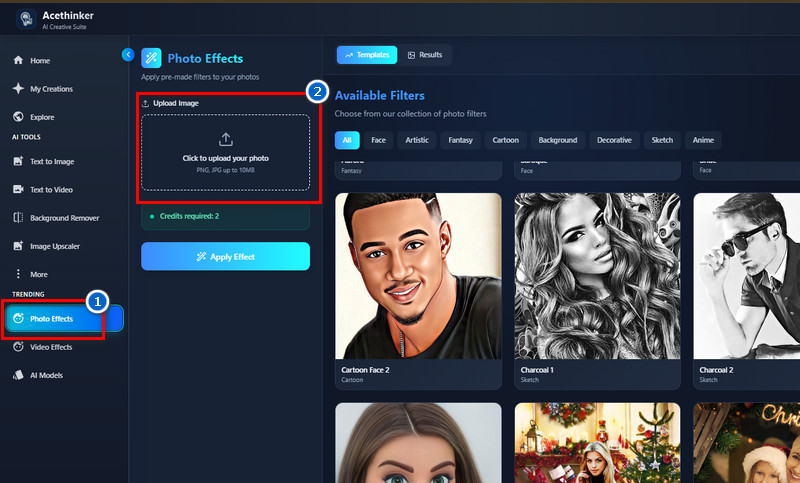
Step 2 Apply the Photo Effect
Once the image is uploaded, choose what effects you want to apply. Then, click on the photo effect and select it by adding a check icon. After that, hit the “Apply Effect” button below to start applying the effect.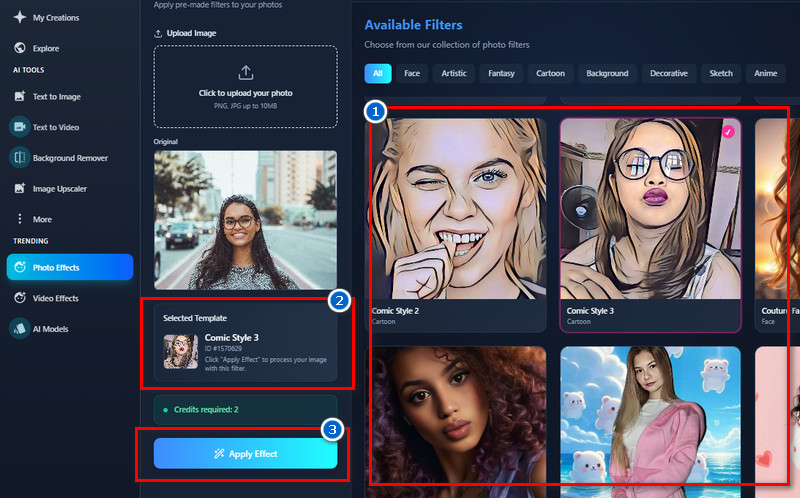
Step 3 Download the Output Image
Applying the effect only takes a few minutes. Once done, you can see the result below on the original image. Next, save the output photo by clicking the “Download’ icon. Then, right-click on the image on the new page and select the “Save Image As” option. Lastly, select the output folder, rename the file, and click the “Save” icon.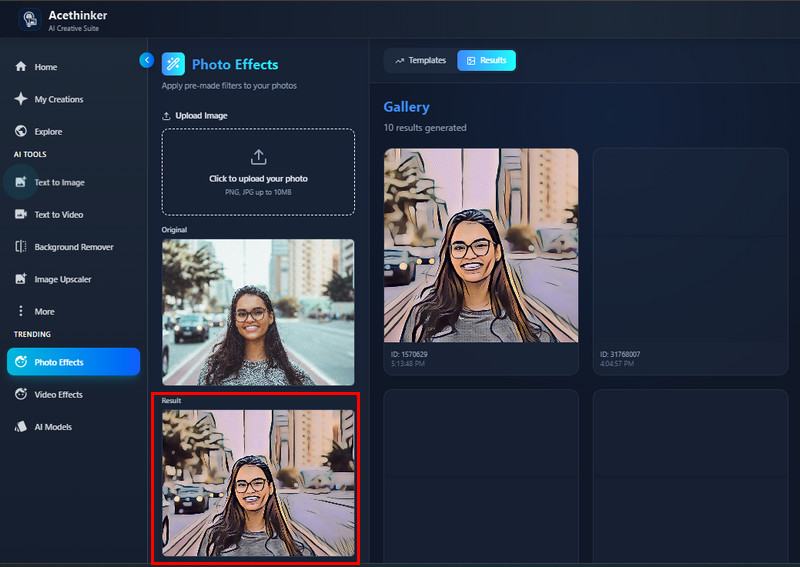
FAQs About Reducing Photo File Size on iPhone
Why can't I find the option to reduce photo file size in the Mail app?
You might not see the option to reduce photo size in Mail if the photo is already small or if you're sending it through another app. Ensure you attach the image directly from the Mail app, not from third-party apps.

Will reducing the photo size delete my original?
No, reducing a photo's size will not delete your original image. When you crop, resize, or send a smaller version, your iPhone saves it as a new copy. Therefore, your original high-quality photo will stay safely in your Photos library.
What is the best format for a reduced size? HEIC or JPEG?
The HEIC format is the best choice for reduced file size because it uses modern compression technology. It maintains high image quality while using less storage space compared to JPEG. However, if you need better compatibility with older devices or apps, JPEG is a safer option.
Conclusion
Reducing the photo size on your iPhone offers several benefits, including saving storage space, speeding up uploads, and making it easier to share pictures online. It also helps your device run smoothly without constant “storage full” alerts. Moreover, there are several ways to do it—using built-in tools like the Photos app or Camera settings, and third-party apps for more control. For best results, try combining these methods to achieve the right balance between convenience and quality. However, always remember that smaller file sizes can slightly affect photo clarity. Therefore, choose settings that maintain good image quality while efficiently reducing file size. With the right approach, you can keep your photos organized, optimized, and ready to share at any time.