
 Photo upscaling refers to enlarging an image while maintaining its clarity. It is a task many artists need to do. You might prepare a picture for print or fix an old photo. You may also work with digital art and need a larger version. Small images often look blurry or pixelated when resized. GIMP is a free tool that helps solve this problem. It offers smart resampling and interpolation options. These settings help keep edges sharp and details smooth when you scale an image up. GIMP cannot create new information, but it can protect the quality that already exists. With the right settings, you can reduce blur and improve clarity. This guide explains the GIMP upscale image process to manage size, resolution, and interpolation. It will help you upscale images for screens or print with better results.
Knowledge About the Ganging in GIMP Upscaling Tools
When discussing image upscaling, it is essential to understand the concepts of image size and resolution. Image size refers to the number of pixels in width and height. This determines the size of the image on a screen or digital device. Image resolution, measured in pixels per inch (PPI) and often referred to as DPI in printing, indicates how densely the pixels are packed. Higher resolution results in sharper and clearer prints.
When performing a GIMP image upscale, you increase the pixel dimensions of an image. GIMP generates new pixels to fill the larger space. Without proper resizing, printed images can appear soft, blurry, or blocky. Resolution is less important for screens but crucial for printing. A typical print resolution is 300 PPI, which ensures crisp and clean results. Effective GIMP image upscale balances size and resolution for clarity on both screens and paper.
Upscale Image in Gimp Using Interpolation Methods
When enlarging images, GIMP adopts various interpolation algorithms to compute and include new pixels. The differences in each technique impact the quality and sharpness of the resulting image in different respects:
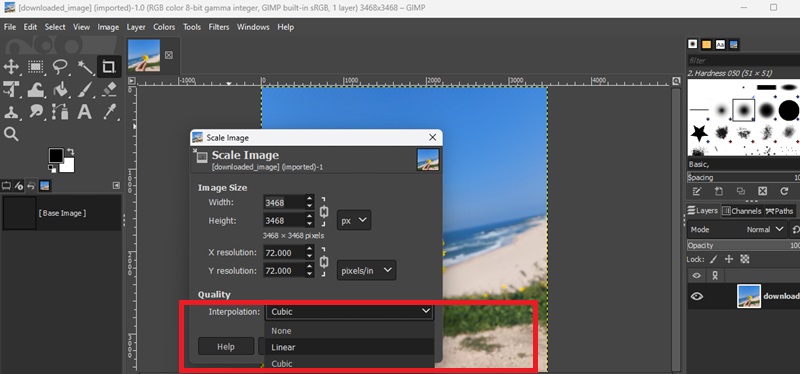
- None: This technique does not do pixel interpolation but instead copies pixels verbatim. The effect is a blocky pixelated image, commonly not suitable for photographic imagery, but occasionally used in pixel art or icons where sharp edges are desirable.
- Linear: Linear interpolation measures the mean of the neighboring pixels to create new pixels. It is also computationally sound and gives smoother results than None. Nevertheless, it might provoke certain softening, which is particularly apparent with bigger enlargements.
- Cubic: Cubic interpolation uses the nearest sixteen pixels to compute new pixel values, therefore having smoother gradients and edge detail compared to Linear. It is a compromise commonly used between quality and speed, and the one appropriate to most photo enlargements. In gimp how to upscale an image, this method plays a key role in maintaining visual quality while resizing.
- Sinc (Lanczos3): This mathematical filter helps limit aliasing and retain sharpness. The most advanced technique available in GIMP is called Sinc (Lanczos3). It is very sensitive to the right balance between smoothing and details preservation, being the most desirable option when it comes to high-quality upscaling procedures, particularly in cases when images are enlarged in a very significant manner.
Here’s How to Resampling Images in GIMP Upscaling
Upscaling in GIMP is a type of resampling, the act of generating new pixels to enlarge the image and attempting to preserve a similar appearance. This is by the following means:
Scale Up the Image Size: As you enlarge image in GIMP and resize the image, GIMP has to create more pixels to occupy the enlarged canvas. This involves computing the colour and location of pixels that have not existed before as per the original image information.
Choice of an Interpolation Algorithm: GIMP uses the selected interpolating technique to examine the neighboring pixels to approximate new pixels based on color. This mathematical computation makes the changes less abrupt and helps to cease pixelation.
Resample and Create an Enlarged Image: After the new pixel values are derived, GIMP reconstructs the image to the new size. Although this process can smooth and enlarge the photos further, there is bound to be some level of softness since the computer software is unable to conjure up any real detail beyond that which was recorded. Additional processes like sharpening can then be needed to regain sharpness.
Step-by-Step Guide: How to Upscale an Image in GIMP
Upscaling an image in GIMP involves more than just increasing its size. It requires careful adjustments to maintain clarity and avoid visible pixelation or blur. Gimp has easy-to-use tools to smart size an image, whether you have a large image that you need to print or a small picture that you need to enhance with a presentation or even to edit your artwork. You should adjust the image size to the right size, adjust the resolution, and select the most appropriate interpolation process to ensure the image is not degraded. Gimp does not apply more fine details on its own, and thus by setting the right settings at the beginning of your picture, you can save your picture clean and crisp. With this step-by-step guide, you'll be able to resize images in enlarge image without losing quality Gimp using its native controls to resample and upscale your image while maintaining a natural and clean appearance suitable for both digital and print purposes.
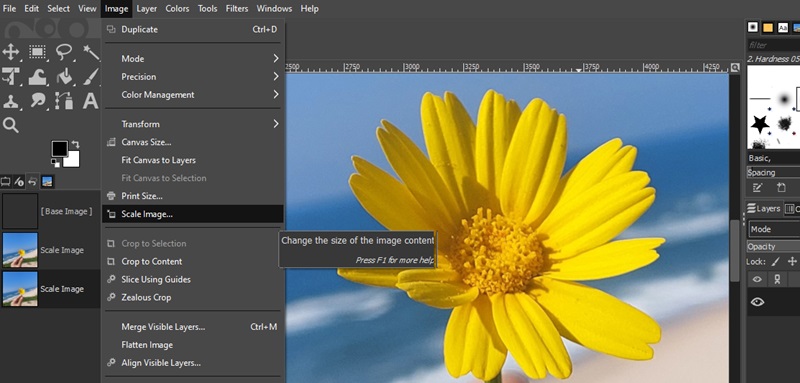
Step 1 Set the New Image Size
Open your image in GIMP, then go to the Image menu and select Scale Image. In the dialog that appears, enter the new width or height you want. Make sure the proportions stay locked to maintain the original aspect ratio. This ensures your image won't stretch or distort during resizing. You can double the size if needed, but avoid extreme increases unless you plan to sharpen the result afterward.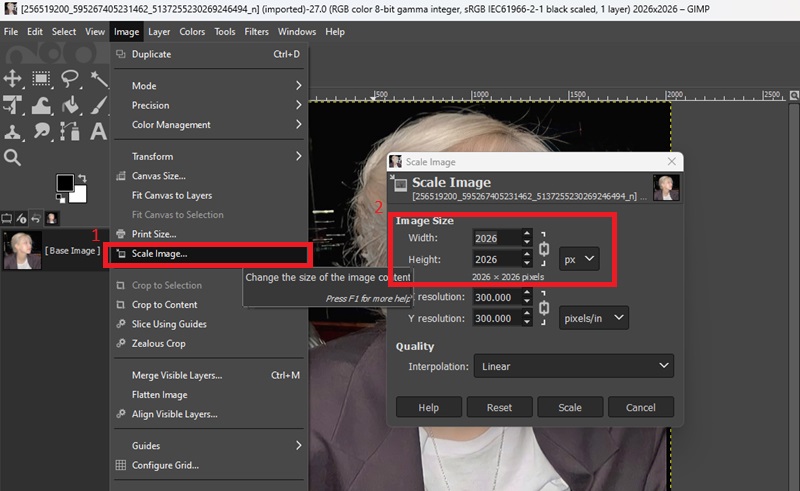
Step 2 Adjust Resolution and Interpolation
Below the size fields, update the resolution settings. Use 300 pixels per inch if the image is for printing. For web or screen display, the default 72 or 96 pixels per inch is acceptable. Next, choose the interpolation method. Sinc Lanczos3 is the best choice for preserving detail when enlarging photos or complex graphics. For faster processing with good quality, use Cubic. The selected interpolation determines how GIMP generates new pixel data during enlargement.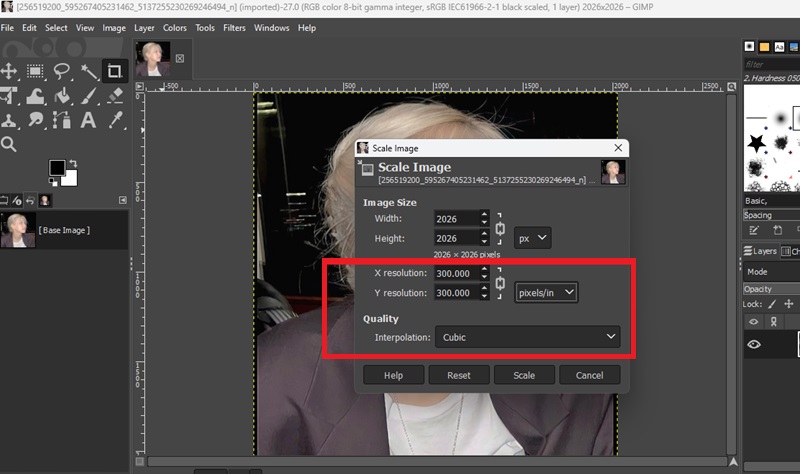
Step 3 Apply Scaling and Improve Sharpness
After setting the size, resolution, and interpolation, confirm by clicking Scale. GIMP will resample the image and generate the enlarged version. If the result looks slightly soft, apply sharpening. Go to the Filters menu, select Enhance, then choose Unsharp Mask. Start with a low radius and increase the amount gradually until edges appear more defined. This step restores clarity that may have been softened during the upscaling process.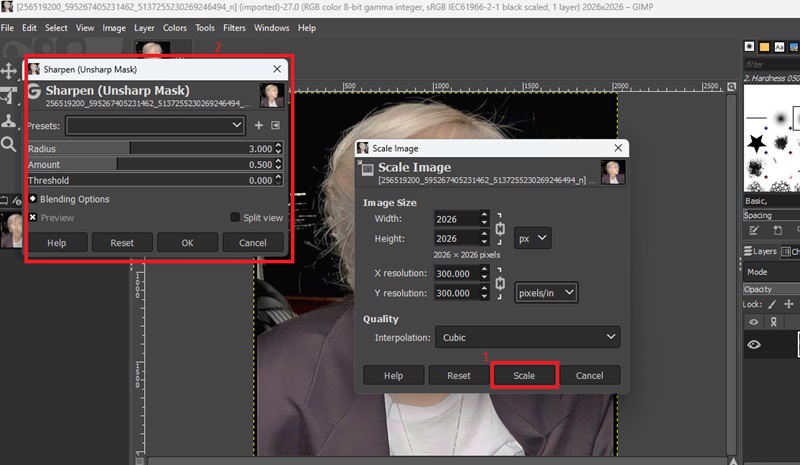
Best Free Alternative Tool to Upscale in GIMP
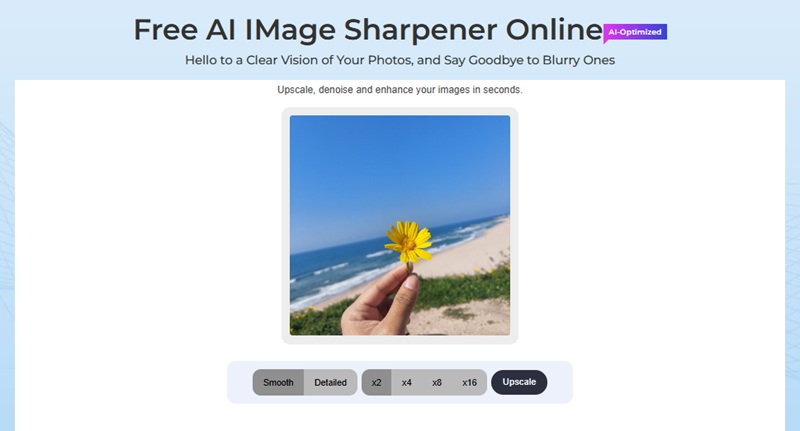
Although GIMP allows users to control interpolation and scaling, it fails to reverse the loss of visual clarity and details during enlargement. AceThinker Free AI Image Sharpener is an online tool that will help such users find a more intuitive and smart experience by integrating sharpening and upscaling into a single, simplified process. It runs in the browser, utilizing AI-powered algorithms to analyze the contents of your image and optimize it accordingly, smoothing noise, retrieving edges, and refining textures along the way. It is more effective when it comes to images that are blurred, in low resolution, or are not defined. Whether you need to sharpen portraits, enhance visuals for online use, or design something ready to share, AceThinker will help you with everything, without needing to download any software or tweak any settings. This makes it a great option for users who want to Gimp enlarge image without losing quality.
Step Guide:
- In any modern web browser, go to the Free AI Image Sharpener site. After going to the home page, drag and drop your file to the upload files section, or click the upload button. The tool is compatible with such standard formats as JPEG and PNG. Once the image is uploaded, a preview of the image will appear, and the system will prepare it to be enhanced.
- After your image loads, you can choose how the sharpening should be applied. If your image requires a soft, natural look, select the smooth option. For more defined results with sharper edges, especially on graphics, objects, or older photos, choose the detailed mode. The tool will automatically detect and adjust the sharpness level accordingly. It optimizes both scaling and sharpening based on your selection.
- After choosing your sharpening preference, click “Upscale” to process. Your setting will automatically resize and sharpen the image as the tool enlarges it. It typically takes several seconds. Once done, a download button will appear. Click it to compress the improved, upscaled picture to your device.
Enhance Your Upscaled Images for Full Image Result
Once an image has been upscaled in GIMP or an AI-based program, it often still requires additional modifications to enhance the image as a whole. AceThinker Pickwish offers a range of helpful functions that can improve your pictures. Background removal is one of its key features, enabling you to isolate the main subject and remove any unwanted background objects. This works especially well when preparing images for listing a product, portfolio, or online work. When the upscaling results in a little blurriness, the unblur tool within it might assist in restoring image intensity and making it sharper. The feature to add a custom watermark is another convenient alternative for easily identifying a brand or protecting original content. It is a straightforward process that does not require specialized technical skills. Users are only supposed to upload the image, select the desired feature, and make the adjustments. It makes AceThinker Pickwish a worthy addition to anyone seeking to advance and refine their upscaled photos to give them a professional appearance.
Try it for Free

Conclusion
To resize image without losing quality Gimp, it is important to adjust both the image size and resolution while choosing a suitable interpolation method to reduce quality loss. To keep the image sharp and smooth when enlarging, you can use options like Sinc Lanczos3. However, if the image is scaled too much, it may still appear pixelated or soft. In such cases, AI-powered tools like AceThinker Free AI Image Sharpener can help increase image size without losing important details. Choosing between these methods depends on what you need—whether it's full control, faster results, or the highest possible image quality.