
 Image formats are not all created equal, particularly in terms of background transparency. JPG (or JPEG) is a common image file format that is compact in size and compatible with most platforms. It is effective on photos, but there is one significant flaw: it fails to use a transparent background. This is to say that a JPG will not slice in case you wish to peel the white or colored background of a graphic or logo. Conversely, PNG is a more loose format. It maintains the image quality and provides the option to have elements of the image be completely or partially transparent. This has made PNG the preferred format for use in web design, digital art, branding, and presentations. To get clean and crisp images without background clutter, you can always convert any JPG into a transparent PNG. We will guide you through that conversion step by step in this guide, using simple tools and tips that anyone can follow without needing to be a designer.
Top Reasons to Convert JPG to Transparent PNG
The format has its limits, as evidenced by the awkward white box that often surrounds a JPG image on a colored background, which you have likely experienced when attempting to place one. JPEG files are excellent in storing space and sharing photos, yet they do not have transparency. It is a significant issue when you require clean, stretchable, or professional photos, particularly for design, branding, or web purposes. Convert JPG to PNG without background process unlocks greater control, presentation, and sharpening options. Here's why it matters:
1. More Flexibility in Graphic Design
The art of overlaying images is crucial when creating any visual content, whether it's a poster, a flyer, or a digital advertisement. JPGs have backgrounds, which cannot be moved and may be obstructive to other objects or appear as an outcast. An open PNG will enable you to cut the background away and to incorporate the image perfectly into your design. It can be overlaid on patterns, gradients, or other images without conflicting or forming jagged edges.
2. Cleaner, Professional Visuals
Photos with solid white or colored backgrounds tend to appear rough and unpolished, particularly when placed against other backgrounds. A transparent PNG provides a better, cleaner result. It eliminates the additional background, allowing attention to remain focused on the image itself. This makes your content appear sharper and more professional, whether on a website, a slideshow, or in printed marketing materials.
3. Perfect for Logos, Icons, and Social Media
The visuals of a brand, including logos and icons, may have to be presented on different platforms. The background of a JPG can restrict the way and the location where you can use it. However, with a transparent PNG, your logo or icon can be placed on any background color or picture without looking distorted. It is most suitable in social media posts, profile pictures, banners, and even app design, where clean branding is vital.
4. Better Fit for Web and Presentations
Transparent PNGs are also a better choice for websites and presentations, as they blend well with the layout. Whether it's to add images to a PowerPoint slide or insert graphics on a webpage, you want them to appear integrated, not confined. PNGs also perform well on screen and in browsers, so that your graphics will maintain their clarity and responsiveness on any screen.

Easy and Quick Guide to Convert JPG to Transparent PNG
One of the easiest ways to turn JPG into transparent PNG is by using AceThinker Free Online Background Remover. This tool runs entirely in your browser—no need to download or install anything. It uses smart AI to detect the subject in your image and remove the background in seconds. The platform supports common image formats, including JPG, PNG, and WebP, and maintains sharp image quality throughout the process. What sets AceThinker apart is its straightforward layout and rapid results. It also includes manual tools, such as a brush, to refine edges and correct any areas that the AI might miss. After removing the background, you can keep it transparent or replace it with a solid color, gradient, or even another image. When you're done, just download the file as a PNG with the transparency intact. It's perfect for anyone needing a clean logo, product photo, or graphic—no design skills required.
Step 1 Upload Your JPG Image
Go to the AceThinker Background Remover. On the homepage, click the "Upload Your Photo" button to choose the JPG file you want to edit. You can also drag and drop your image directly onto the page. The tool accepts most common file types and doesn't require you to sign up or install anything. Once uploaded, your image will be processed instantly.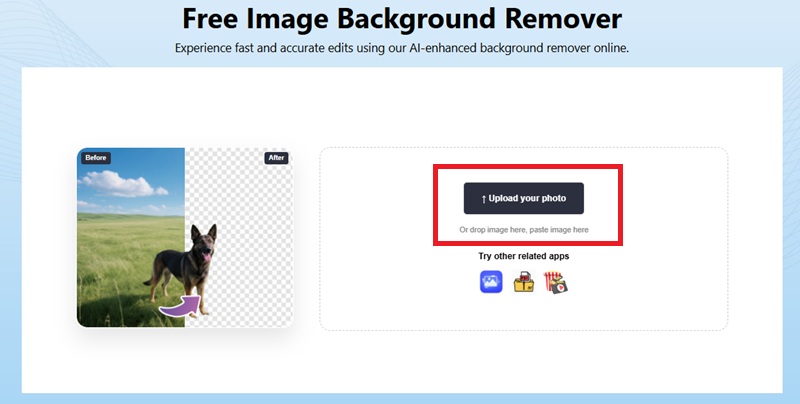
Step 2 Let AI Remove the Image Background
After uploading, the tool will automatically scan your image using built-in AI. In seconds, it will isolate the main subject and delete the background. You'll see a live preview with a transparent background applied. No need to adjust anything manually—unless you want more control. This automatic feature saves time and makes the process accessible, even for first-time users.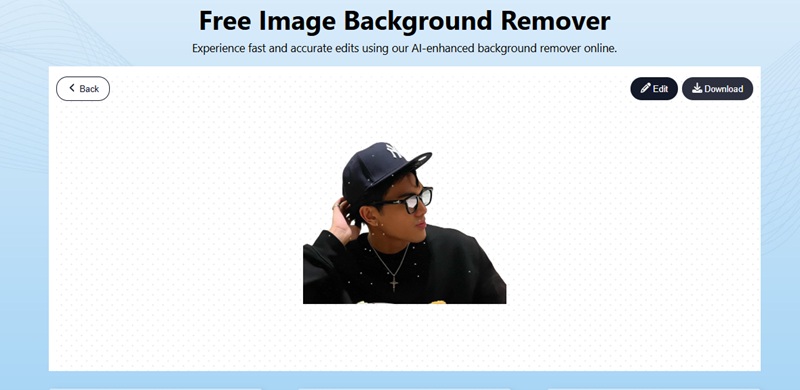
Step 3 Download the Transparent PNG
Once satisfied, click the "Download" button. The final image will be saved as a transparent PNG. It is now ready to use in your design projects, websites, or presentations.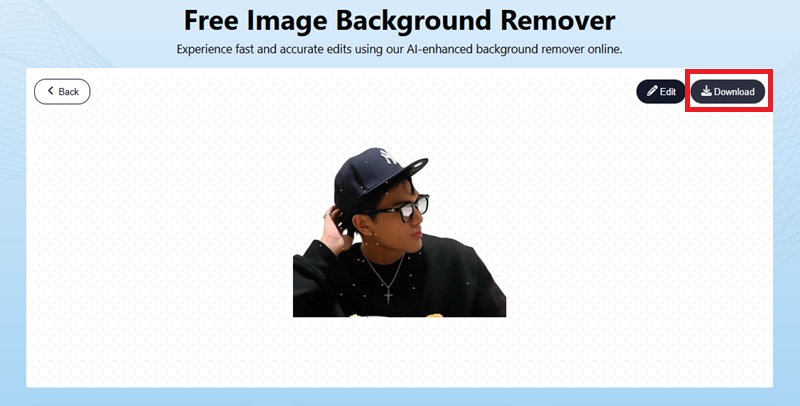
Convert JPG to Transparent PNG Using Adobe Photoshop
Adobe Photoshop is a professional tool trusted by photographers, designers, and digital artists worldwide. It offers precise control over every part of an image, making it perfect for removing backgrounds and creating transparent PNGs. Unlike free tools, Photoshop provides detailed selection options, including the Quick Selection Tool, Magic Wand, and Select Subject. These features help isolate your image from the background with accuracy. You can also use Layer Masks and the Refine Edge tool to clean up tricky areas, such as hair or soft edges. Photoshop works with layers, allowing you to remove the background without deleting any parts of the image. Once finished, you can export the image in PNG format with transparency, which is ideal for logos, web graphics, and marketing materials. Suppose you want full creative control and a high-quality result. In that case, Photoshop is one of the best tools available for turning a JPG into a clean, transparent PNG.
Step 1 Unlock the Background Layer
Begin by opening your JPG image in Adobe Photoshop. Look at the Layers panel, usually located on the right side of the screen. You will see the image labeled as "Background," and it will be locked. To unlock it, double-click on the background layer. A pop-up will appear asking you to rename the layer. You can rename it or leave it as "Layer 0," then click OK. Your image layer is now editable and ready for background removal.
Step 2 Select the Subject in Selection Tools
To remove the background, you first need to select the main Subject. Go to the top menu and choose Select, then click on Subject. Photoshop will automatically detect and highlight the most important object in the image. If the edges are not perfect, you can use tools like the Quick Selection Tool or Lasso Tool to refine the selection. For more precise control, open the Select and Mask workspace to adjust edge smoothness, contrast, or feathering.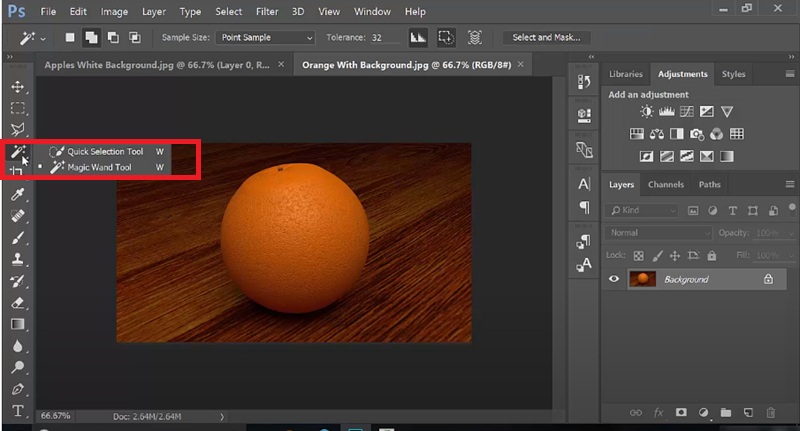
Step 3 Remove the Background and Reveal Transparency
Once your Subject is selected, you need to remove everything else. Return to the top menu and choose Inverse. This will select the background instead of the Subject. Now press the Delete key on your keyboard. The background will be removed and replaced with a checkerboard pattern, which represents transparency in Photoshop. You can use the Eraser Tool to clean up any leftover areas if needed manually.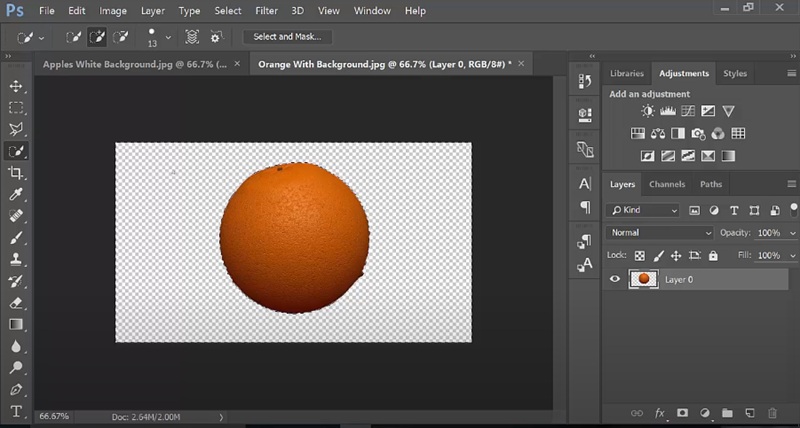
Step 4 Export the Image as a Transparent PNG
To save your image with its transparent background, go to the File menu and select Export, then click on Export As. A new window will open with export settings. Choose PNG as the file format. Ensure the Transparency checkbox is selected, which ensures the background remains invisible in the final image. Adjust the resolution or size if needed. When you are ready, click "Export" and select a destination on your computer. Your image is now saved as a transparent PNG.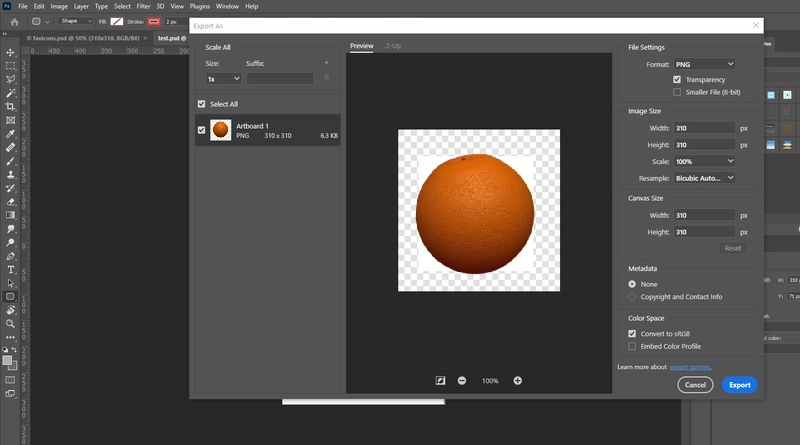
Frequently Asked Questions (FAQs)
Why doesn’t a JPG file support transparency?
JPG is a compressed image format designed primarily for photographs. It does not support transparent pixels because its compression method flattens the image onto a solid background, usually white. This means every pixel must have a color value, leaving no room for see-through areas. If you need transparency, you must convert the JPG to a format that supports alpha channels and transparent layers, such as PNG.

Will converting a JPG to PNG automatically remove the background?
No, converting a JPG to a PNG only changes the file format—it does not remove the background by itself. To achieve a transparent PNG, you must manually or automatically delete the background first using tools like AceThinker Free Online Background Remover with background editing features. Only then can you export or save the image as a transparent PNG.
Does removing a background reduce image quality?
It depends on the method and tool you use. High-quality tools. AceThinker Free Online Background Remover can preserve the original image’s resolution and sharpness. However, over-editing or using overly compressed tools may result in jagged edges, loss of detail, or color distortion. Always zoom in to inspect fine details, such as hair, edges, and shadows, before saving the final PNG.
Conclusion
Convert JPG to PNG with transparent background offers numerous benefits, particularly for individuals involved in design, marketing, or web development. Transparent images allow for flexible layering and seamless integration into various backgrounds, which makes your visuals look cleaner and more professional. Whether you want to remove distracting backgrounds from photos or prepare logos and icons for multiple uses, transparent PNGs provide the polished edge. It is essential to select a conversion method that aligns with your experience and needs. Beginners can rely on simple online tools, while those seeking precision and control may prefer professional software like Adobe Photoshop. Regardless of which method you choose, transparent images enhance the versatility of your work, enabling you to create eye-catching designs that truly stand out. Embracing this format will help your projects look sharp, adaptable, and truly professional.