
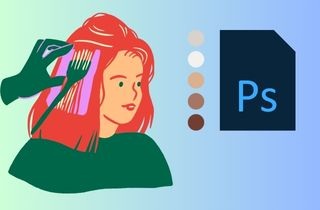
 Changing hair color in photos with Adobe Photoshop is more than just a fun edit—it's a powerful way to visualize new styles, enhance creative projects, or produce professional-quality retouching. Perhaps you're considering a bold new hue, creating standout social media content, or perfecting a magazine cover look. Photoshop makes it all possible. Thanks to its advanced tools like layer masks, adjustment layers, and precise brush controls, you can transform hair color realistically while keeping natural texture, shine, and shadows intact. No wigs, no dye, just digital magic. In this article, we'll break down the most effective methods to change hair color in Photoshop, share essential tips for making it look natural, and reveal creative tricks that bring your edits to life. Whether you're a curious beginner or a seasoned editor, you'll find everything you need to master this eye-catching effect.
Step-by-Step Guide: Change Colour of Hair in Photoshop
Adobe Photoshop is a professional image editing software created by Adobe Inc. It is highly reputed in terms of accuracy, versatility, and artistic manipulation. It is the industry standard for photo editing, graphic design, and digital art, having been published in 1990 and remaining in print since then. Photoshop offers more sophisticated features, including layers, masks, and the ability to make precise adjustments. It enables users to produce realistic and non-destructive edits, such as altering hair color or improving portraits. Photoshop is also compatible with high-resolution editing and detailed retouching, unlike most free or basic editing programs. It is easily integrated with other Adobe Creative Cloud applications. Though associated with a steep learning curve and a subscription fee, its advantages usually surpass the disadvantages for professionals seeking to achieve professional outcomes.
Step 1 Download and Launch Photoshop
Visit the official Adobe site at adobe.com and browse to the page with Photoshop. Click the free trial or buy now button, then follow the instructions to install the Creative Cloud installer. After the installation, log in using your Adobe ID, download Photoshop, and follow the on-screen instructions to complete the installation.
Step 2 Open Image Duplicate Layer
To start Photoshop, begin by selecting an image you want to edit. This is done by clicking on the top menu, opening the file, and then opening it. Once your image has loaded, duplicate the background layer by pressing "Control" or "Command" and the letter J. This ensures that your original photograph is not lost, and you can edit a copy without permanently altering the original.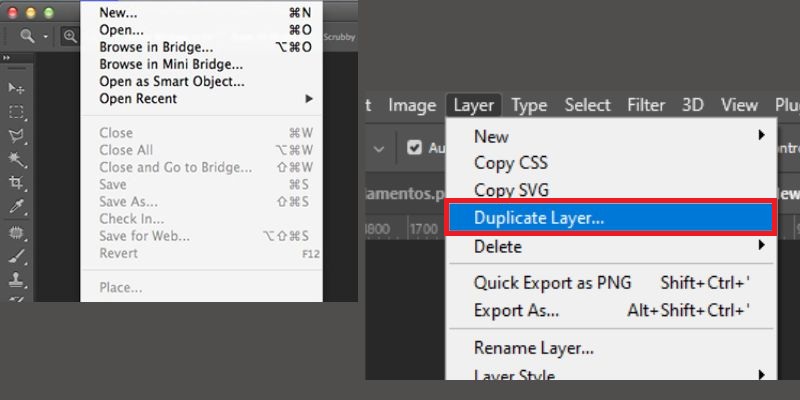
Step 3 Select Hair Refine Mask
Select the "Quick Selection Tool" in the toolbar and drag it over the hair region, and a first selection is made. Next, choose "Select" and then "Select and Mask" to narrow the edges and achieve finer hair strands. Apply the "Refine Edge Brush", adjusting the "Feather and Shift Edge" sliders as needed, and then output the result as a layer mask for better blending.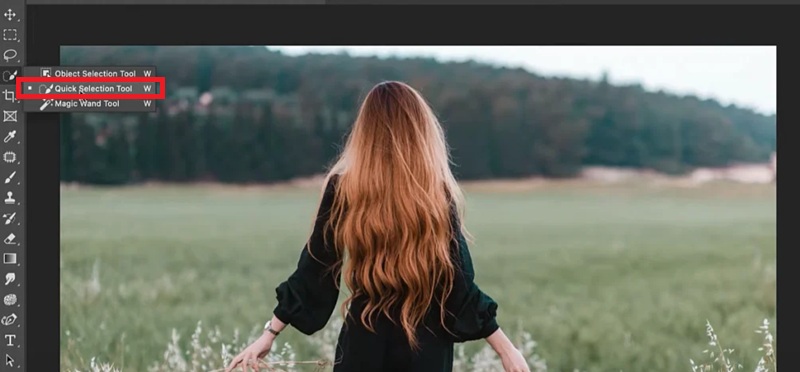
Step 4 Insert Hue Saturation Adjustment Layer
Add a new "Hue Saturation" adjustment layer. This can be done on the Adjustment panel or Layer menu. Under the properties panel, tick the Colorize box and use the Hue, Saturation, and Lightness sliders until you achieve the desired hair color. Right-click the adjustment layer and choose Create Clipping Mask to cut the layer to the masked hair.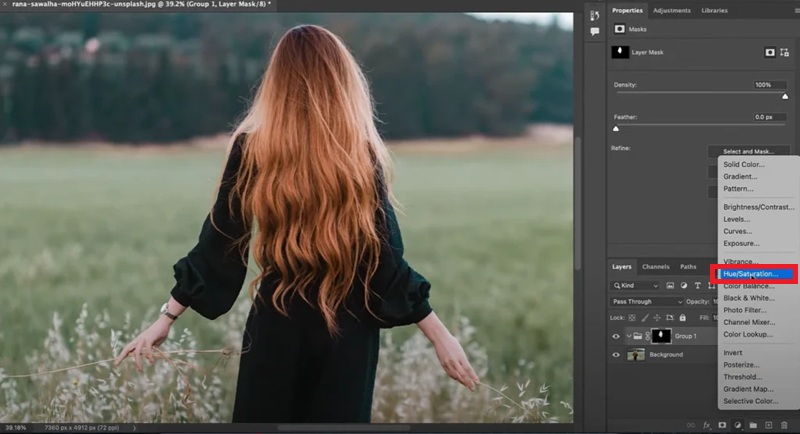
Step 5 Add Effects Color Clean Mask
Change the blending mode of the Hue Saturation layer to Color or Soft Light to enable the new tone to mix with the original lighting. On the layer mask, apply a soft round brush to correct any color spillages or gaps in fine hair. To make it more real, use Curves or Levels clipped layers, and Dodge or Burn to increase highlights or darken shadows.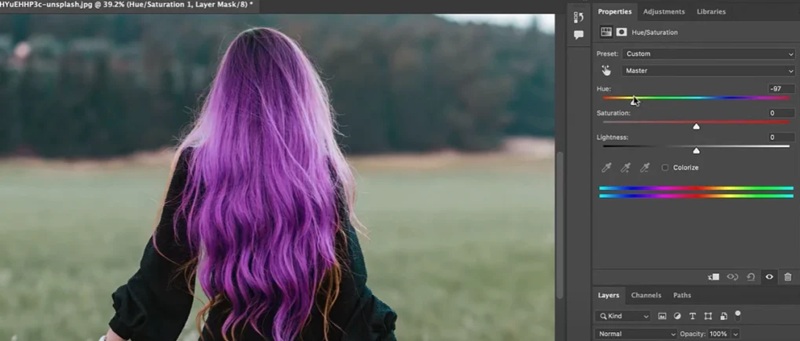
Tips for Achieving Realistic Hair Color Results
Photoshop is not just about changing the hair color - it is about making the color look more natural within the entire picture. The most sophisticated edits can never be sufficient when the color does not match the natural lighting, texture, or background. Four professional tips that you can always keep in mind when editing your work will make it look as natural as it can.
Lighting and Background to Hair Color Match
The direction, color, and strength of the light in your photo must determine your hair color. As an illustration, when your subject is placed in a warm and golden glow, you can add a cool-colored hair colour (icy-blue or ashy-grey) without any alteration, and the result is a clash of visuality. Likewise, colors that are bright in low-light conditions might appear out of place. This creates a balance between the new color and the photo's natural tone.
Keep Natural Appeals Natural
Highly saturated hair colors can appear flat, fake, or cartoonish, especially when applied uniformly. As a matter of fact, hair appears in various colors and shades in terms of thickness, movement, and light. In editing, seek balance: make the image brighter without being too vivid and regulate the saturation with the Hue/Saturation filter or apply the Soft Light blending mode to the image rather than Color to achieve a subtler effect.
Zoom In to Sharpen Appearances and Flyaway Hairs
The hair is one of the most complex elements to work on because it is unnaturally messy and has a fine texture. At 100 per cent and above, you can see and adjust coarse mask edges, colour bleeding, or missing strands. Clean up unwanted parts on the layer mask using a soft, round brush at low opacities. This will bring out the desired parts, including those behind the ears, near the forehead, and the back of the head. Such additional attention will ensure that the color change occurs naturally in the hair.
Compare Before and After Versions Often
The common habit of comparing the edited and original image enables you to identify the overcorrections, omissions, or even the artificial color change at an early stage. Switch your adjustment layers on and off at regular intervals to estimate your progress and check whether the hair retains a realistic look. You may also copy the document or open the original in another tab so that you can compare it side by side. This will not only help you maintain a balanced edit but also increase your confidence in identifying when the transformation is complete and when further editing is necessary.
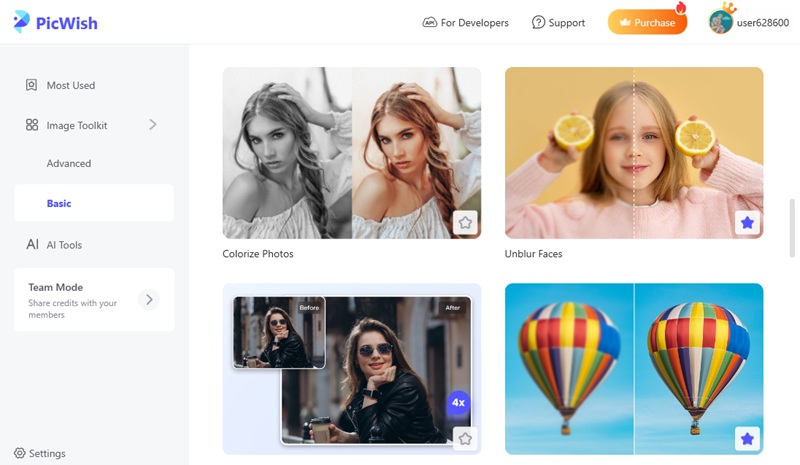
Edit Hair Color using the Best Photoshop Alternative
AceThinker PicWish is a user-friendly photo editing platform based on AI, designed to enhance images quickly and efficiently. It is relatively untechnical to use and so can be a strong competitor to Photoshop. PicWish advocates for a range of photo editing services, including photo retouching, unblurring, AI-based colorization, photo upscaling, and bulk background remover. Its interface design is simple and easy to use, allowing users to change their appearance in seconds with a clear preview outcome. Its separation tools, both in the background and for object separation, are easy to use for hair color edits; that is, the subject can be separated, and color changes can be made. Although the service provides several features as a free service, the complete editing capabilities of the service (HD export, batch editing, and advanced AI) are only accessible with a subscription. Nevertheless, PicWish remains a handy tool for making quality, fast, and simple edits with minimal effort, making it useful for both creative experiments and everyday use.
Try it for Free
- Automatically removes backgrounds from images with precise edge detection.
- Improves image clarity and resolution, supporting upscaling up to 4K.
- Allows users to edit multiple photos simultaneously for a faster workflow.
- Compatible with JPG, PNG, WebP, and other common image file types.
- Erases unwanted objects or blemishes using AI-powered tools.
FAQs
Why would someone want to recolor hair in Photoshop?
Removing and adding color to photos also gives you a chance to play around with hair color, tones, and beauty without the need to make permanent alterations. When planning a new color, it provides an excellent visualization of the potential appearance of the latest color before one goes to a salon or takes a major step. In the case of professionals, including influencers, photographers, and marketers, digital recoloring makes campaign imagery and branding more consistent.
Why is it important to choose a dedicated photo editor for changing hair color?
With a special photo editor, you can be as precise and realistic as possible and have complete control over your edits. It enables you to obtain natural sounds and still retain texture and highlights. Dedicated editors also support high-resolution outputs and edge refinement. They are important when doing fine work, such as coloring individual strands of hair.
How can an edited photo be saved with the most realistic result?
To obtain the most realistic edited photo, it is important to retain the quality of the image and take care of natural textures. Always save in high resolution, and apply non-destructive processes.One should not use excessive saturation or extreme contrast because this may render the edit unnatural. Lastly, save the image in lossless formats such as PNG or high-quality JPEG to have the finer detail, but save the original file to use in the future in case of adjustments or corrections.
Conclusion
To sum up, the ability to edit hair color in Photoshop provides an unmatched level of flexibility and accuracy. It is the ideal tool to improve portraits, create distinctive branding images, or experiment with different creative appearances without making long-term decisions. Using the method of selection, masking, and hue/saturation, users can get professional-level results and feel confident about their photo-editing capabilities. Working using various techniques, mixes, and refinements of edges will enhance precision and assist in realising imaginary concepts. No matter the reason for having it done, whether it is personal work, social media posts, or professional photography, there are endless creative options available as a result of being able to change the color of their hair confidently. Start making these actions with your personal photos today and discover the power of subtle Photoshop changes.