Stream YouTube Videos in VLC Media Player
If you're looking for a manual way on how to play 4K YouTube video in VLC, you can rely on the new update of VLC. The update allows users to stream directly from different video sharing sites. In connection with this, go to the tool's network protocol window and just put the video's link from YouTube. Follow the steps below to learn how to stream on YouTube with VLC Media Player.
Detailed steps below:
Step 1 Download and Install VLC
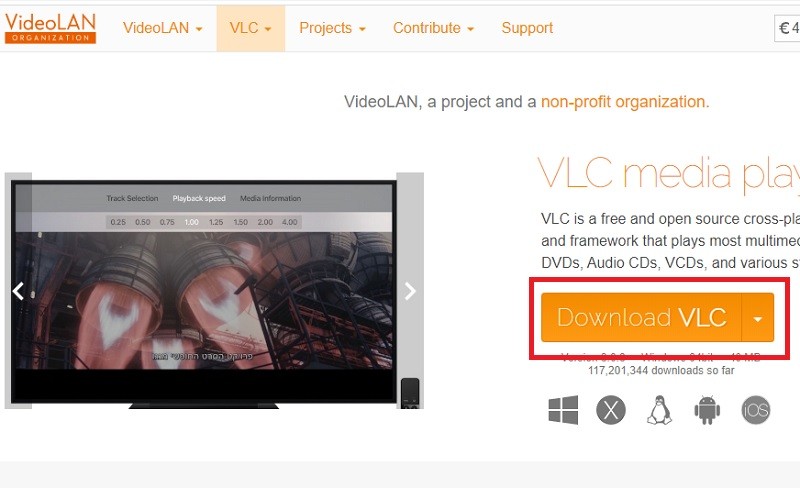
First, launch any web browser to visit the official website of VLC Media Player. From the tool's webpage, click the "Download VLC" button to download the installer and follow the installation guide to save the media player on your computer. After installing, launch the media player to access the main interface of the tool.
Step 2 Look Video from YouTube
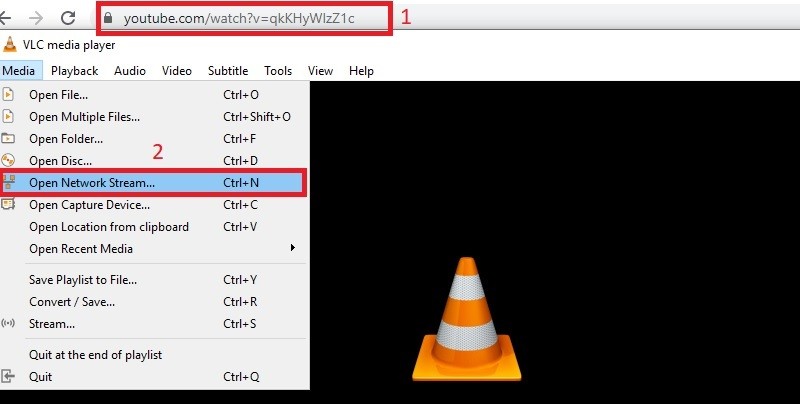
Next, open a new tab to visit video sharing sites like YouTube. Then, play YouTube live stream in VLC that you wish to stream on VLC and copy its URL. From the media player interface, click the "Media" button on the upper left corner of the tool to select the "Open Network Stream" menu.
Step 3 Stream YouTube Video with VLC
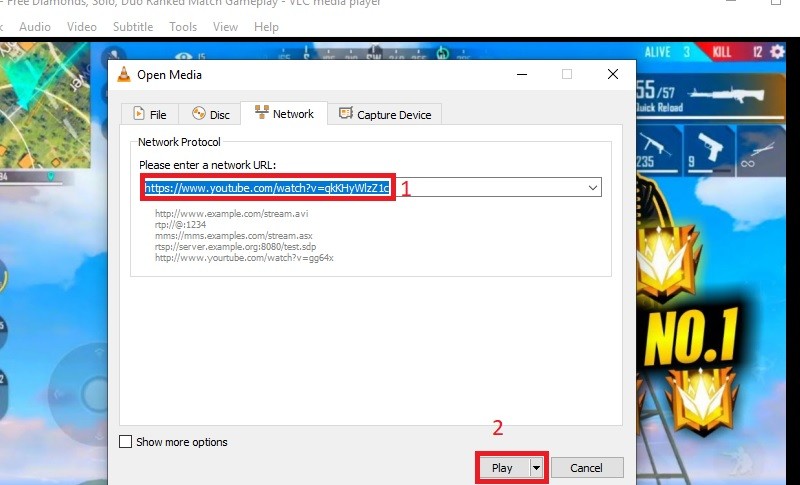
From the Open Network Stream window, paste the URL of the YouTube video on the "Network Protocol" bar. Lastly, click the "Play" button on the lower right corner of the tool to start the streaming YouTube videos.
How to Download YouTube Video
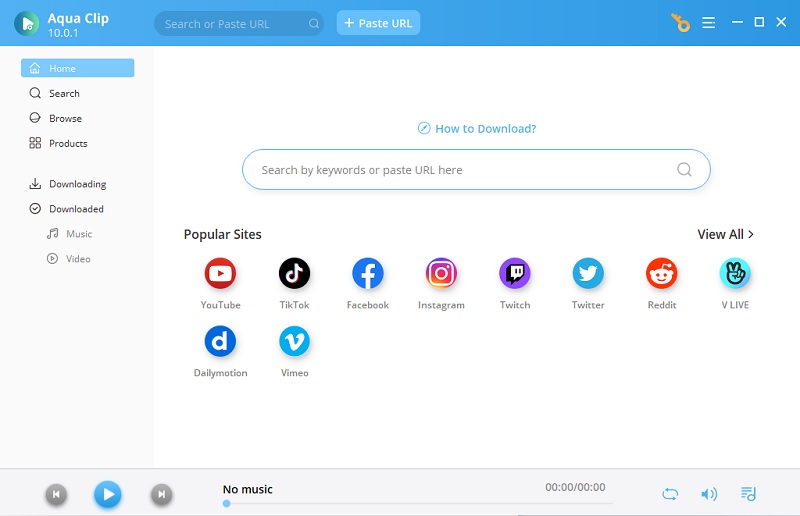
The first thing you need to do before you play a YouTube video on VLC is to download it. That being said, Aqua Clip can help you with that task. This app is an all-in-one downloader that can get multiple YouTube videos at the same time. Besides, this tool supports downloading video quality ranging from 720p, 1080p, 4K, and even 8K resolution. Additionally, it can even grab all videos in an entire YouTube playlist with its “Batch Downloading” feature. To learn more about this excellent solution, follow the steps provided below.
Try It Free
Step 1 Download and Install the Software
First, choose the compatible "Download" button above to acquire the Aqua Clip's installer. Then, open it and do the set-up process to install the tool on your Windows computer. Once done, launch it to access the main interface.
Step 2 Download YouTube Video
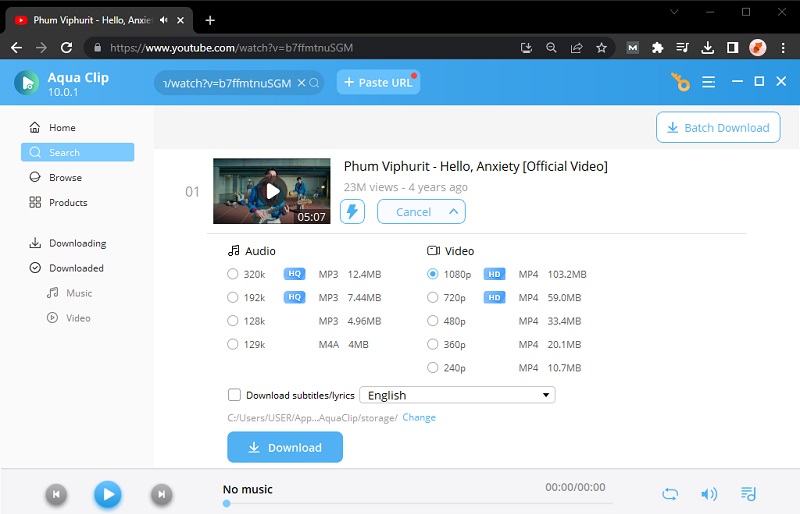
Next, go to YouTube, and get video URL that you want to download. Then, go into the search bar of Aqua Clip and paste it to start analyzing the video. Afterward, hit the “More” button to open the drop-down menu and select the preferred quality and format. Lastly, click the “Download” to start saving the video to your computer.
Step 3 Watch YouTube Video on VLC
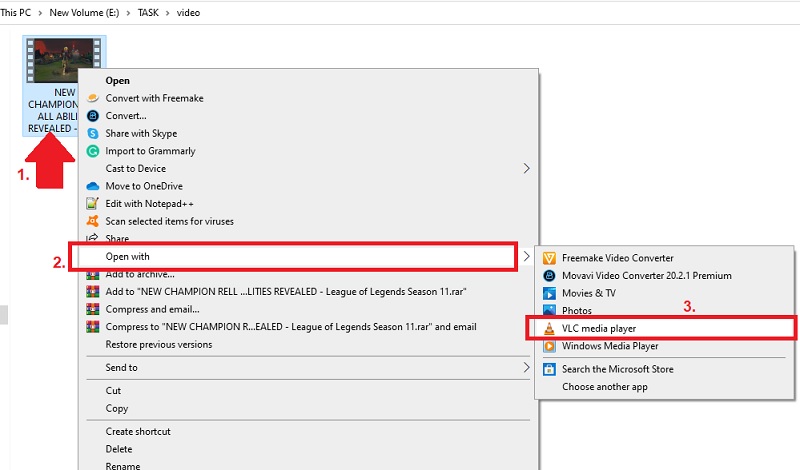
When finished, go to the "Downloaded" section and right-click on the video, and choose "Open File Location". From there, right-click on the video file again and select "Open With" and choose VLC. It will play the video on the VLC automatically.
Troubleshooting VLC Not Playing YouTube Video
There are some instances when you might experience errors in streaming YouTube with VLC. For example, if you have encountered problems like videos from YouTube not working through VLC and some videos crashing. Then you might take a look at the steps to fix VLC player and the YouTube error. In this case, we will show you some tips on how to resolve VLC YouTube not working. After that, follow the detailed guide below to know how to play YouTube videos on VLC.
1. Change the Value of File Caching of the tool
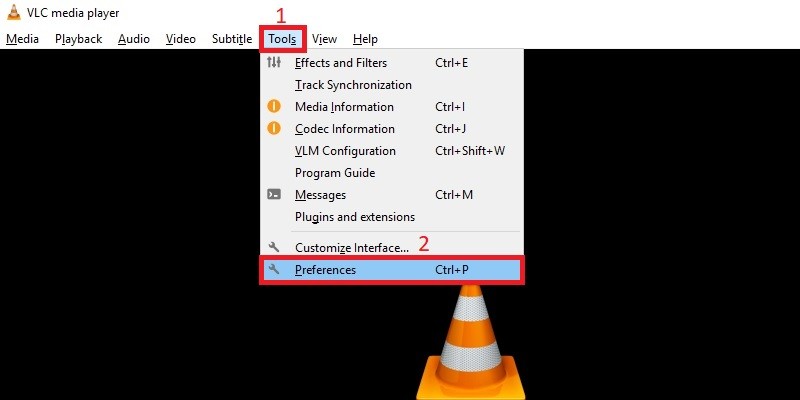
First, on the main interface of VLC. Click the "Tools" option, then click "Preferences" to go to the media player's settings window.
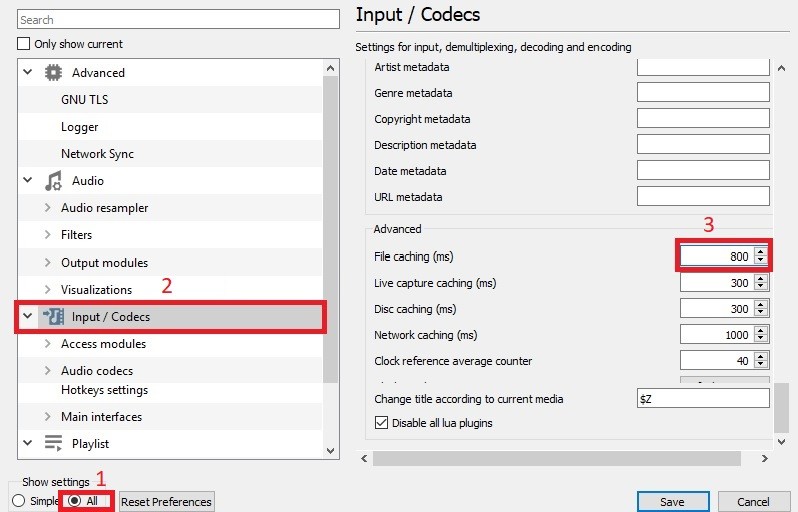
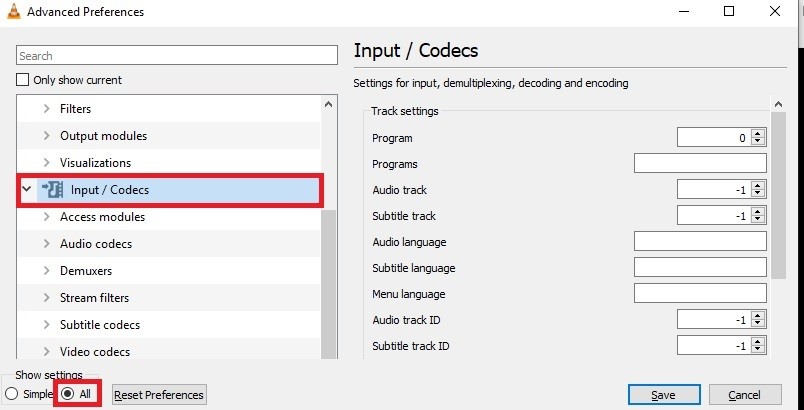
On the preference settings window, click the "All" button on the lower-left corner to preview the advanced settings. Next, click the "Input/Codecs" menu and find the "File Caching" option on the right side of the window and set it to 800. Once done, click the "Save" button to keep the changes you made.
2. Disable Hardware-accelerated decoding
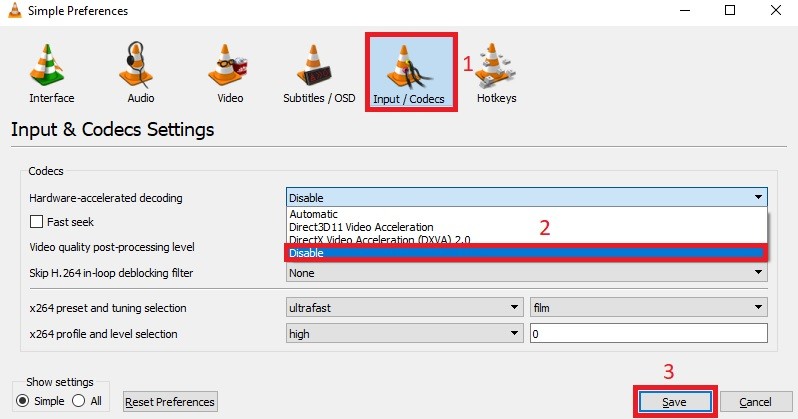
Next, from the settings window, go to the "Input/Codecs" menu of the media player. From here, click the "Dropdown" menu to expand the list and choose "Disable." Lastly, click "Save" to save changes.
Turning off hardware-accelerated decoding in VLC resolves this issue by relying on software decoding. This can ensure compatibility with YouTube's video formats.
3. Change the Threading Value of Media Player
From the lower-left corner of the Settings window, click the “All” button to see the advanced settings and go to the “Input/ Codecs” menu.
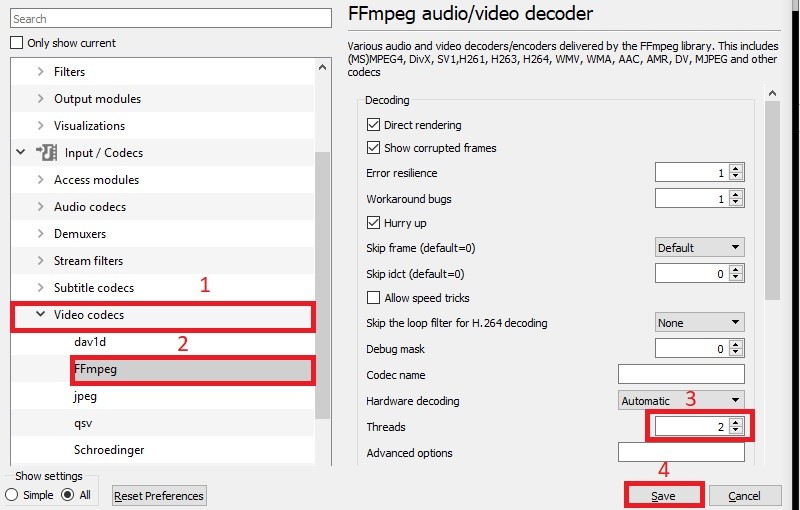
Next, click "Video Codecs" to expand the option list of the tool. Here, click "FFmpeg" and change the value of the "Threads" option into 2. When the set-up is completed, click "Save" to keep the changes.
