
 Old photos tend to fade, discolour, or deteriorate physically with time. The pigments are broken down by sunlight, and changes in humidity and temperature promote the growth of molds and the rotting of paper. Photos stored in acidic albums or in moist environments are likely to yellow, fade, and develop surface cracks. Gradually, these also diminish the sharpness and tonal balance that once made the images memorable. Adobe Photoshop can be used to digitize worn-out or decayed photographs. The Clone Stamp, the Healing Brush, and Adjustment Layers also allow you to fix blemishes, enhance color, and increase contrast without altering the original print. The easy-to-follow design and user-friendly nature of Photoshop make it effective for both beginners and professional restorers. The article will guide you through the process of how to restore old photos in Photoshop and other enhancement tools, step by step. It will revive your favorite memories.
Things Your Need to Prepare Your Photo
Scan the old photo at high resolution
Begin by thoroughly cleaning the photo with a soft, lint-free cloth or an anti-static brush to remove dust and particles. Lay the photo flat on your scanner and select a resolution of at least 600 dpi to capture fine details, so that not even the smallest scratches or textures are lost. Scan it in the highest-quality lossless format, such as TIFF or PSD, to maintain the best possible quality, and turn off any automatic enhancement or color-correction options in the scanner preferences to ensure an exact digital copy of the photograph. This high-resolution scan will be a strong basis for detailed restoration.
Open the scanned image in Photoshop
After the scan is complete, open Photoshop and open your scanned file. Test the picture for clarity, correct orientation, and overall color balance. Ensure that all photos are aimed at and that the scan includes a small border around the edges in case they are cropped and straightened later. Here, you may also set up your own workspace with necessary panels such as Layers, History, and Properties, which will be useful during restoration.
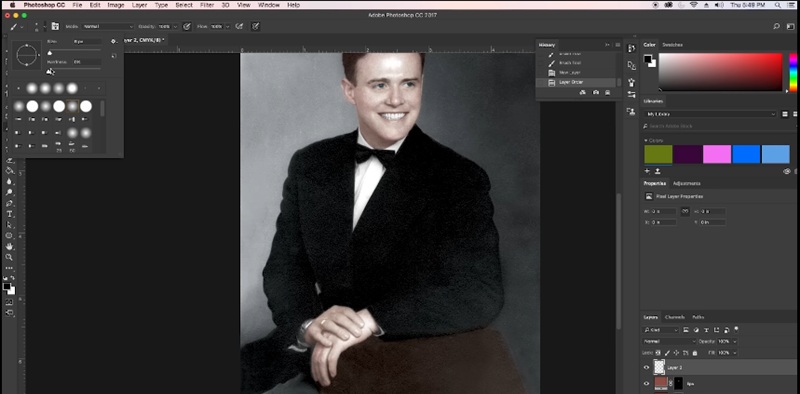
Duplicate the background layer to work non-destructively
In Photoshop, select the Background layer in the Layers panel, right-click it, and choose Duplicate Layer (or Ctrl/Cmd + J). It ensures the original scanned image is not altered, allowing you to experiment and make changes with ease. Label the copy layer with a name like Restoration_Work to make your project easier to follow. Using this copy allows you to make edits, corrections, and improvements without permanently modifying the original scan, which is necessary for a professional, controlled process of restoring a work.
Step-by-Step: Restore Old Photos in Photoshop
Adobe Photoshop is a powerful software tool that can fix old or damaged photos and offers a wide range of features to address flaws and restore lost memories. Its hi-tech software enables users to eliminate scratches, tears, and other blemishes, without losing the photo's original texture and tonal balance. The color-correction feature of Photoshop can be used to restore faded colors or improve the contrast of black-and-white images. This makes them look more regardless of your level of expertise, whether amateur or professional. Photoshop offers some of the most user-friendly features. It includes Clone Stamp, the Healing Brush, the Spot Healing Brush, and Adjustment Layers, which have enabled you to perform both minor and more meticulous restoration work. Besides, the non-destructive workflow in Photoshop also means your original image can be preserved, and you can edit and fine-tune your changes.
Step 1 Assess the Tool to Repair Photo
Look at the photo carefully before making any edits to determine what must be done, including scratches, tears, stains, or fading. Choose the tools that will be most useful in repairing each kind of damage, and think of the sequence in which repairs will be done to ensure a logical sequence of activities. This planning level helps prevent unnecessary mistakes and allows you approach the restoration systematically.
Step 2 Remove Scratches and Blemishes
Use the Spot Healing Brush Tool for small scratches and dust spots, which automatically blends the affected area with surrounding pixels. For larger or more complex areas, the Clone Stamp Tool lets you copy pixels from an intact part of the image and carefully paint over damaged areas. Work in small sections, zooming in to maintain precision, and remember to adjust brush size and hardness for natural results.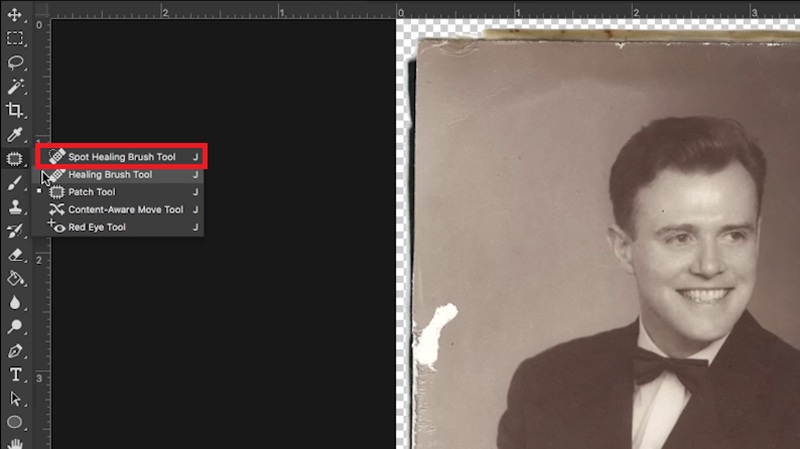
Step 3 Repair Tears and Missing Sections
For tears, creases, or missing parts of the photo, use the Patch Tool or carefully clone nearby areas to reconstruct damaged sections. Pay attention to texture and lighting to ensure the repaired area blends seamlessly with the rest of the image. This step often requires patience and multiple attempts, but a careful approach will produce a professional-looking result.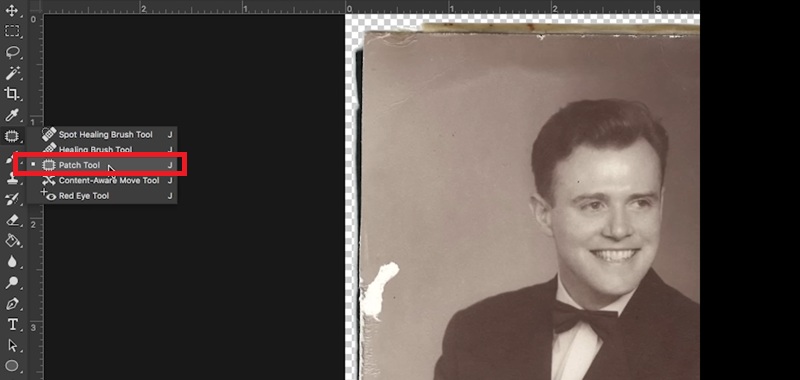
Step 4 Correct Color and Contrast
Use Adjustment Layers such as Levels, Curves, or Hue/Saturation to correct faded colors, adjust brightness, and restore natural contrast. For black-and-white photos, carefully adjust tonal ranges to bring out details without overexposing highlights or losing shadow information. Layer masks can help you apply corrections selectively to specific areas, preserving the photo's authenticity.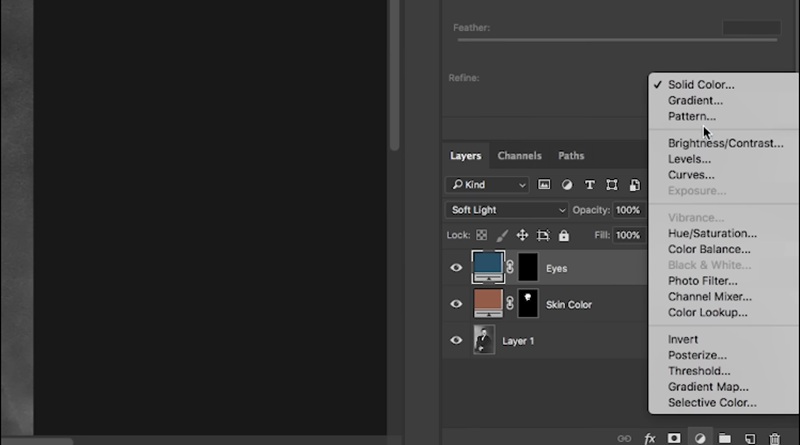
Step 5 Final Touch-Ups and Sharpening
After major repairs, inspect the photo at 100% zoom to identify any remaining imperfections. Apply subtle sharpening to enhance details, and use Dodge and Burn tools to adjust highlights and shadows for a more realistic depth. Finally, save your work as a layered PSD for future edits and export a high-quality copy in your preferred format, preserving both the restoration and the original scan.
Restore Old Photos by Using an Online Upscaling Tool
Even when your restored picture remains soft, grainy, or lacks sharp details, it can be sharpened with a more advanced AI program, such as AceThinker Photo Enhancer, which can significantly improve the result. This photo-enhancing software is based on an intelligent deep-learning algorithm that can reconstruct fine textures, sharpen facial features, and smooth coarse pixels in an image without altering the natural appearance of the original picture. Depending on the quality of your photo, you can select between smoothing effects or very sharp detailing, according to your preferences, which provides even clarity and a clean texture without artificial over-processing. Another feature of the tool is the ability to scale up to 2x, 4x, 8x, and 16x enlargement, which is ideal for low-resolution scans or small vintage prints that require expansion to frame or store information. Upon processing, the images are provided in high-definition JPG format, which makes them look more professional, realistic, and printable, without affecting the essence of the original photo.
Step 1 Upload Your Restored Photo
Open your browser and go to the AceThinker Photo Enhancer webpage. Click Upload Image, then select your restored photo file, preferably a TIFF or a high-quality JPEG exported from Photoshop. The tool supports most image formats and processes them securely in the cloud.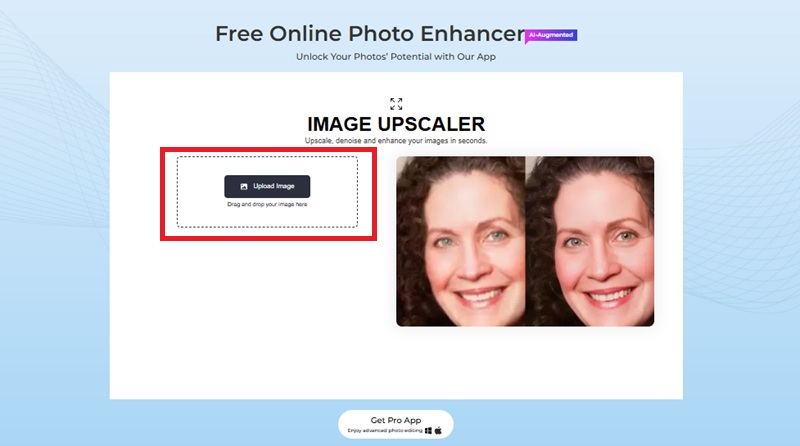
Step 2 Choose Enhancement and Upscale
After uploading, select the enhancement or AI Upscale option to improve resolution. You can choose a scaling factor, such as 2× or 4×, depending on how much detail you want to recover. The AI system automatically enhances sharpness, adjusts tones, and restores lost details for clearer, more vibrant results.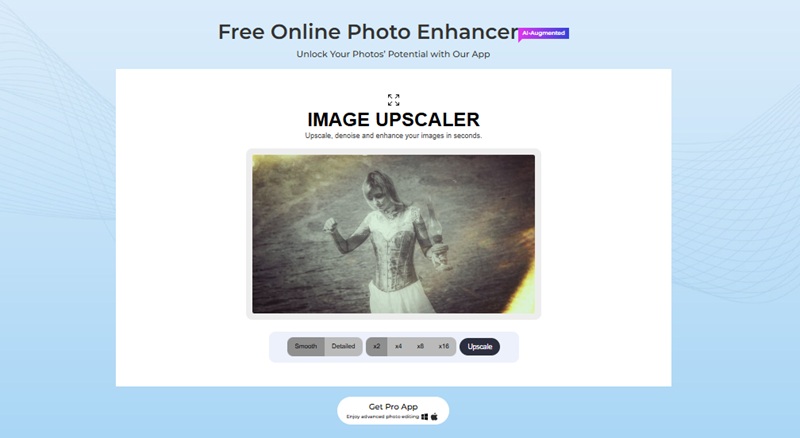
Step 3 Download the Upscaled Image
Once the processing is complete, preview the enhanced Image to compare it with your original version. If you’re satisfied, click Download to save the improved photo. For the best finish, reopen the upscaled version in Photoshop and apply subtle final touches, like light sharpening or contrast adjustments—before saving your final, high-resolution restored photo.
Remove Unwanted Objects on Restored Photos
After taking the time to repair, color-correct, and enhance the image, the final step in achieving a perfect restoration is to eliminate any distractions. Old photos often have marks, creases, or background debris that were captured by accident. Someone might have strayed into the shot, a shadow might have been cast over a face, or dust and stains may be left upon after a human cleaning. With a contemporary AI object remover, the required elements are removed, leaving a clean and elegant look without compromising image quality. With a precision brush tool for manual selection and a typing-based removal option that allows you to type in what you want removed, you have full control over the process. The AI immediately fills the space with complementary elements. Because it is generated quickly, your output appears smooth, natural, and impeccable a few seconds later, as though those elements were not there to begin with.
Step 1 Upload the Restored Photo
Begin by exporting your restored photo from Photoshop and uploading it to the AI object-removal tool. You can either click Upload Image or use the drag-and-drop feature to bring your file into the workspace. For the best results, always use the highest-resolution version of your photo so the AI has maximum detail to work with.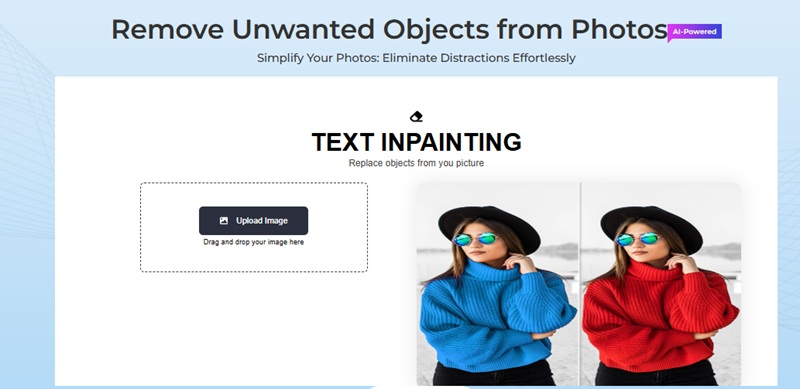
Step 2 Select the Object and Generate
Once your Image is uploaded, use the Brush tool to manually highlight the unwanted object or area you want to remove. For additional precision, you can also use the Prompt field to describe the object or distraction, guiding the AI on exactly what needs to be eliminated. After marking the unwanted area and entering the prompt, click the Generate button to let the AI process the Image.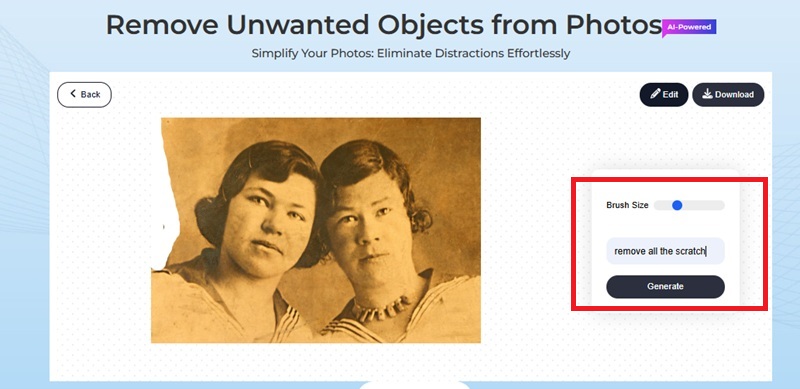
Step 3 Download the Final Image
After uploading your Image, you can also manually highlight the undesired object or area that you wish to remove using the Brush tool. To be more specific, the Prompt field is also available to tell the object or distraction to the AI to ensure that they know what, in particular, should be removed. Once the unwanted area has been marked and the prompt typed, press the Generate/Remove button to have the Image processed by the AI.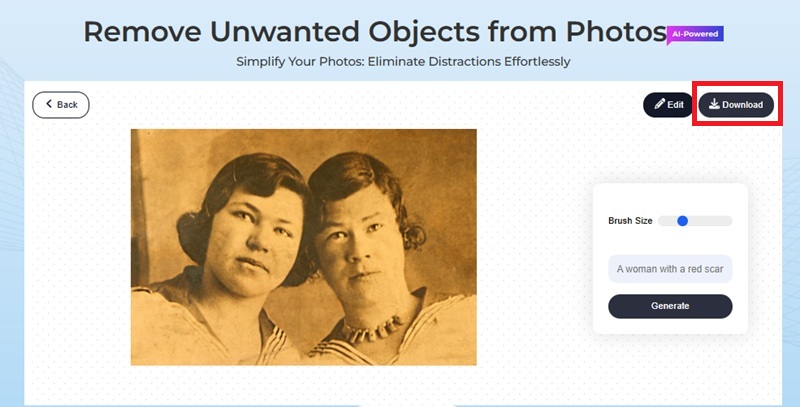
Conclusion
All the tools and techniques in Photoshop make it possible to restore the lives of even the most seriously faded, scratched, or damaged photographs with amazing clarity and emotional impact. Using a blend of cautious healing, cloning, fixations of color, and improvements of details, you can revive the priceless memories that might have seemed irreparable at first. The act of restoration is not merely technical—it is an art and craft that requires patience, accuracy, and a keen eye for detail. Any change is important, and the time spent perfecting every detail will help ensure that the final picture is natural and consistent with its own nature. Through practice, persistence, and careful editing, you can transform tired photos into immaculate treasures that can be shared, printed, and enjoyed by generations to come.