
How to Use AceThinker Fone Keeper
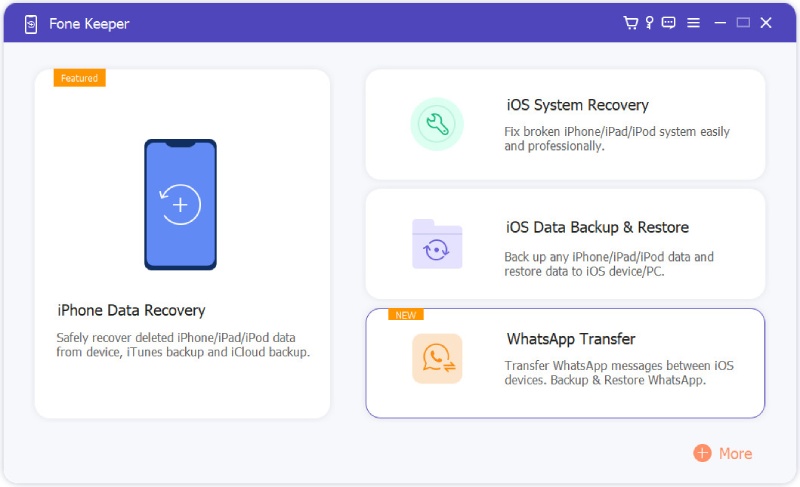
AceThinker Fone Keeper is a professional and all-in-one tool that lets you easily recover lost and deleted data from iPhone/iPad/iPod or iTunes/iCloud backup files. You can also use it to fix iPhone not working normally problems, backup iOS data, and transfer WhatsApp data among iOS devices and computer. Download the software and follow the detailed steps below to use all the functions.Register the Program
On the main interface's upper right section, click on "Register" for the registration window to open. You can also choose the option which says "Register" from the Help menu. As you see, you can select to buy and register which tool you need to use.
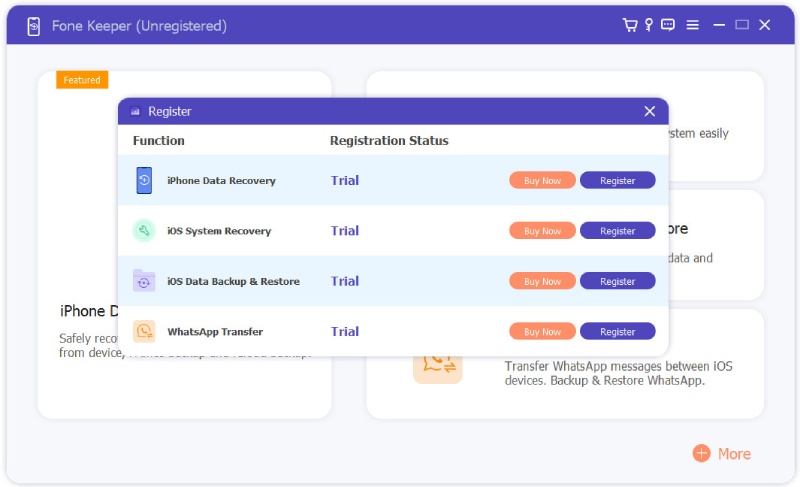
Note that once it has been successfully purchased, the registration code is going to be emailed to the email address which you have submitted in the form.
Email Address: This is the email address that you have filled in while completing the form.
Registration code: This is also known as Activation Code. It is a series of different characters which will be sent to your email address. Registration code is only sent after you have made the purchase.
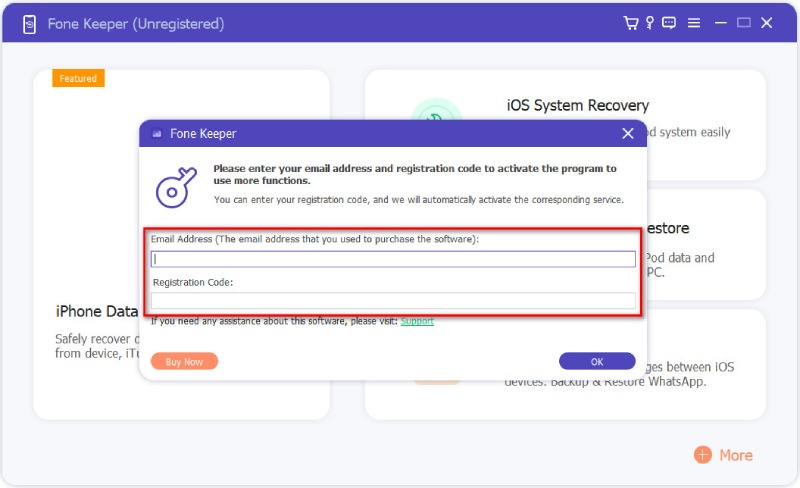
After the correct email address and registration code are inputted, you can hit the "OK" button to complete the registration.
Set Preferences
Click on Menu > Preferences to open the Preferences window, where you can make several adjustments for optimum performance.
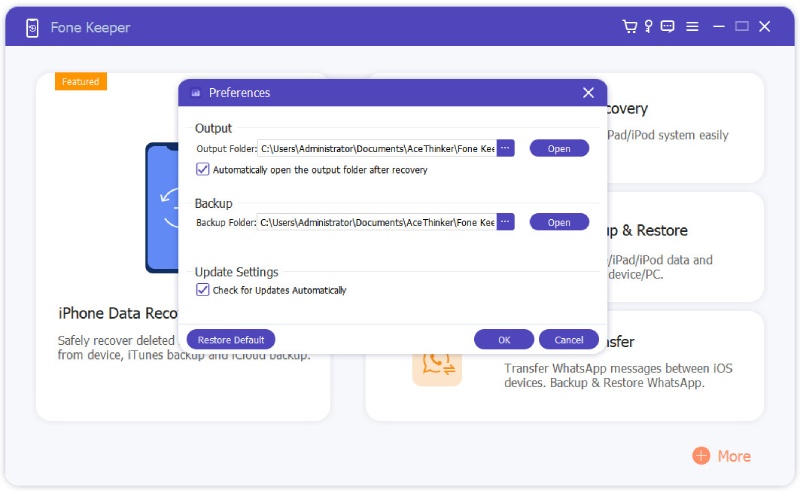
Output and Backup: A storage location will have to be selected for the output folder. Ensure that the "Automatically open output folder after recovery" is checked as shown above.
Updating Settings: It is possible for this app to help you check for updates automatically. In this case, you can configure such a process to be done at different time intervals like monthly, weekly, or even daily. It is also possible to search for such updates manually.
Update and Uninstall
1 Update to the Lastest Version
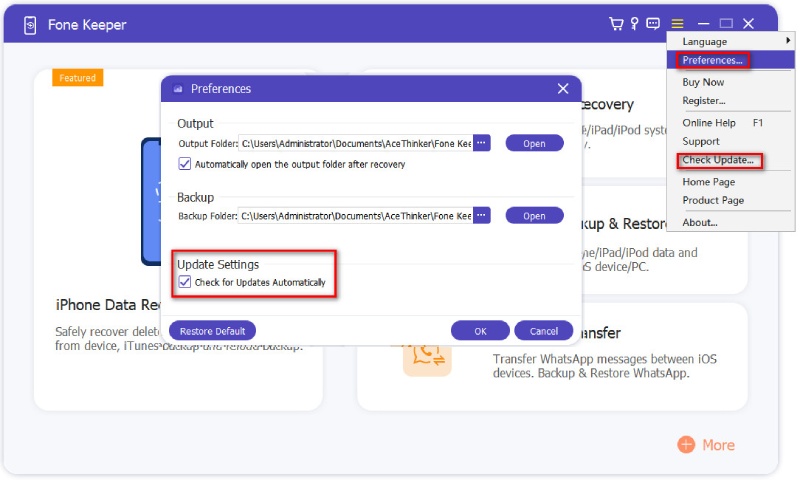
To check for the latest software, you can either click Menu > Check Update to manually check for updates. Or go to Preferences and select Check for Updates Automatically under Update Settings. If there is any update, you will be notified. In order to download as well as install the most recent installation file, locate "Update Now" and click on it.
2 Uninstall the Software
In case you don't want this application on your system again due to some reasons, the process is quite simple and straightforward. Follow the methods below to get this done.
Method 1: Click on the Start menu on Windows. Look for "All Programs". Locate Fone Keeper. After that, "Uninstall" should be selected.
Method 2:
Windows XP: Click on Start > Settings > Control Panel > Add or Uninstall Programs > Fone Keeper > Uninstall
Windows 7: Click on Start > Control Panel > Programs and Features > Fone Keeper > Uninstall
Windows 8: Click on Settings > Control Panel > Programs > Fone Keeper > Uninstall
AceThinker Fone Keeper - iPhone Data Recovery User Guide
iPhone Data Recovery offers 3 modes for you to recover lost or deleted files from all popular iPhone, iPad and iPod touch models.
1 Recover from iOS Devices
AceThinker Fone Keeper - iPhone Data Recovery has the potential to recover files that have been deleted from your device like WhatsApp, Safari bookmarks, reminders, notes, calendar call history, messages, contacts, and many others. Apart from that, it can also recognize and scan other files on devices like Photo Stream, Photo Library, Camera Roll, Message Attachments, App Videos, App Photos, Voicemail, Voice Memos, app audios, and many more.
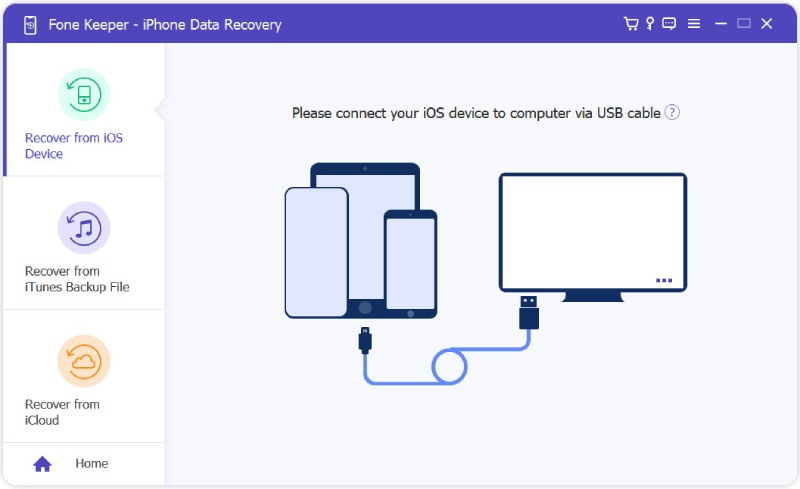
Step 1 Run the software and locate the "Recover from iOS Device" option and have it selected. At this point, your device should be connected. Once the device is detected, its name will be shown.
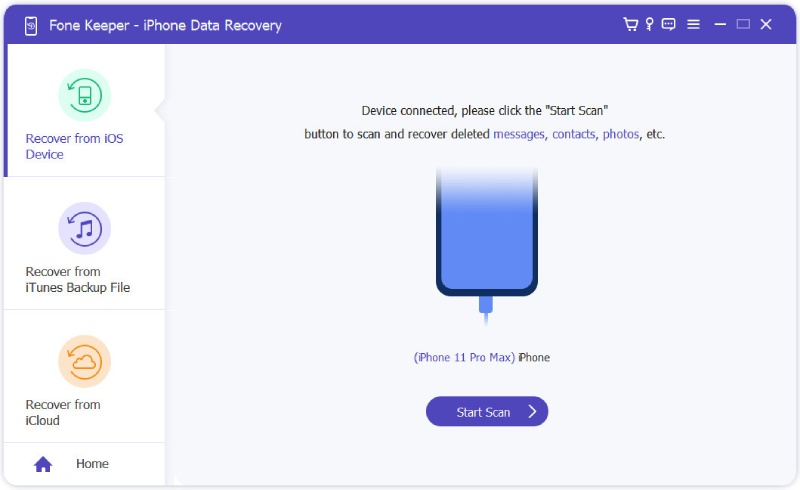
Step 2 To proceed, you will need to click on the button which says "Start Scan". iPhone Data Recovery is going to commence the process of having your device scanned for deleted files.
Step 3 In order to get back lost files, click on the "Recover" button. This will ensure that your data is saved in your system.
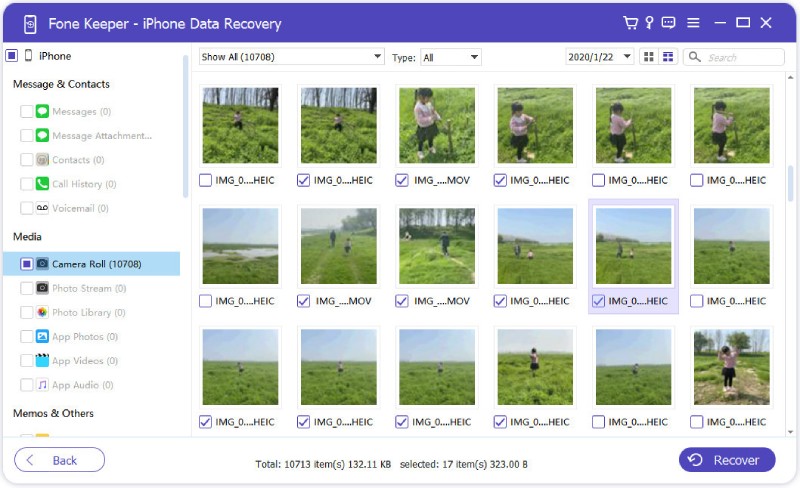
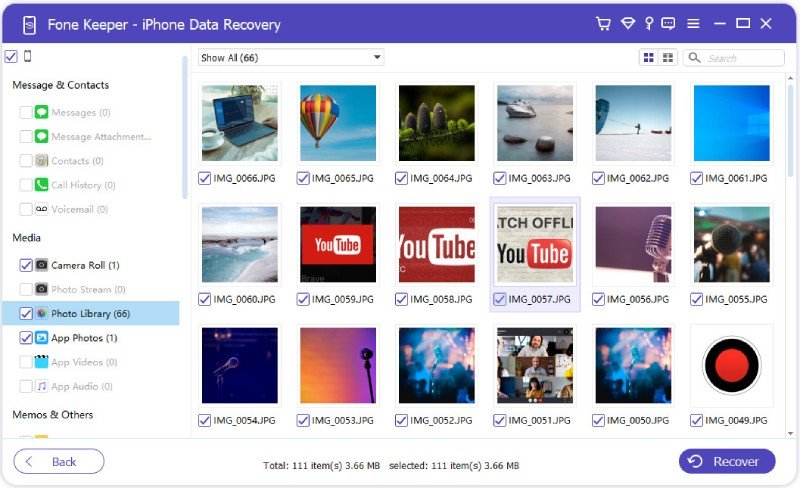
It is possible for your files to be previewed after the scanning process is complete. This will enable you to know files that are worth recovering. On the right part of the software, you will notice that there are different categories of files/data. These could be messages, WhatsApp, call history, and others. Whenever you click on any of these categories, the content that concerns it will be displayed. It is possible for photos to be viewed and rotated.
Important Tips:
- Ensure that the latest version of iTunes has been installed on your PC.
- Avoid opening iTunes whenever you are recovering data. This can lead to your deleted data being overwritten.
- Avoid using such devices whenever files are lost. Apart from experiencing the problem of overwritten data, the software may not be very accurate.
- If you are using iOS 7, Trust should be pressed when it is first connected. To recover lost data, the instructions on the interface should be followed.
- In a situation whereby you are using a device that hasn’t been synced with iTunes, the passcode will be required. It is also the same for password-protected devices. For your device to be unlocked, the passcode should be entered. After that, locate the Start Scan button and click on it.
- For data such as Safari bookmarks, WhatsApp, Reminders, Notes, Calendar, Call History, and Contacts, existing and deleted data will have different colors. You can also click on the option which says "Display only deleted items". This will ensure that only deleted data is displayed.
2 Recover from iTunes Backup File
AceThinker Fone Keeper - iPhone Data Recovery can also help when it comes to recovering lost data from the backup file of iTunes. These could be WhatsApp, Safari Bookmark, Reminders, Notes, Calendar, Call History, Messages, and contacts. It can also scan as well as recognize files in Photo Library, App Audio, WhatsApp attachment, Voice Memos, Voicemail, Message Attachments, and Photo Stream.
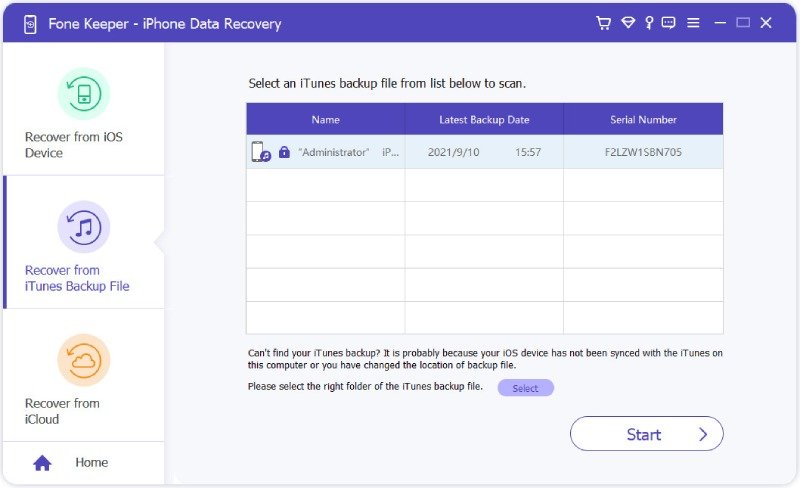
Step 1 Run the application and locate the option which says "Recover iTunes From Backup File" as shown below. Every iTunes backup file will be listed in the right section. You will not just find the device's information. Also, its latest backup date will be displayed. The backup file which you would like to recover from should be selected. After that, hit the Start Scan. This will enable the scanning mode to commence.
Step 2 After the process is complete, data will be displayed. These can be previewed before finally recovered. The left side of the software has categories of data. In other words, files are grouped according to their different categories. If you want to preview any photo, just double-click on it.
Step 3 Files that you would like to retrieve should be selected. After that, the "Recover" button should be clicked on. This will save such recovered data in your local disc.
Important Tips:
- Ensure to install the latest version of iTunes on your system.
- While trying to recover data, ensure that iTunes is not opened. This can cause overwriting of data.
- In a situation whereby the iOS device's backup file has been shown in the list area (for files). It could be due to the fact that your device is yet to be synced with iTunes. Before retrying, ensure to do iTunes backup.
- There are times when the backup list section may show a lock mark. This simply implies that you have an encrypted iTunes backup. A password will be required to gain access before the scanning can commence.
- Scanned results include existing and deleted data. These are differentiated by colors though. However, if you want only deleted items to show, click on Only Display Deleted Items.
3 Recover from iCloud
With AceThinker Fone Keeper - iPhone Data Recovery, it is also very possible for lost data to be recovered from an iCloud backup file. These could be Safari bookmark, Reminders, Notes, Calendar, Call History, Messages, and contacts. Backup file data can also be scanned and recognized like message attachments, App Audio, App Videos, App Photos, Camera Roll, Voicemail and Voice Memos.
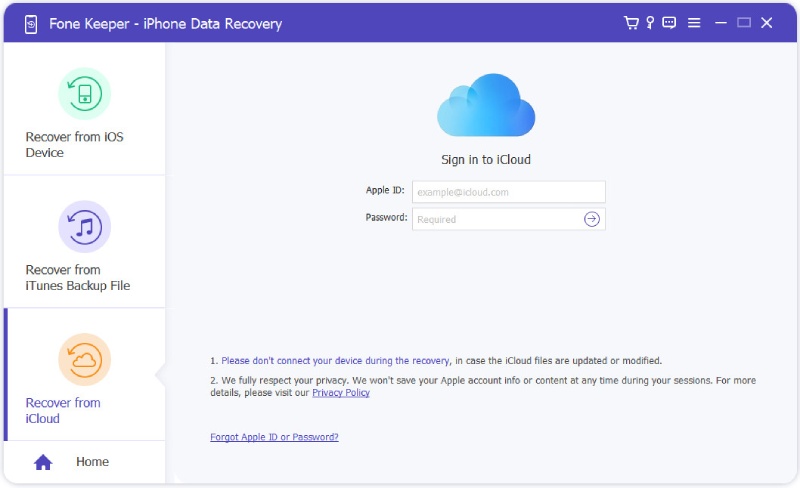
Step 1 Run the application and then select the mode which says "Recover From iCloud". Now, sign in to your account on iCloud.
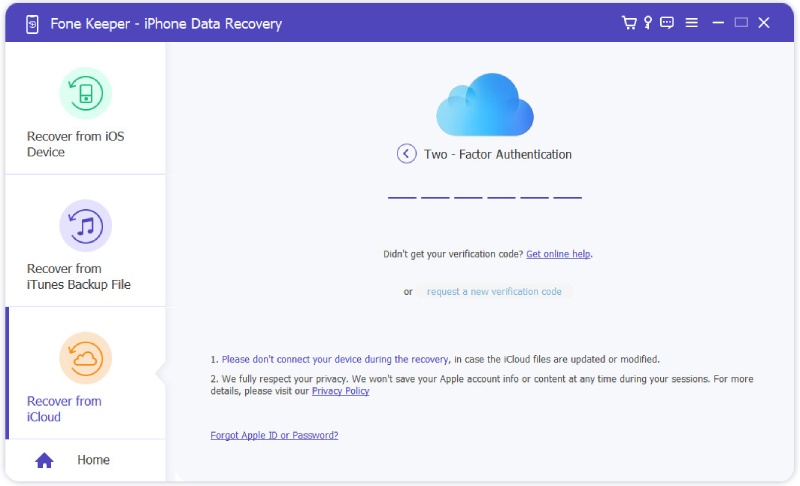
Once two-factor authentication has been enabled, you need to tap the Trust button. You will need to do this after signing into your account with iCloud. When it has been done, a verification code will be sent to you by Apple. To proceed with Fone Keeper, you will need to input the code as displayed below.
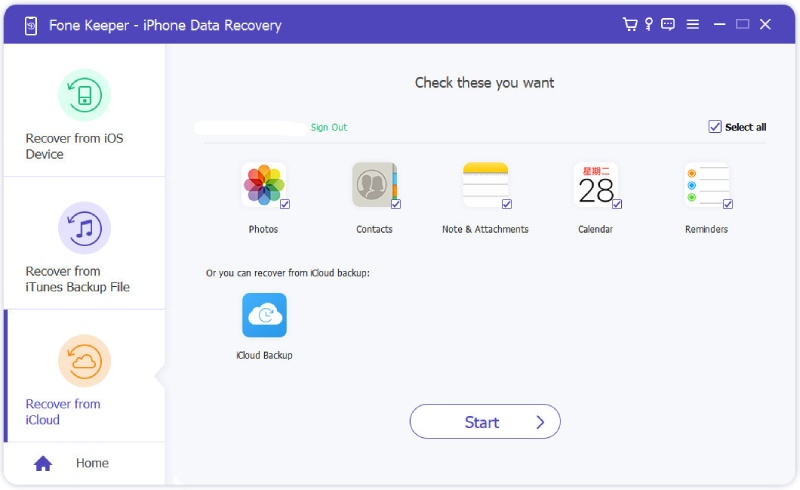
Step 2 There are two ways or methods that you can use to scan iCloud.
1. The data type should be selected from Photos, calendars, Reminders, Notes & Attachments, and Contacts. Now, click on Start for the process of scanning iCloud data to commence.
When the scanning is complete, you can click on any of the categories on the left side. Before hitting the Recover button, select the items that need to be recovered. Once you click Recover, the data will be saved to your local disc.
2. This method involves scanning and recovering the data from the backup file in iCloud. Click on the iCloud Backup option.
All the backup files on iCloud that are related to your iCloud account will be displayed. These have been marked using the iOS device name as well as a backup date.
Select the one you need and then hit the Download button.
Step 3 A popup window is going to appear. The data you would like to have restored should be selected from iCloud backup. After that, click on Next. The iCloud backup file is going to be scanned by Fone Keeper immediately.
Step 4 After the scanning process is complete, you will need to have the data type clicked on from the left side. With this, you can see more details about the data that has been scanned. For any item or file that you would like to have restored, click on the checkbox. After that, hit the Recover button below. With this, deleted iCloud backup data will be restored to your system.
Step 5 Scan results can be previewed after the process is complete. On the left side is the category as well as the amount (number) of data. Clicking on any of these will enable you to view the exact content that belongs to such a category on the right. To view a photo, double-click on it.
Step 6 After selecting the files you would like to retrieve, hit the Recover button for the data to be saved to your local disc.
Important Tips:
- Ensure that the latest version of iTunes has been installed on your PC.
- Do not connect your device while the recovery process is going on. This will prevent the modification or updating of the backup files.
- In case you can't seem to remember your Apple password or ID, hit the option which says “Forgot Apple ID or Password”. This can be found at the bottom of Fone Keeper.
AceThinker Fone Keeper - iOS System Recovery User Guide
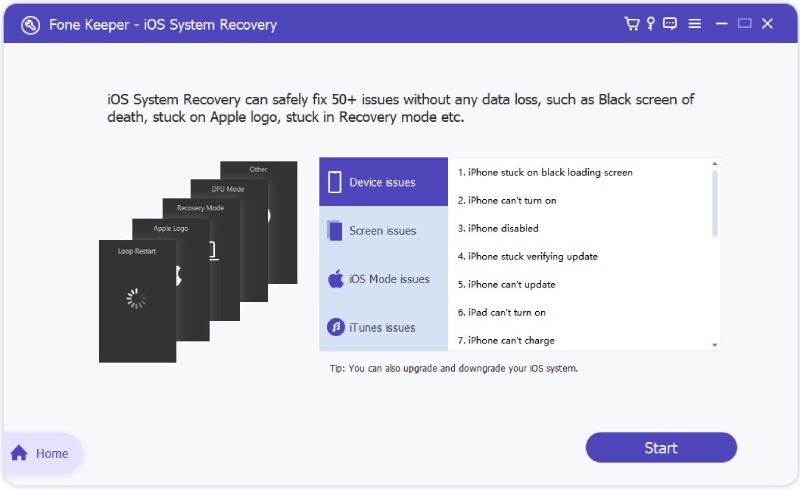
In a situation whereby your iOS device seems to be stuck in white screen death, DFU Mode, recovery mode, or any other problem, the perfect solution could be AceThinker iOS System Recovery. When it comes to solving different iOS system problems, it has always proven to be very effective. Its goal is to ensure that your iPod/iPad/iPhone is working as expected. Using this software enables you to take care of any problem via the click of few buttons. Don’t worry about any possible data loss since such will be completely nonexistent. This software can help in many scenarios like:
- iPod/iPad/iPhone is stuck in recovery mode or iTunes logo
- iPhone/iPod/ iPad cannot exit DFU mode
- iPhone/iPod/ iPad experiences death screen or Apple logo screen turning white
- iPhone/iPod/ iPad screen turns blue, red or black
- iPhone/iPod/ iPad is restarting over and over again
- iPhone/iPod/ iPad refuses to slide to power off or unlock
- and many other issues
Step 1 iOS System Recovery should be launched on your system. On the software interface, iOS System Recovery should be chosen.

Step 2 With the aid of a USB cable, get your device connected to the system. Now, hit Start for the process to commence.
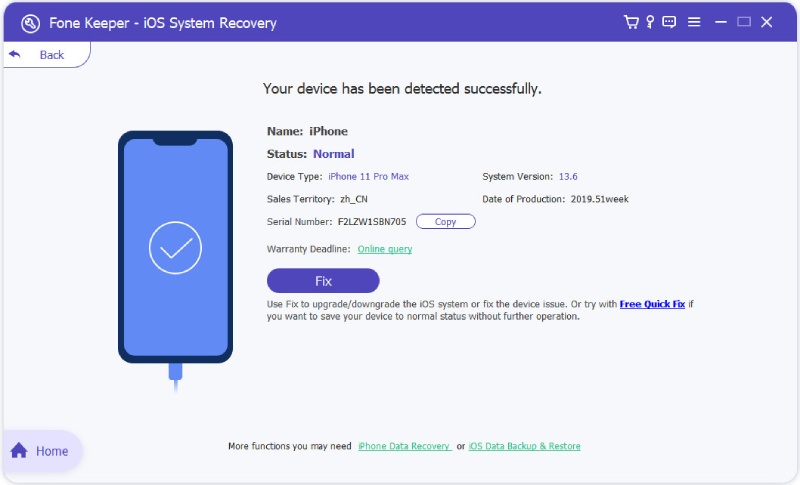
Step 3 After the device has been successfully detected, enter the interface in order to confirm your device's information. To fix common problems in such devices, choose the option which says Free Quick Fix. This option can handle problems like frozen devices and crashed devices within 60seconds. There won't be any need to choose an advanced option once this method solves your problem.
Step 4 However, if the above option doesn't work, locate the one which says Fix Button and have it clicked on. This will take you to a window whereby you will have to choose the type of repair. You can choose from two options here – Standard Mode and Advanced Mode.
Standard Mode: With this, you can fix issues on your iPhone without any risk of losing data.
Advanced Mode: This option will fix your iPhone problem. However, your data will be erased completely. The advantage of this option is that your problems will always be resolved. It has a much higher success rate.
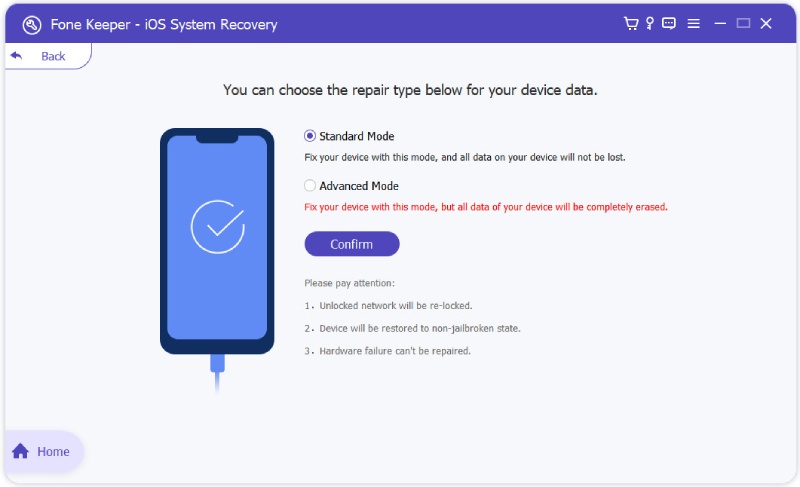
Ensure to make your decisions carefully here in terms of the mode that will help solve your problem. Once you have chosen any of the modes above, hit the Confirm button in order to continue.
Step 5 After that, the firmware information will have to be confirmed. Download the firmware package you need and click Next to continue.
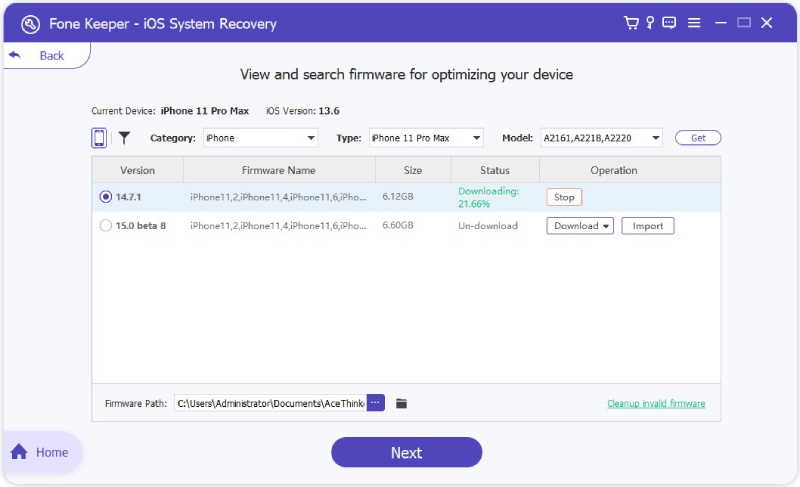
In order to repair your device, hit the Repair button. Once the firmware has been downloaded, the iOS system recovery program will begin to fix your device automatically. When this is complete, your device will be working normally again.
AceThinker Fone Keeper - iOS Data Backup and Restore User Guide
1 Back Up Data for iPhone/iPad/iPod
With iOS Data Backup and Restore, you will be able to successfully backup data on your iPod/iPad/ iPhone.
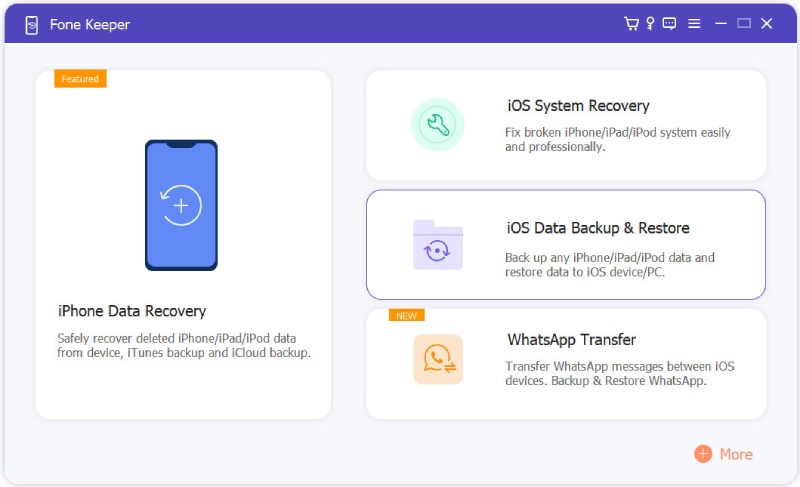
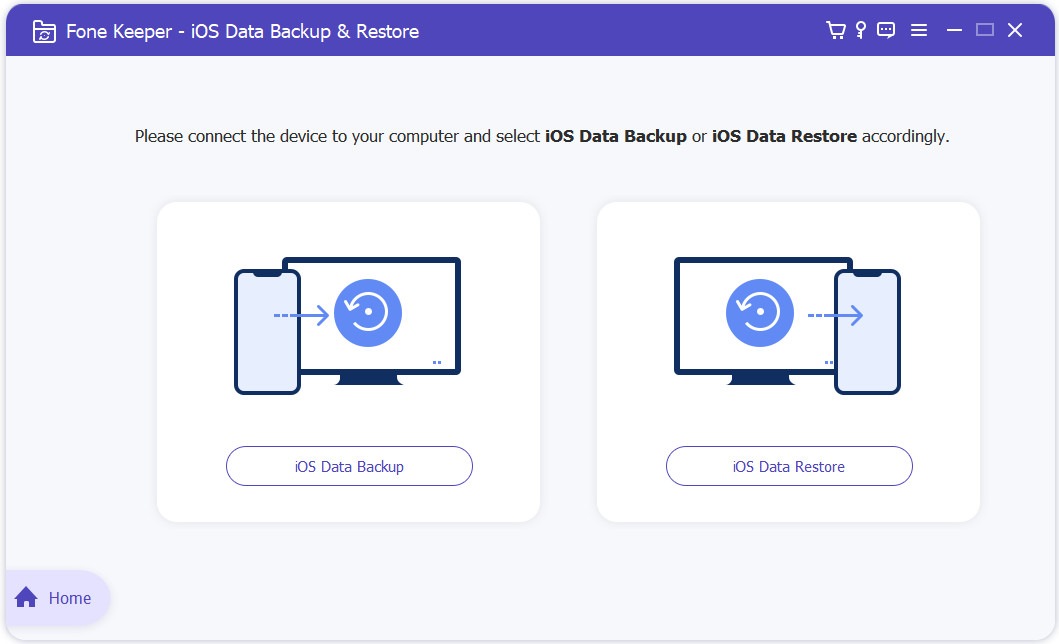
Step 1 Installed and launch Fone Keeper. Now, choose the option which says iOS Data Backup and Restore. This will take you to the program's interface.
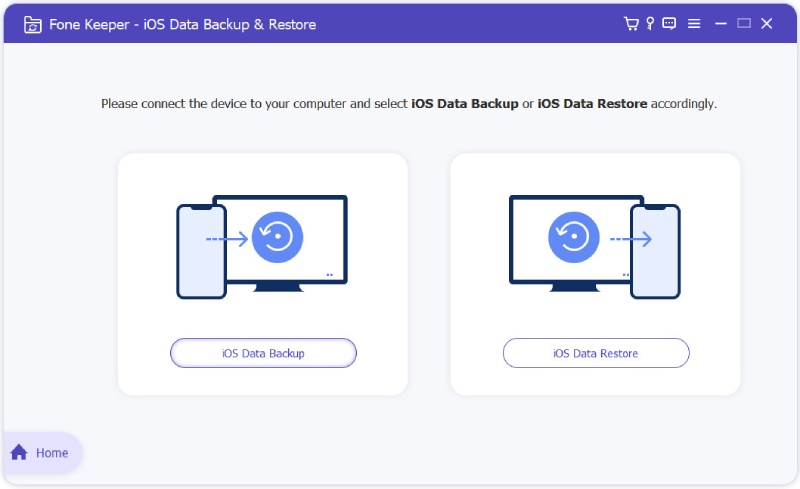
Step 2 You will need to choose either iOS Data Restore or iOS Data Backup. Here we select iOS Data Backup as the example.
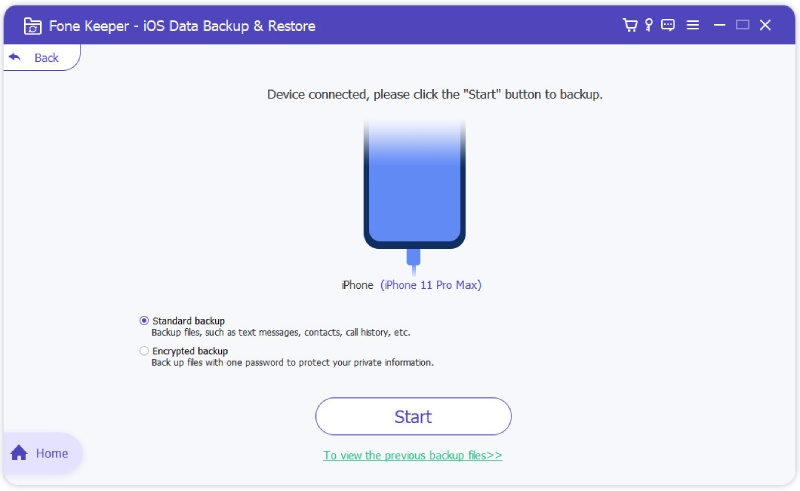
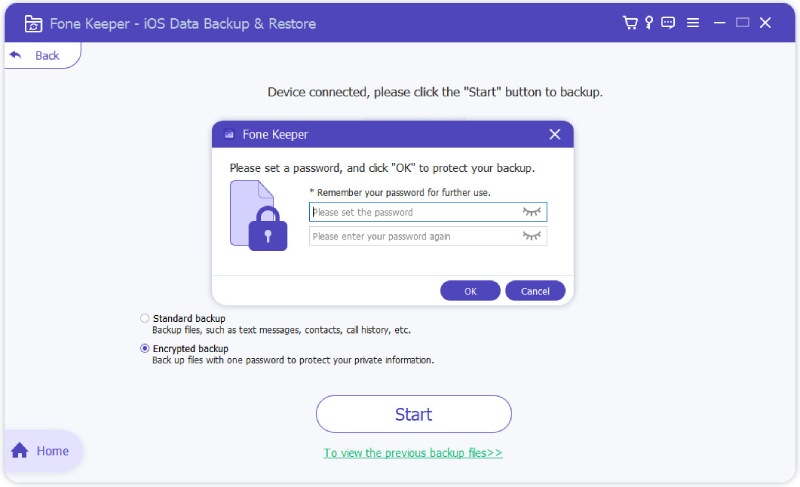
Step 3 After that, your device should be connected to the system. There are two options for backup available. These are Standard Backup and Encrypted Backup.
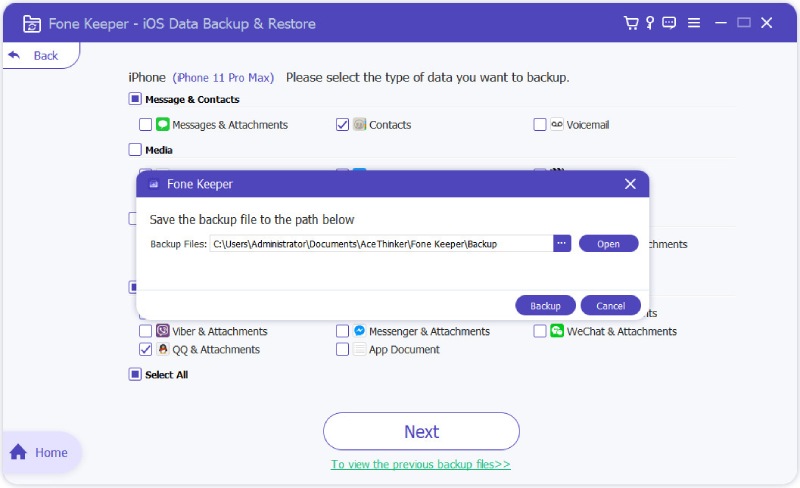
Step 4 If your preferred option is Standard Backup, the data type that needs backup should be chosen. In this option, you will be able to backup notes, photos, call history, messages, contacts, and many others.
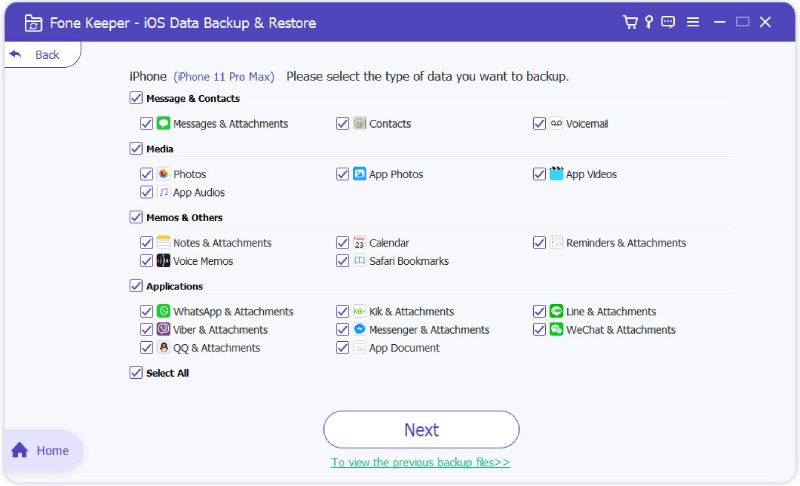
For the option of Encrypted Backup, a password will have to be set for such backup. Ensure that the password is kept in a safe place. This is because it will be required anytime you want to backup data using the option of "Encrypted Backup". Once the password has been set, you can then proceed to choose the file type to be backed up.
Step 5 Once you have chosen the file type, hit Next. Now, choose the folder where the backup will be saved. Once this has been done, the program is going to backup your data instantly.
Step 6 iOS data backup and restore is going to back up the data in such device. It is even easy to know more about the backup information like backup path and size.
Step 7 Once you hit the Ok button, the backup will be displayed on the list. At this point, just have it clicked on in order to view data that you have backed up. It is also possible for data to be restored selectively to either PC or iOS device. It is going to depend on your needs.
2 Restore iOS Data from Backup to PC or iOS
Using the trial version, it is possible for data to be restored from backup to your iOS device. However, note that in the case of restoring data from backup to PC, such can be done only 3times.
Step 1 iOS Data Backup & Restore should be chosen. Now, click on the option which says iOS Data Restore.
Step 2 You will be shown all the backup files on the list. You can choose any of them and click on View Now.
Step 3 From the interface, it is possible to view the data information. Just choose whatever you would like to restore.
Important Note: At the moment, data that you can only restore to your iOS device are notes and contacts. The restore to PC option doesn’t have any limitations or restrictions. Just click on it and you can backup other types of data.
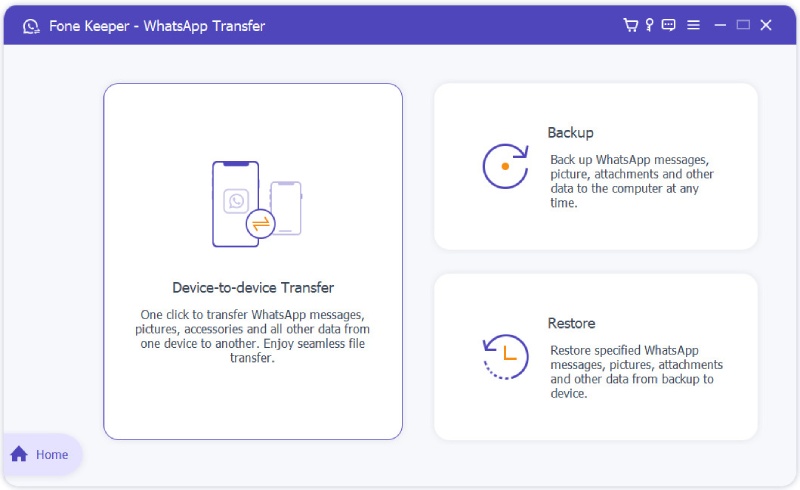
AceThinker Fone Keeper - WhatsApp Transfer User Guide
With WhatsApp Transfer for iOS, you can restore, backup and transfer WhatsApp data in your iOS device.
1 Transfer WhatsApp from one iPhone to Another iPhone
With this, you can transfer WhatsApp data from one iPhone to another iPhone.
Step 1 Once Fone Keeper has been downloaded and installed, run the software and select WhatsApp Transfer.
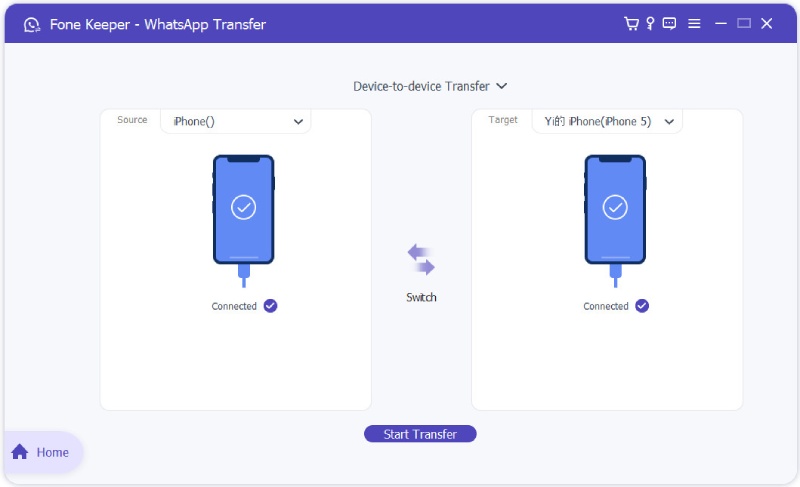
Step 2 Select the option which says device-to-device Transfer. Now, get 2 USB cables that will be used in plugging the two iPhones into your system. After that, wait for some seconds until the devices are detected by Fone Keeper.
Step 3 For WhatsApp data to be successfully transferred from one iPhone to another one, it is important they are in the expected place. Anything other than this means you will have to click on Switch to get the transfer orientation changed.
Once you have done all the settings as recommended, click on Start Transfer for the process of moving WhatsApp data from one iPhone to another to commence.
Your iOS is going to reboot once this process is complete. When you launch the WhatsApp application for the target device, you will find the transferred data. Note that before this process will commence, a popup window is going to appear notifying you that the WhatsApp data of the target device will be deleted (erase) and such device has another backup WhatsApp data that is better.
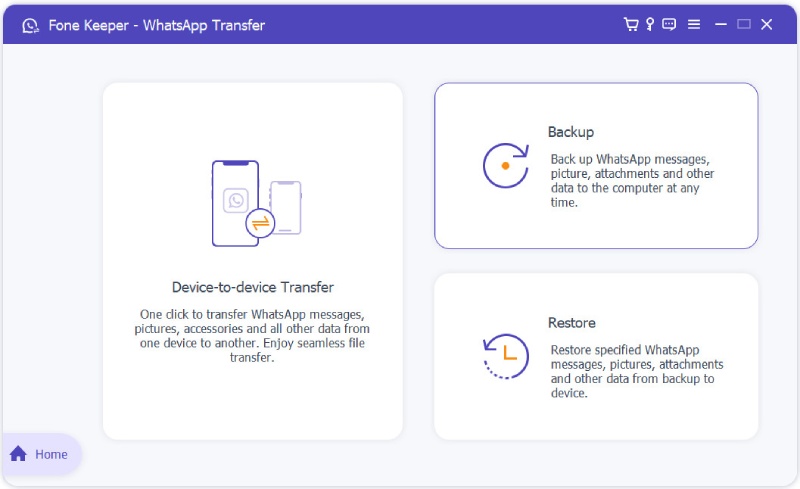
2 Backup Your iPhone WhatsApp to PC
As compared with WhatsApp cloud backup, it is possible to backup your WhatsApp data into your system locally using Fone Keeper.
Step 1 Run the program on your PC. After that select the option which says "WhatsApp Transfer".
Step 2 Now choose the Backup option. After that, connect your iPhone to the system with the aid of a USB cable. Once this has been done, the program will recognize such a device.
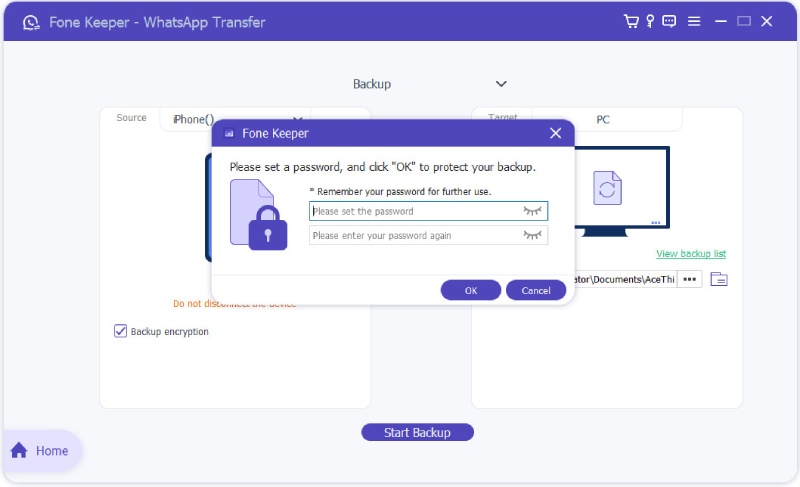
Step 3 As shown in the diagram below, there are 3-dots beneath the backup storage path. Click on the 3 dots to choose where your WhatsApp data will be stored. Once you have done that, click on the Start Backup button for the process to commence.
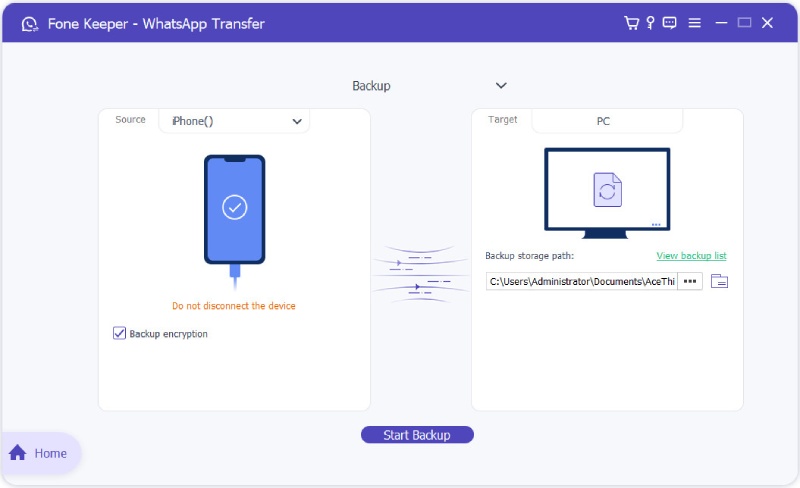
There is the option of Backup Encryption. To make use of this, you will need to tick the box. Just input the password for WhatsApp backup to be encrypted. You will need to type the password before this can work.
3 Restore WhatsApp Backup to iPhone/PC
Once WhatsApp data has been backed into your PC, it is possible for the WhatsApp backup file to be restored to your iPhone and PC.
Step 1 After Fone Keeper has been launched, select the option of WhatsApp Transfer.
Step 2 Choose the Restore option. Your WhatsApp can be chosen in two ways.
1. With this program, your WhatsApp backup file will be detected and loaded automatically.
2. In a situation when No WhatsApp backup file is detected by the program, click on Import Local File. You will be taken to the location where your WhatsApp has been stored.
Every WhatsApp backup file will then be loaded. Now, get your device connected to the system and hit the Restore button. This will enable WhatsApp backup to be restored to iPhone.
If your WhatsApp file requires a password, a window will appear where you will need to input such. This will enable the file to be unlocked.
Step 3 It is possible for files to be viewed before restoring them. In this case, the View icon should be clicked on.
WhatsApp data to be restored should be selected. After that, click on either Restore to PC or Restore to Device.
Important Note:
- After the process of restoring, your iPhone is going to reboot. Also, the existing WhatsApp files are going to be replaced using those that have been restored.
- After WhatsApp backup has been restored to PC, chat messages are going to be saved in HTML and CSV.