AceThinker Aqua Demo is a professional screen recording program that can help you record online meetings for future reference and review. If you want to record Zoom conference with Aqua Demo but have some problems in the settings. You can follow the steps below to capture Zoom video with audio in high quality successfully.
Step 1 Set the Audio Output in Zoom
You will find the sound output option in the lower-left corner of the Zoom program. Just click the icon and confirm the audio settings. For both Windows and Mac, choose "Same as system" for Microphone and also "Same as system" for Speaker as the picture below shows. The principle is not to interfere with how the system chooses the audio.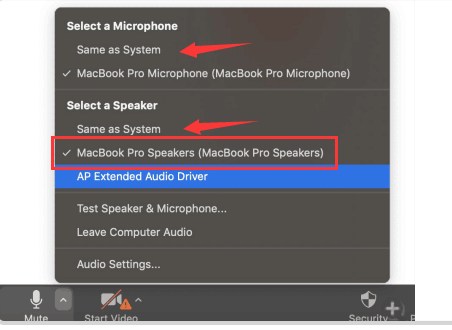
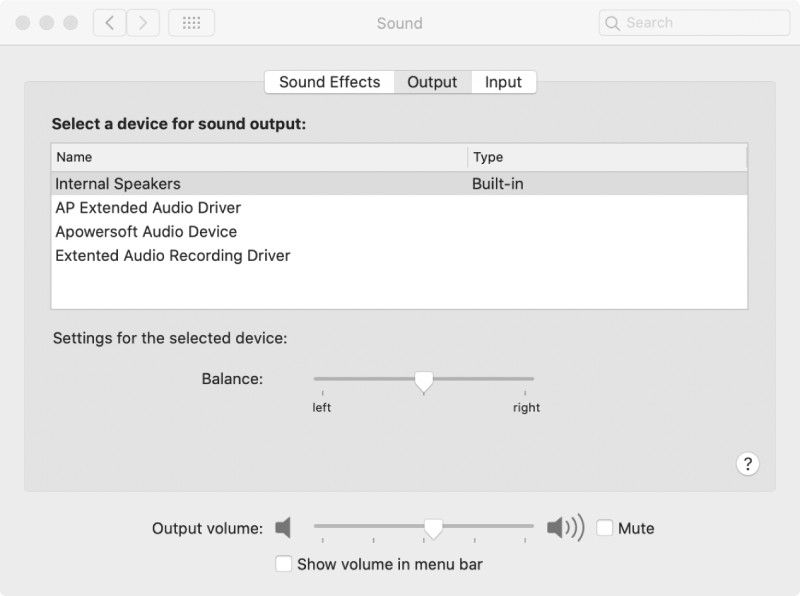
Step 2 Choose the Sound Input and Output Device on Your Computer
Next, select the sound output device as well as the input device on your Windows or Mac. After the selection, enter the Zoom meeting and check to make sure the sound is OK.
Just note that you will need to authorize the microphone under Mac OS 10.14 and authorize both the desktop and microphone under Mac OS 10.15. To record system audio, an extended audio recording driver plug-in is required. After the recording begins, the output sound device will automatically switch to this plug-in, and it cannot be switched to others during the recording process.
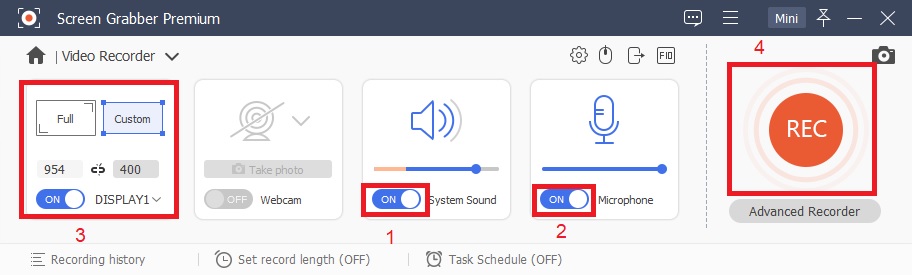
Step 3 Start to Record Zoom Meeting
Now launch AceThinker Aqua Demo, turn on both "System Sound" and "Microphone" as the audio input source, and start to record Zoom meeting. No other operations are required. For Mac systems, Aqua Demo will switch to the corresponding virtual sound card for recording by default.