Best Fixes for MP4 Not Playing in VLC in Easiest Ways
 VLC Media Player has gained immense popularity due to its versatility in playing various audio and video file formats. Its user-friendly interface and wide compatibility across different operating systems have contributed to its widespread adoption. However, a common issue users encounter is the inability of VLC to play MP4 files. Understanding the causes of this issue, such as codec issues or file corruption, is crucial in troubleshooting and resolving playback issues. Users can ensure seamless playback of their media files by knowing the solutions, such as updating VLC, installing necessary codecs, or repairing the MP4 files. We'll talk about that later as we indulge more in the content of these posts.
On This Page
Common Reasons for VLC Not Playing MP4 Files
VLC being unable to play MP4 files is not a common issue. However, there are different reasons on why this error persists.
- Missing Codecs: This refers to the absence of the necessary software components needed to decode and play MP4 files in VLC. Codecs are essential for interpreting the data in multimedia files.
- Outdated Software: If VLC is not updated to the latest version, it may lack the new features and bug fixes needed to properly handle MP4 files. Updating the software can resolve compatibility issues.
- Corrupted Files: If the MP4 file itself is damaged or corrupted, VLC may struggle to play it. In such cases, using a different copy of the file or repairing the existing one can help.
- Incorrect Settings: VLC's settings, such as audio and video output options, may not be configured optimally for playing MP4 files. Adjusting these settings can potentially resolve playback issues.
- External Device Issues: Problems can arise from the external devices, such as the storage device containing the MP4 file or the hardware used for audio/video output. Troubleshooting these devices may help resolve the problem.

How to Fix MP4 File Not Playing in VLC
1. Update VLC PLayer
If you're encountering issues with playing MP4 files in VLC Media Player, you may need to update the software to the latest version. Updating VLC can often resolve playback issues and improve compatibility with various file formats, including MP4. Updating VLC Player can often resolve common playback issues and ensure smooth performance with a wide range of media formats. After updating, you should be able to play MP4 files without any issues.
- Open VLC Media Player on your computer. You can usually find it in the Applications folder on a Mac or in the search VLC UPdates on a Windows PC.
- This will prompt VLC to check if there are any new updates available. If an update is readily present, a notification will appear, and there will be prompted text to walk through the on-screen guide to download and get the latest package of VLC Media Player. /li>
- This process may vary depending on your operating system. Once the update is complete, it's a good idea to restart VLC Media Player to ensure that the changes take effect. After restarting, try playing your MP4 file again to see if the update has resolved any issues you were experiencing.

2. Enable the Automatic Repair
The Automatic Repair feature in VLC is designed to fix minor issues and errors in multimedia files, such as video (MP4, AVI, etc.) and audio files. When enabled, VLC will attempt to repair damaged or corrupted parts of the file during playback, allowing you to still watch or listen to the content. This feature can be particularly useful for resolving playback issues caused by minor file corruption. By checking the Repair MP4 files option in the Preferences menu, VLC will automatically apply its repair capabilities when encountering problematic sections of multimedia files, potentially improving the overall playback experience for users.
- Open your VLC media player by double-clicking on its icon. Once VLC is open, look at the top of the window for the menu bar. Click on the Tools menu, which is located between View and Playback. From the menu option, select Preferences. This will open the Preferences window.
- On the left-hand side, you will see a list of categories in the Preferences window. Click on the Input/Codecs option. It's usually near the top of the list. Within the Input/Codecs section, scroll down until you find the Files section. Check the box for Repair MP4 files. This will enable VLC to attempt to repair corrupted MP4 files during playback.
- Lastly, to save your modification, click the Save button at the bottom section of the Preferences window. This will apply the new settings and close the Preferences window.

3. Change External Devices
When encountering issues with playing an MP4 file in VLC, it's important to consider potential problems related to external devices. The storage device containing the MP4 file, such as a USB flash drive or external hard disk, could be a source of the problem. Ensure that the storage device is functioning properly and that the file is not corrupted. Additionally, issues with the hardware used for audio and video output, such as speakers, headphones, or display devices, can also cause playback problems. Troubleshooting these external devices may involve checking connections, trying different USB ports, or testing the MP4 file on alternative devices. It's also beneficial to verify that the audio and video output devices are configured correctly within VLC.

4. Disable Hardware Video Decoding
Hardware video decoding in VLC allows the player to offload the video decoding process to the computer's GPU (Graphics Processing Unit) instead of using the CPU (Central Processing Unit). This has an impact on playback performance and CPU usage making them better and lower when you watch high-definition or high-bitrate videos. VLC works with hardware video decoding for many GPUs from makers like NVIDIA, AMD, and Intel. To turn on hardware decoding in VLC's settings can result in smoother playback, less power use, and better overall performance on devices with weaker CPUs. But this feature might also be why you can't play MP4 video in VLC.
- First, access VLC Media Player and click on Tools in the menu bar. Select Preferences from the dropdown menu. In the Preferences section, click on Input/Codecs in the left-hand sidebar.
- Next, scroll down to the Codecs section. Find the option labeled Hardware-accelerated decoding and set it to Disable . Click the Save option to add the changes and close the Preferences window.
- After completing these steps, VLC will no longer use hardware video decoding, and the video decoding process will be handled by the CPU instead of the GPU, which can resolve the issue of MP4 not playing on VLC.

5. Use Another Media Player
When VLC is not able to open an MP4 file, you can try using another media player as an alternative. One popular option is the Windows Media Player, which is pre-installed on most Windows devices. To open the MP4 file using Windows Media Player, right-click on the file, select "Open with," and then pick Windows Media Player from the list of available programs. Alternatively, you can use other third-party media players such as Media Player Classic, KMPlayer, or PotPlayer. These media players can handle various file formats, including MP4. Using an alternative media player, you can still enjoy your video content without being limited by VLC's inability to open the MP4 file.

6. Convert and Fix MP4 File
If the main issue of VLC can't open MP4 is due to a corrupted MP4 file, wrong codecs of the video, and other related MP4 issues, you must fix your MP4 right away. We recommend that you use AceThinker VidElement. This video-processing software contains advanced features that no other software has in its arsenal. It comes with multiple codes for a single file, which helps users choose and pick the suitable video parameters for their converted files. What is more, it can upscale the quality of the video without damaging the file itself. The app also contains other advanced features such as denoising, setting the volume of the file, cropping, editing, and more. You can take a look below on how you can use this app.
Step 1 Download and Install AceThinker VidElement
The initial guide is to download AceThinker VidElement; start by opening the VidElement software on your computer. Then, click the Add Files button or option to import the MP4 file you want to convert.
Step 2 Select File
After the file is imported, choose the output format for the conversion. VidElement supports various output formats like MP4, AVI, WMV, and more. You can also access the codecs option to change the MP4 codecs.
Step 3 Change Output Settings
Next, select the output quality settings according to your preferences. You can also choose a specific destination folder for the converted file. Once you have configured all the settings, click the "Convert" button to start the conversion process.
Step 4 Save Converted File
Wait for the conversion to complete, and once finished, you can access the converted file in the specified output folder. That's it! You have successfully converted an MP4 file for AceThinker VidElement. You can also check if the error persists by playing the file on VLC.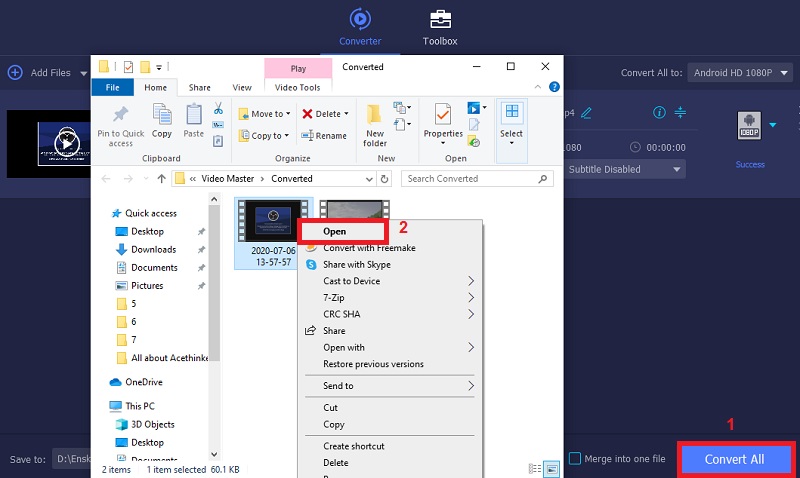
Conclusion
To wrap up fixing MP4 playback problems in VLC Media Player needs a step-by-step plan to spot and tackle the root causes. From codec gaps and old software to broken files and wrong settings, knowing why VLC can't play MP4 files is key. By using the fixes we talked about - like updating VLC, turning on auto-repair, switching external devices, turning off hardware video decoding, trying another media player, and tweaking the MP4 file - users can solve playback issues and watch videos without a hitch. These tricks help users beat common MP4 playback hurdles and get the most out of VLC Media Player.