

How to Use Screen Grabber Pro
AceThinker Screen Grabber Pro is the perfect tool for taking a quality screen capture of your desktop. It is a robust screen recorder that perfectly suits the needs of any individual who requires recording on-screen activities, live streams, and professional walkthroughs. It is installed with a convenient interface and professional features that make it simple to give clean recordings, whatever the intention.Install and Register AceThinker Screen Grabber Pro
Getting started with AceThinker Screen Grabber Pro is quick and hassle-free. With a simple installation and a smooth registration procedure, you'll be ready to capture your screen quickly. Whether you're using Windows or macOS, just follow these steps to get the software fully up and running.
Step 1 Download the Software Installer
Go to the official AceThinker website and navigate the Screen Grabber Pro page. Click the "Download" button to get the installer that matches your operating system. Once downloaded, locate the file in your computer's Downloads folder to proceed.
Try it for Free
Free Download
Windows 8/10/11
Secure Download
Free Download
Mac OS X 10.15 and above
Secure Download
Step 2 Install the Program on Your Computer
Double-click the installer file to begin the setup process. Follow the on-screen instructions to agree to the terms and select your installation preferences. Click Install, and the software will be ready to launch in just a few moments.

Step 3 Launch the Software
After installation is complete, click "Finish" to exit the setup wizard. Find the AceThinker Screen Grabber Pro icon on your desktop or in your applications list. Open the program to start setting up your user account for full access.
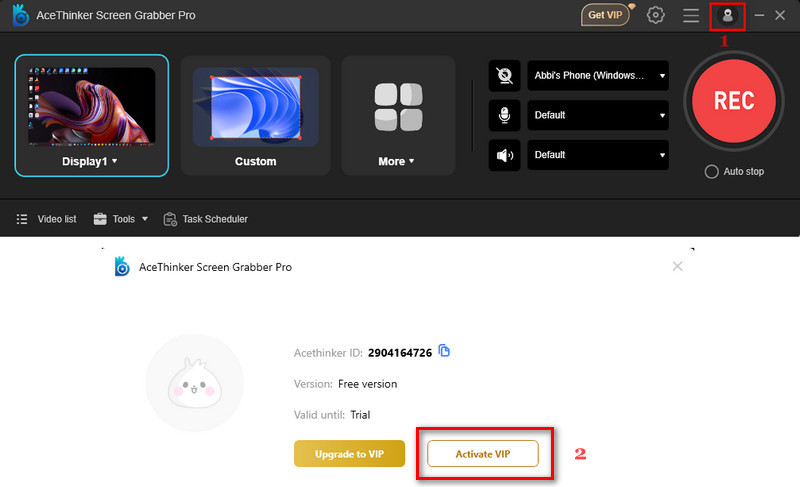
Step 4 Activate Your License
In the upper-right corner of the main interface, click the Account icon and you will see your registration status. If you've purchased a license, simply click "Activate VIP" to proceed. If you haven't bought the program yet, you can click "Upgrade to VIP" to visit the store page and purchase one.
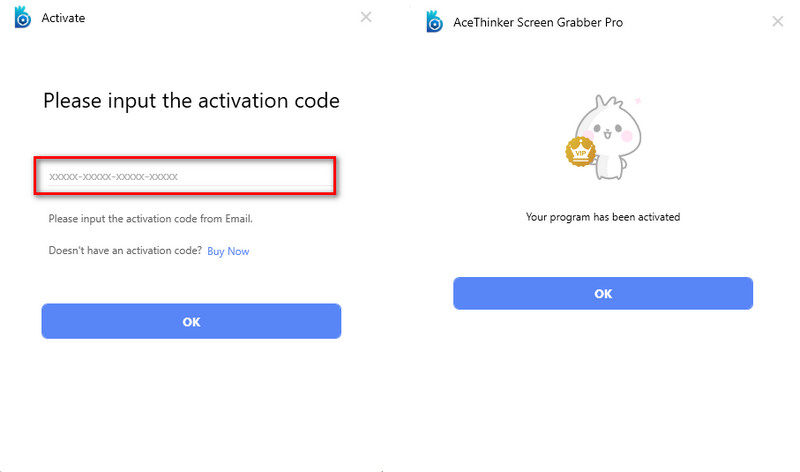
In the next prompt activate window, copy and paste the activation code you've got from the Email after your purchase into the blank area and click OK to register with the keycode and unlock all advanced recording features and removes usage limitations. The "Your program has been activated" hint means the registration is successful.
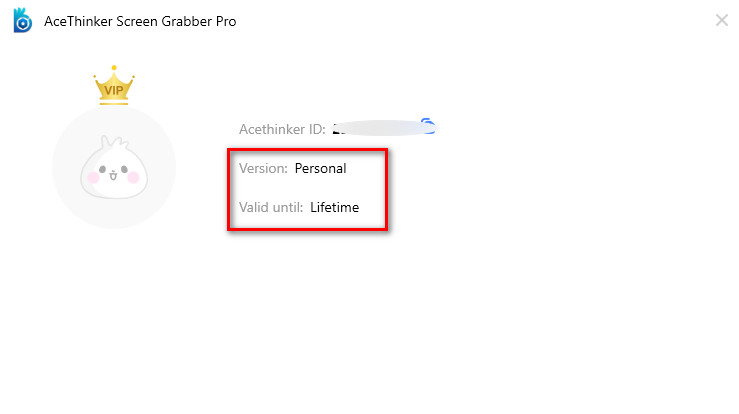
Then, your account status will be updated from Free version to the conresponding VIP license.
How to Record Your Screen
Using AceThinker Screen Grabber Pro, capturing any activity on your screen is smooth and efficient. Whether preparing a tutorial, saving a video call, or recording gameplay, the tool gives you total control with flexible recording options. Follow these accurate steps to begin recording your screen like a pro:
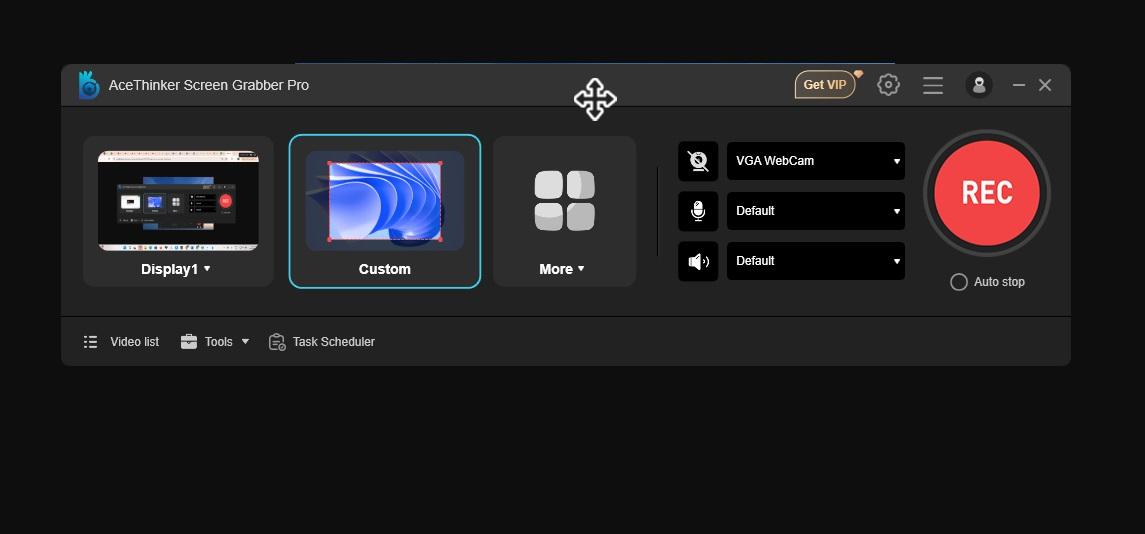
Step 1 Launch the Program
Open AceThinker Screen Grabber Pro and go straight to the main dashboard. Click on the recording mode that suits your needs: Full Display, Custom Region, Webcam, or Audio-only. This allows you to customize the recording to fit your capture content.
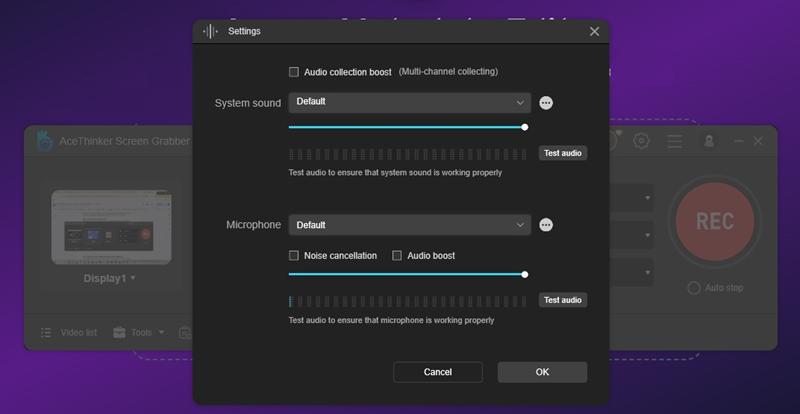
Step 2 Configure Audio Input Settings
Click the audio icon to set your preferred input sources before recording. You can choose to record system sound, microphone input, or both simultaneously. This is ideal for narrations, voiceovers, or capturing audio from online streams.
Step 3 Adjust the Recording Region
When selecting Region Mode, drag and resize the frame to highlight the desired area. Ensure only the important content is within the boundary to avoid distractions. This method is perfect for focusing on specific apps or sections of your screen.
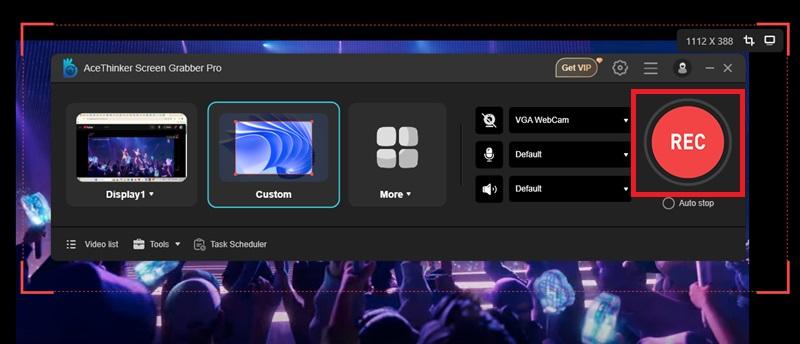
Step 4 Start Recording Your Screen
After setting up, press the "Record" button to begin your screen capture. A short countdown will appear, and then the recording will start automatically based on your setup. Everything inside the selected area will now be recorded in real-time.
Step 5 Use Real-Time Annotation Tools
While recording, click the pencil icon to open the annotation toolbar. Add highlights, arrows, text, or shapes to emphasize important elements on-screen. These tools are helpful during live demonstrations or explainer videos.
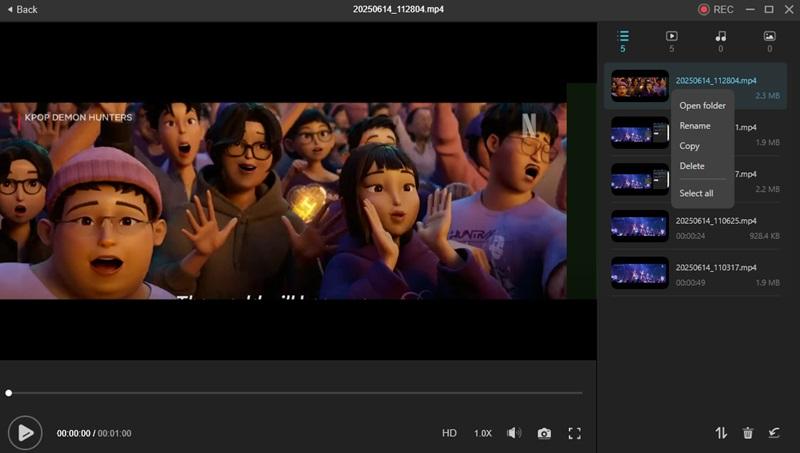
Step 6 Stop, Preview, and Save Your Recording
When finished, click the Stop button to end the session. A preview window will pop up, allowing you to trim unnecessary parts if needed. Finally, you can export your video in MP4, WMV, or MOV format or upload it directly online.
Capture Your Screen in Different Recording Modes
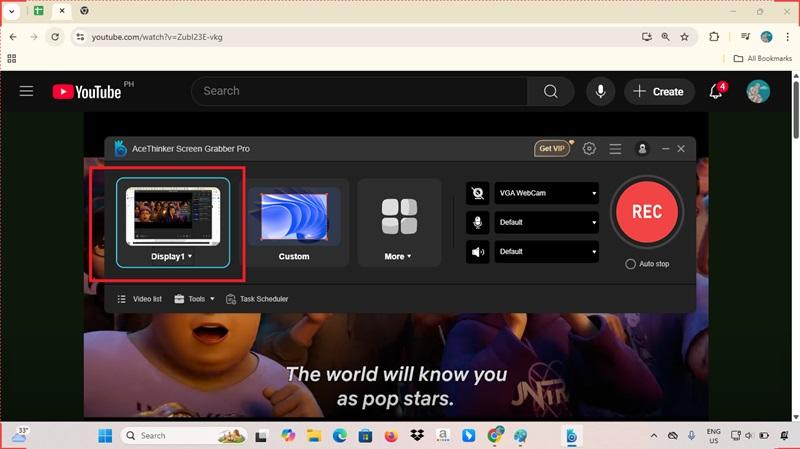
Mode 1: Record in Full-Screen Mode
To record all the activity on your screen, open AceThinker Screen Grabber Pro and choose Full-Screen recording mode. This mode is perfect for recording screen videos or webinars and does not allow you to lose anything that happens on the screen. Just open the software in your browser, press the "Record" button, and let it capture everything displayed on the screen in real-time.
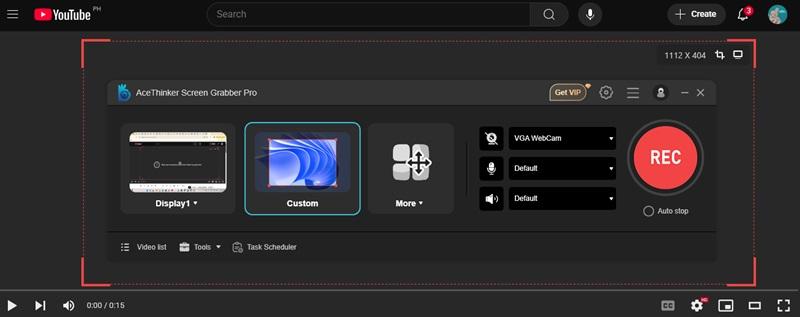
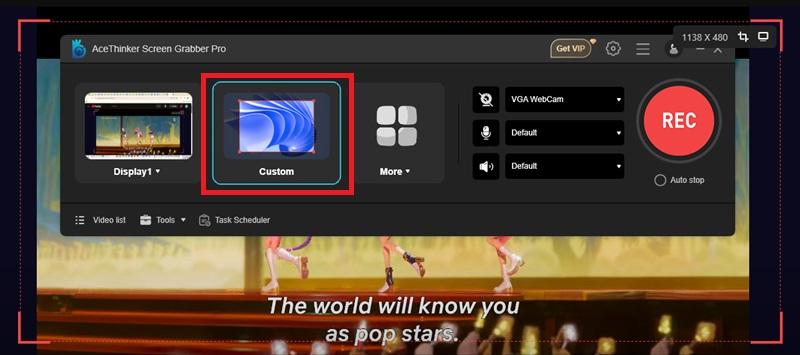
Mode 2: Record in Custom Mode
The Custom Mode is best when you need to pay attention to a certain aspect of your screen, such as a Vimeo video or a specific app window. Select the area, place it anywhere on top of the content you want to capture, and hit REC to start recording only that area. This process assists in removing distractions and conserves storage space.
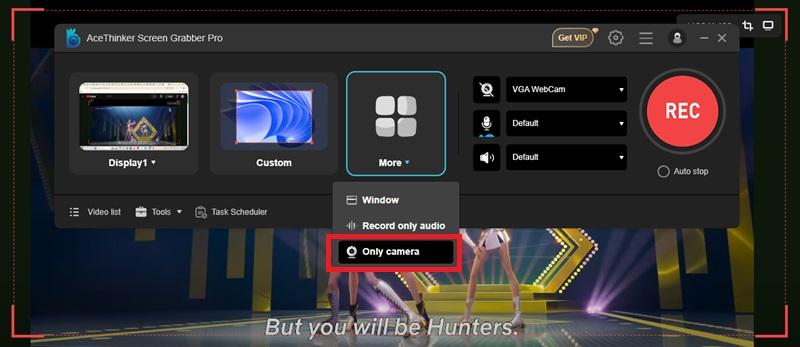
Mode 3: Record with Camera
To use your Webcam and record a tutorial, reactions, or personalized video, you may turn on the "Record with Camera" mode. This enables you to capture yourself beside or in place of the screen content. Just enable your Webcam in the preferences, select the layout (e.g., picture-in-picture), and record.
FAQs of AceThinker Screen Grabber Pro
For more questions about how to use AceThinker Screen Grabber Pro, please check: https://www.acethinker.com/support/screen-grabber-pro-faq