You can follow the step-by-step user guide to record any video with AceThinker Screen Grabber Pro: https://www.acethinker.com/desktop-recorder/howto-use-screen-grabber-pro.html
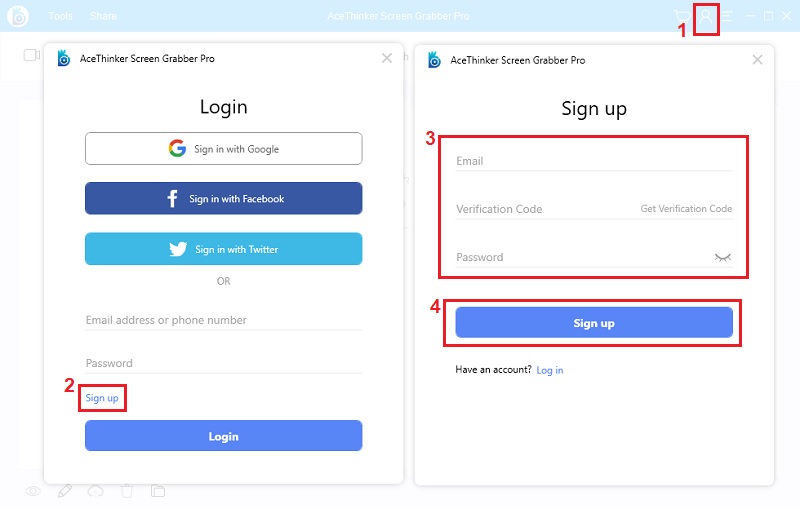
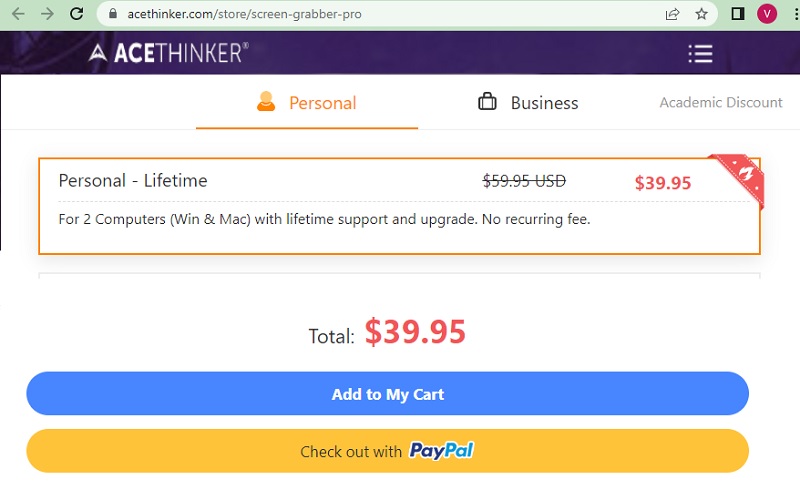
Open AceThinker Screen Grabber Pro, and tap on the account icon. Then, click the ‘Sign up’ link from the login box. Enter valid account information and purchase the preferred license type.
For more details, you can check: https://www.acethinker.com/desktop-recorder/register-screen-grabber-pro.html
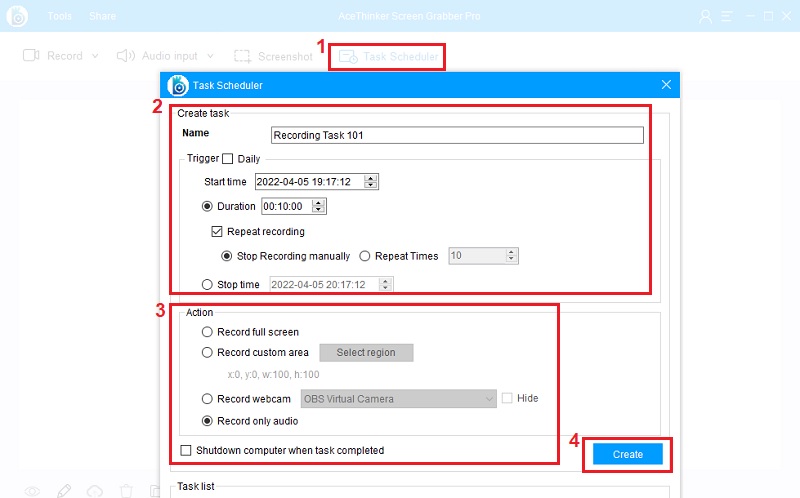
With AceThinker Screen Grabber Pro, you can set a schedule by clicking the ‘Task Scheduler’ tab. You can set up the name, time, and duration of the recording task. Also, it also offers many options you can choose from its ‘Action’ Tab.
For more details, you can check: https://www.acethinker.com/desktop-recorder/how-to-schedule-screencast.htmlActivated users can access the tool's exclusive features. By acquiring a license, you can put watermarks on each recording. You can also enjoy annotating features while recording.
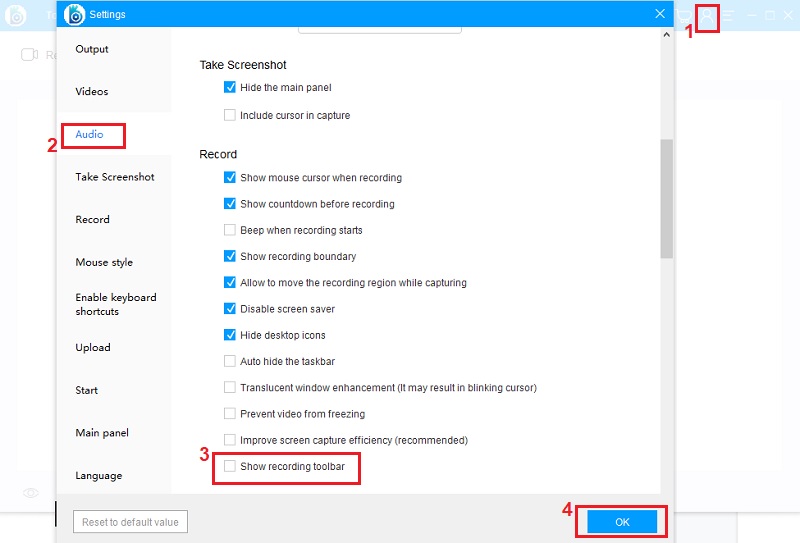
Click the "Settings" option from the menu icon in the Screen Grabber Pro’s interface. Select the "Audio" from the left settings panel from the settings. Do not tick the ‘Show recording toolbar’ for it to not be visible in the recording process.
You can follow this article to troubleshoot the problems: https://www.acethinker.com/desktop-recorder/fix-audio-recording-issue.html
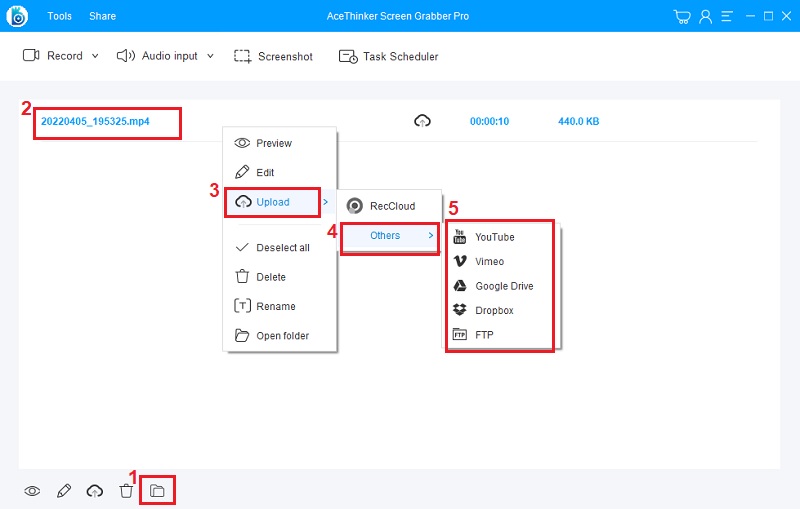
Tap the folder icon located in the lower-left area of the tool’s interface. The list of recorded sessions will then appear; right-click on the file you want to share. Select the ‘Upload’ button and choose a streaming site you want to upload the video.
For more details, you can check: https://www.acethinker.com/desktop-recorder/upload-video-online.html