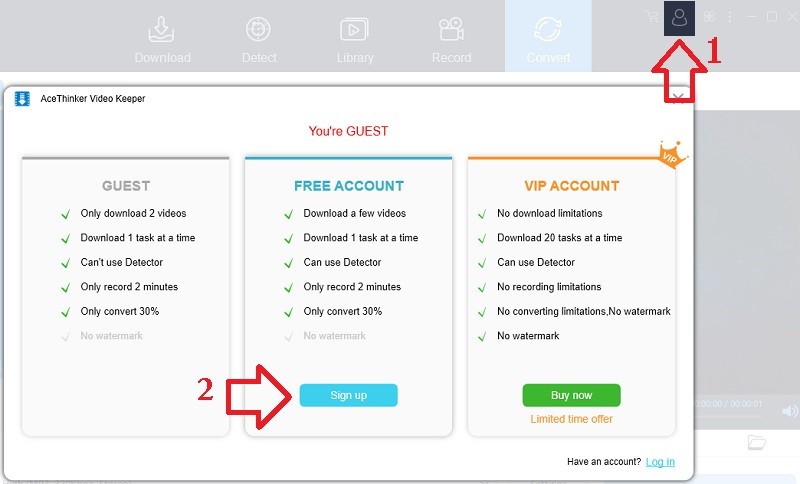
Register and Activate An Account
To start your free trial, you must register for an account using your Facebook, Twitter, or Gmail account. To set some expectations, if you are going to use the free trial, there are some limitations. Like being able to download one video at a time, and for the screen recorder, you can only record video at a maximum of 2 minutes. If you are planning to use the converter, you must activate the tool by purchasing a premium account. In the meantime, follow these steps to begin with the free trial.
1.1 Sign-up for a free trial
If you are using it for the first time, click the user account icon located at the upper right corner of the interface. Now click the "Sign up" button under the Free Account panel.
1.2 Register your email address
From the Signup window, register using your working email along with your password and click the "Get" button to receive the verification code from your email.
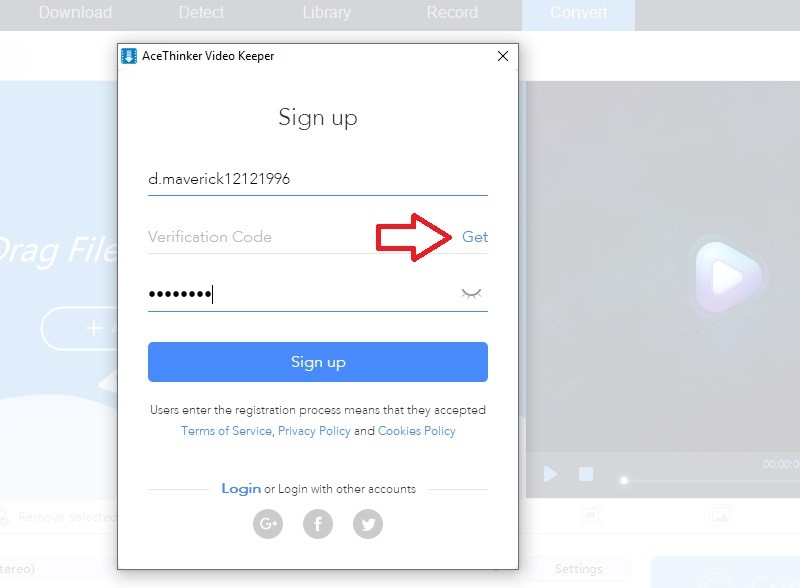
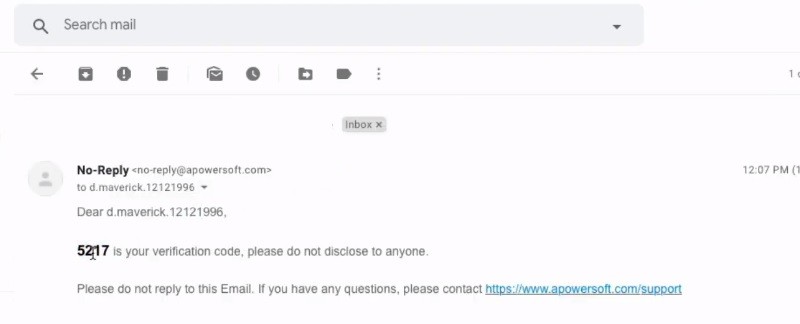
1.3 Copy and Paste the verification code
Now, check your account and look for the email that contains the verification code for Aqua Clip. Copy the four-digit code and go back to the Signup panel. Paste the code and click the "Sign up" button to finally register your free trial.
After following these steps, you can now enjoy the privileges of the free account, allowing you to videos, record screen, and convert videos. However, these privileges are still under a free trial. You might experience some limitations like you can take screen recording for only 2 minutes. Better yet, upgrade to the full version to to download without worrying about any restriction.
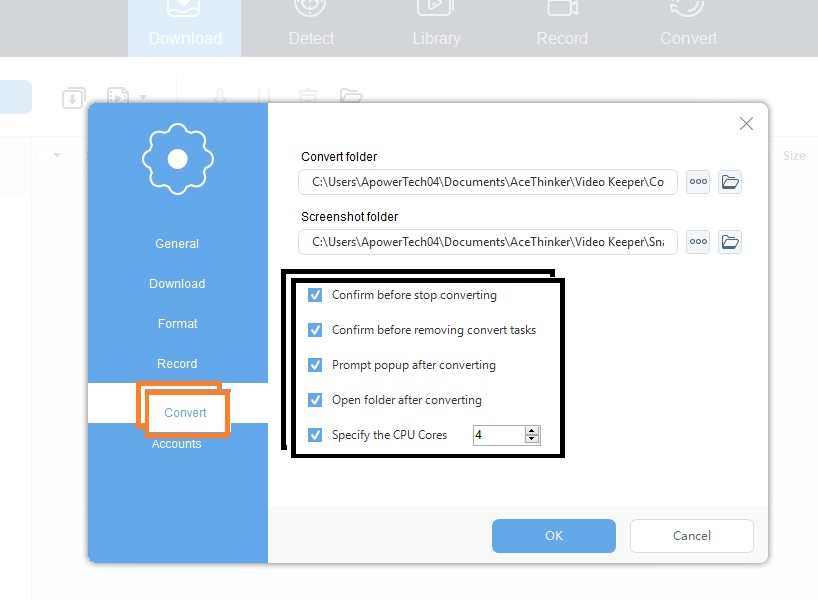
Adjust the Settings of According to Your Preference
To adjust the settings of the tool according to your preference, click the "Ellipsis" located at the upper right-hand side of the interface. From there, you will see the "Settings." Once clicked, a window will pop. Click each section to change the produced format of the video and location of each saved video. Check out the picture below for a better understanding.
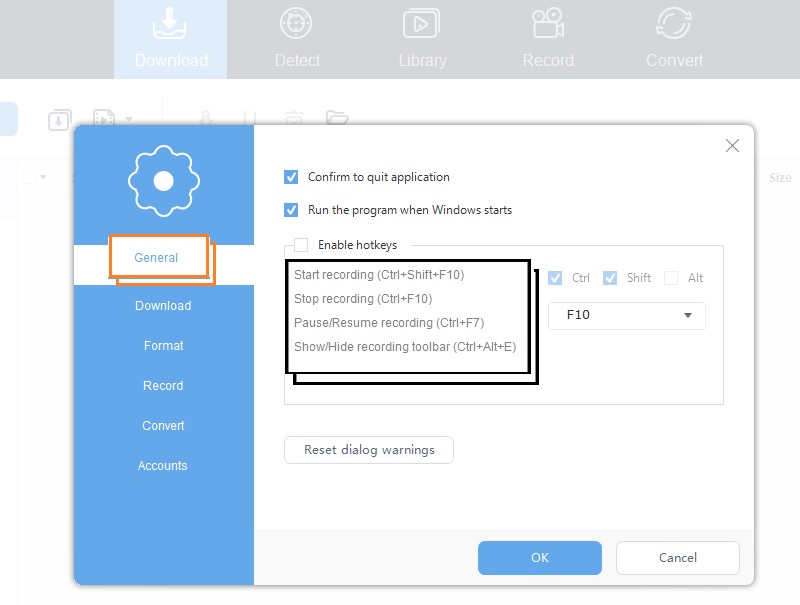
2.1 General settings
The general setting is where you change the default keys and settings when launching the app. You can enable, run the application when you start your computer or change the shortcut keys of the start, stop, pause, resume, toolbar, and dialogue warning.
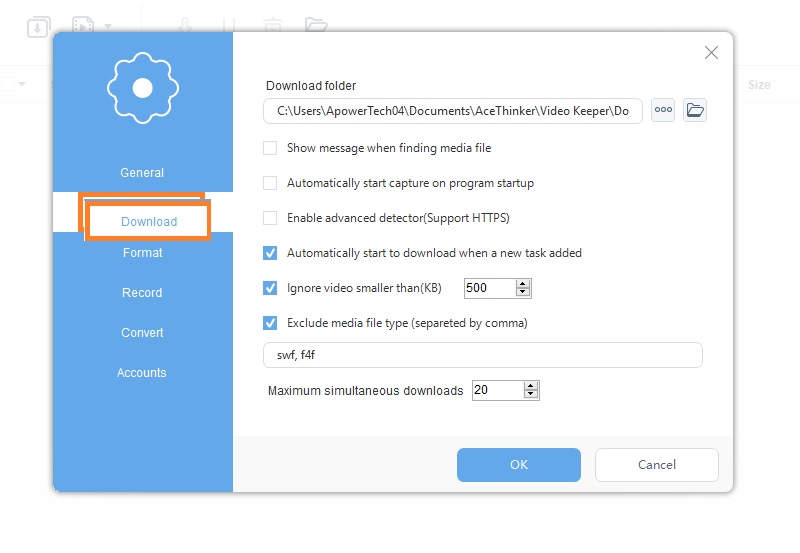
2.2 Download settings
This is where you can change the default location of the video being downloaded by the tool. You can change the location according to your preference. You can also set on how many videos can be downloaded simultaneously.
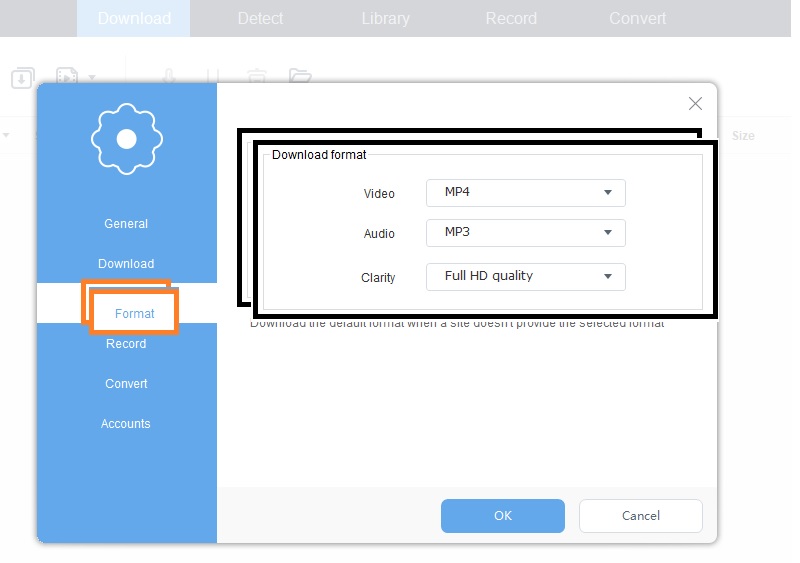
2.3 Format settings
As the word implies, you can change the format you want to produce on your downloads. You can change the video's format, audio, and adjust the quality of the video or audio.
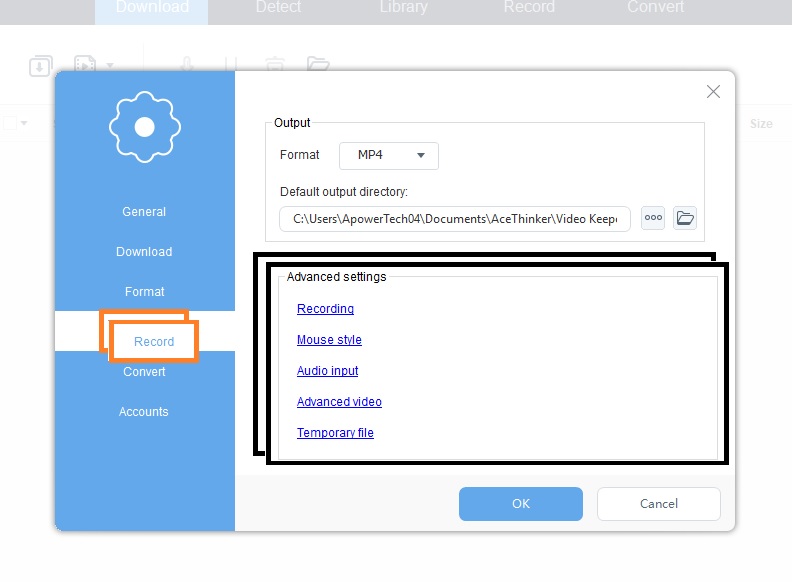
2.4 Record settings
This section is the setting for screen recording. You can change the format produced and quality of the video when it comes to the Mic, and system sound.
2.5 Convert settings
This section can give you the ability to change the default settings of the converter from the folder location, format, and quality.
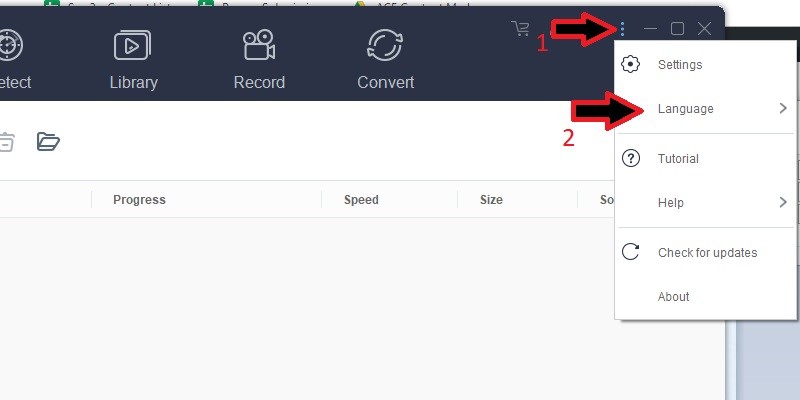
Change the Language
If you prefer to use the tool in another language or are a non-native speaker of the English language, it also provides language settings. It supports over 20 languages so you can navigate the software comfortably. Follow the guide below and learn how to set up the language settings.
3.1 Locate the Language Settings
From the main interface of the program, click on the "Ellipsis" icon. There you should see the "Language" option.
3.2 Select the Preferred Language
Hover your mouse to the "Language" option, and a menu list should open, showing different languages. Select your preferred language, then the labels of the interface should change accordingly.
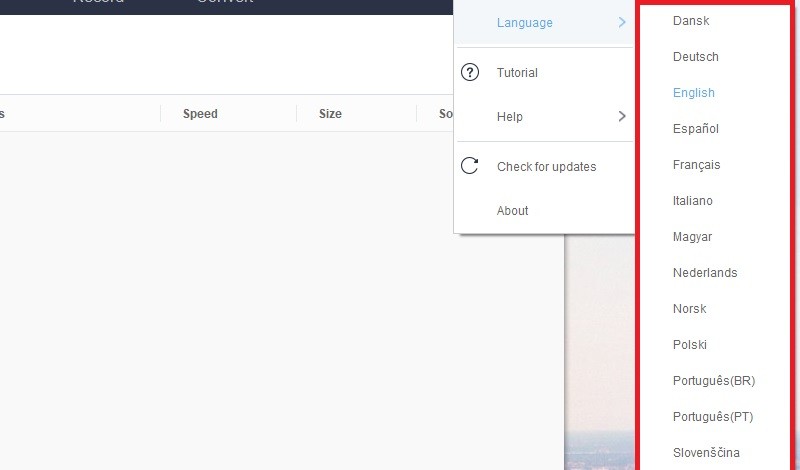
3.3 Use the Tool using the Selected Language
Then, you will be able to operate the tool using the other language that you selected. Here we chose Deutsch as an example. So, you would notice that the labels are changed from English to Deutsch language.
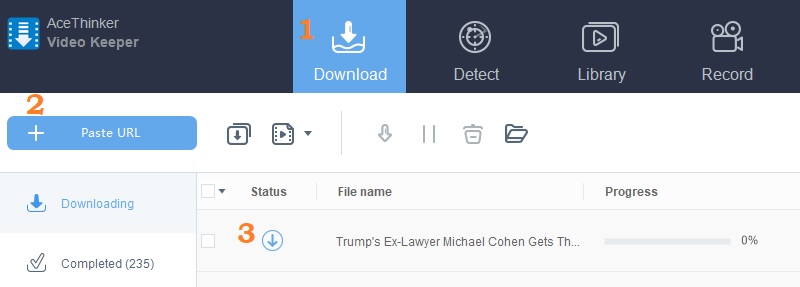
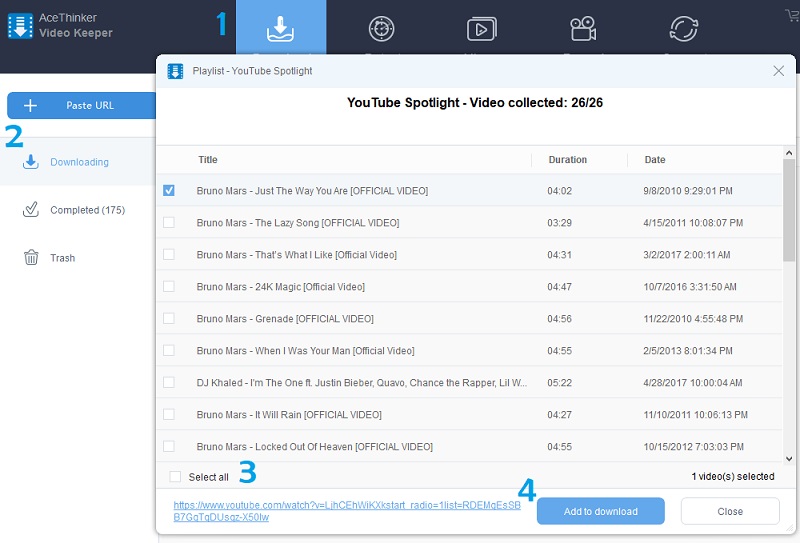
Download a Single Video/Playlist Manually
To download the video manually, simply copy the link of the video you wish to download. Go back to Aqua Clip, and under the "Download" tab, click the "Paste URL" button. From there, the video will be added to the download queue.
Do you also know that this can download multiple videos at the same time? Yes, it can. Simply create a playlist on Youtube or choose a playlist created by others. Remember downloading a playlist is only applicable on Youtube. For other sites, it will not work for compatibility reasons. Next, play at least one video from the playlist, then copy the link from the address bar. Finally, go to Aqua Clip, click "Download" > "Paste URL," > "Select all" for the final touch, click on "Add to download." All videos will then be downloaded.
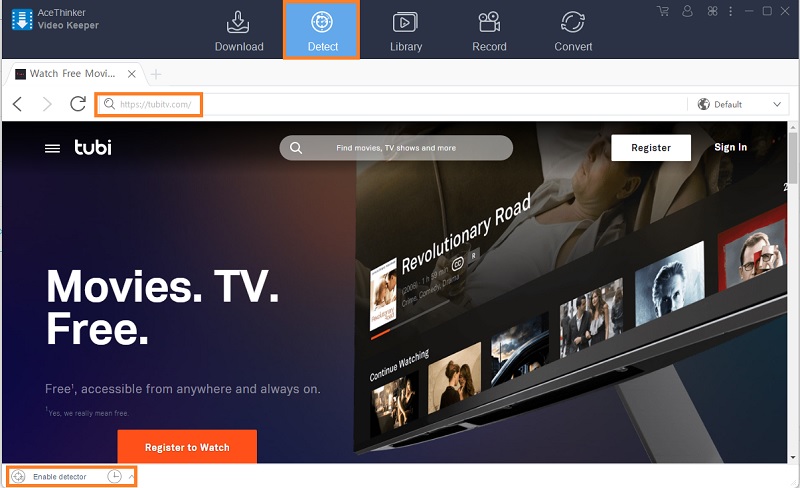
Download Using the Auto-Detection
To download while streaming, click on "Detect," then under that, use the built-in browser to stream your favorite site. Play the video, and then the tool will do the job for you. You also need to know that auto-detection is enabled upon download and installation, just in case the video is not detected, double-check it. Head to the bottom left side of the interface, click "enable detector" to make sure.
How to Do Screen Recording?
This tool was infused to use it as an alternative just in case the video you want to download is not allowed.
6.1 Start the Recording
First, from the main interface of the tool, click on "Record," next "Start," then decide if you are going to do a full-screen recording or partial screen recording.
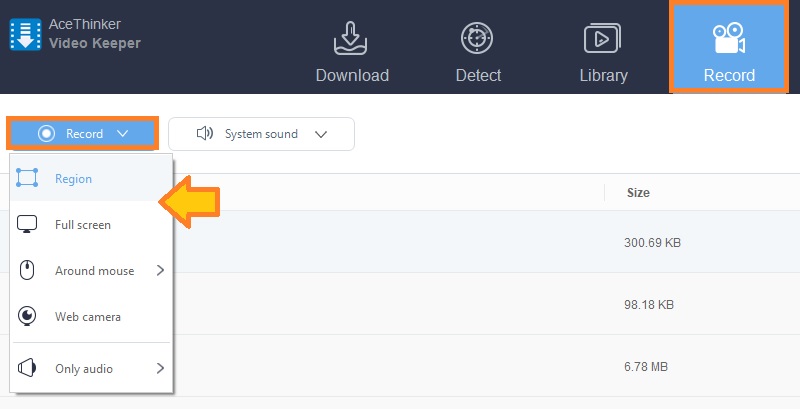
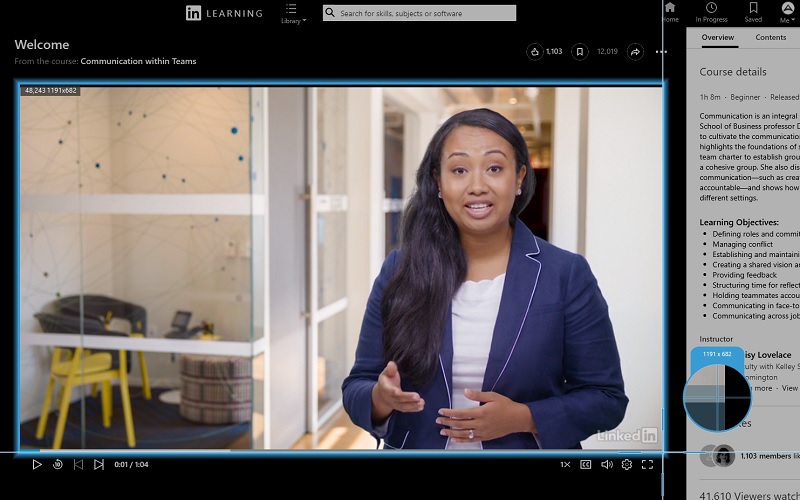
6.2 Choose the Region size
If you choose to record specific parts of the video, click on "Region," then use your mouse to click and hold while dragging the frame. Make sure to fit the frame size into the video.
6.3 Annotate while recording
One added feature of the tool is adding shapes, text, and lines to emphasize some parts of the video.

6.4 Stop Recording
To stop the recording, click the "square button" representing the "stop" function to end the recording. Under the same tab, you will see the list videos recorded.
Extract Audios Out of A Video
As mentioned a while ago, this tool can also extract audios on videos by conversion. The built-in converter can convert the video into MP3 and other formats mentioned above. Do that follow the simple steps below.
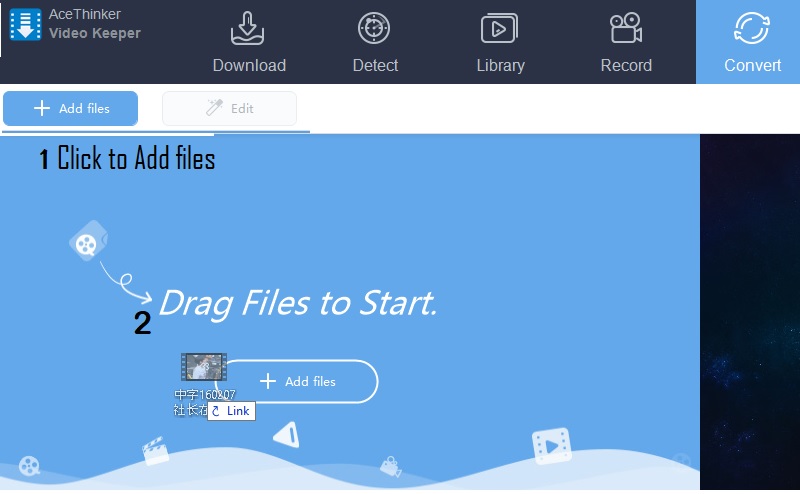
7.1 Add file to convert
First, choose the file you want to convert. You have to ways on how to add it. One is by clicking the "Add Files" button and then finding the file location form your folders. The other way is to "drag the file" from the open folder location into the interface.
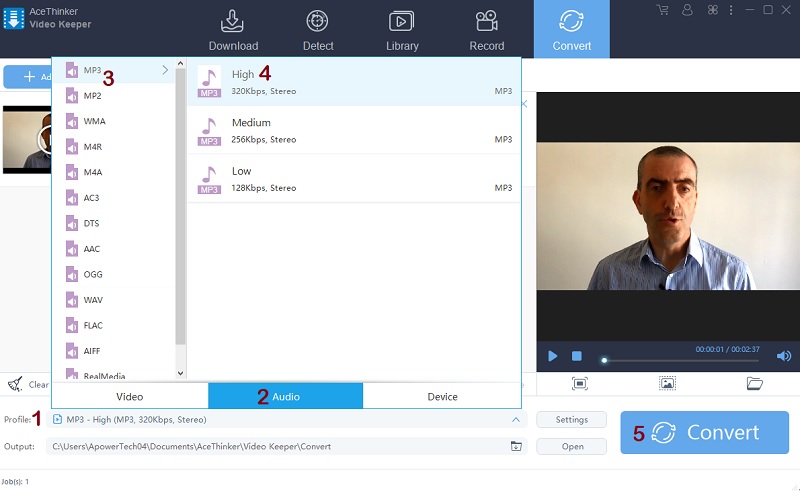
7.2 Start the conversion
Once the video is uploaded, set the right format of the file by clicking "Profiles" > "Audio," > example "MP3" > "high Quality"> then finally click "Convert".
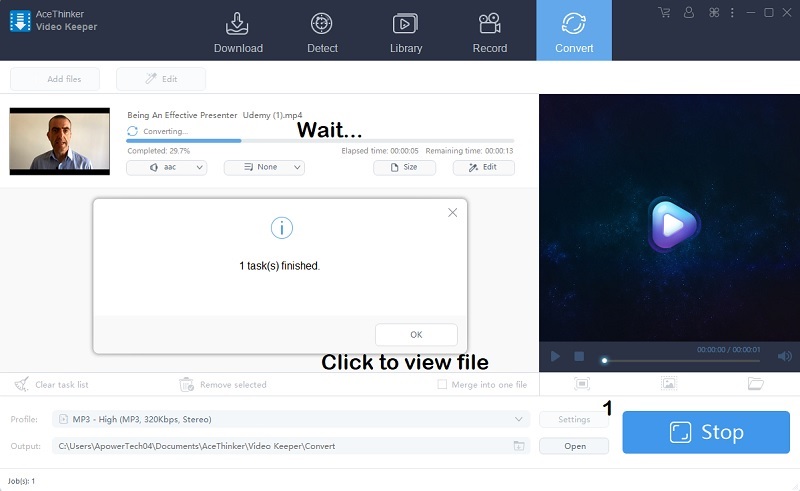
7.3 Check converted file
Wait until the converting process is finished. You will know if converting is done once another window pops up. Simply click "Okay" to locate the file and play.
Troubleshooting and Facts About Aqua Clip
Just like any other tool, this tool is not perfect. There might be times you will encounter problems upon using it. At least to eliminate 99.9% of the problem through updates is being implemented. That is why being aware of the issues and ways on how to fix it helps. Some issues were identified while developing it. So, we listed some workable solutions and facts you can refer to and do on your own without contacting our technical support representatives. Here are some of the inquiries received by our technical support representatives.
8.1 Downloading issues on "Paste URL"
Question: Hi! I just downloaded your app moments ago. I am currently using the trial version because I want to see the tool's credibility before buying it. So I tried to download by pasting the URL of the video. However, it won't download when I click the "Paste URL" button.
Answer: Normally, you use the "Paste URL" button to paste the copied link to download it. Yes, that is right. However, you must also know the limitation of the feature. Sites that have open source can only be downloaded through this method. If you are trying to download videos from Educational sites or Movie sites, it won't work. This only works on sites that are less restrictive like Youtube, Twitch, Facebook, Instagram, Myspace, Rutube, and more. These sites are not encrypted. Moreover, it does not stop there; that is why auto-detect was developed to kill this limitation. Try downloading the video using the "Detect" tab instead. If the video is still not downloaded by any chance, that means it is encrypted to avoid copyright issues
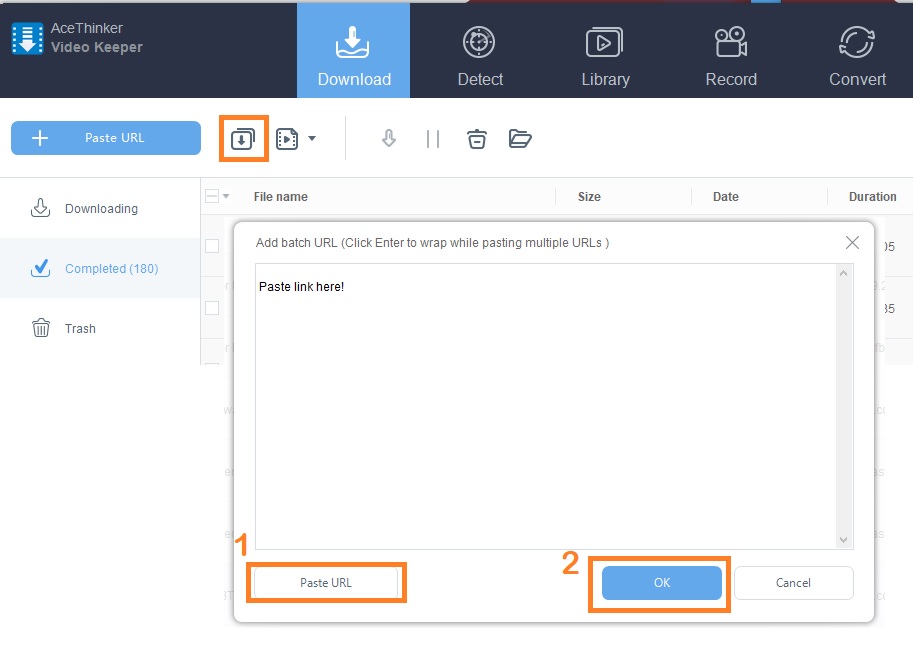
8.2 Downloading issues on "Paste URL" continuation
Question: However, I am just downloading videos from YouTube. There must be no problem, right? But the video is not downloading. Is there a way to fix it? Should I download it again? I will try to download and install the app I hope it works. I will let you know guys if the tool works after. But I hope to hear something from you; it will be a great help in the future.
Answer: If this is the case, please try our alternative way of pasting the URL. From the main interface, click the second download button beside the "Paste URL" button. This tool is also for bulk/playlist download, but it can be used as an alternative. It is a square-shaped icon with an "arrow pointing down." Once clicked, a window will pop, and from there paste the link by using your mouse or shortcut keys (ctrl+v for Windows)(Command+ V for Mac). Or click the "Paste URL" button below. Finally, click "okay" to initiate the download. See the picture below for a better understanding.
8.3 Downloading issues on "Auto-Detection"
Question: I am downloading Movies using the Auto detection feature of the tool, but it suddenly stops and has a "red exclamation mark" beside it. What do I do? Should I repeat the download? Is there a way for me to continue the download without repeating it?
Answer: Possible cause is your Internet connection. Downloading videos need a reliable internet connection. If your internet is too slow or suddenly stops, this is the usual case. Do not worry, though, as you won't have to repeat the download once your internet is stable enough. Simply double click the download or right-click then choose "Start Download."
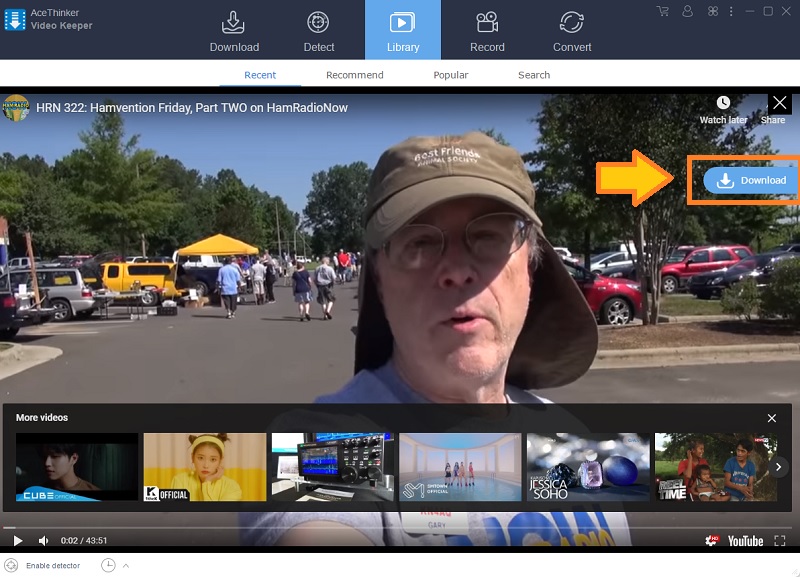
The Library Feature
Extra Feature: The Library
The Library contains the "Recommended" "Recent" and the most popular videos online. It is like a shortcut catalog instead of going to other websites. Also, a direct download button is infused to easily fetch the video. You can add multiple videos to your download list while browsing for more.
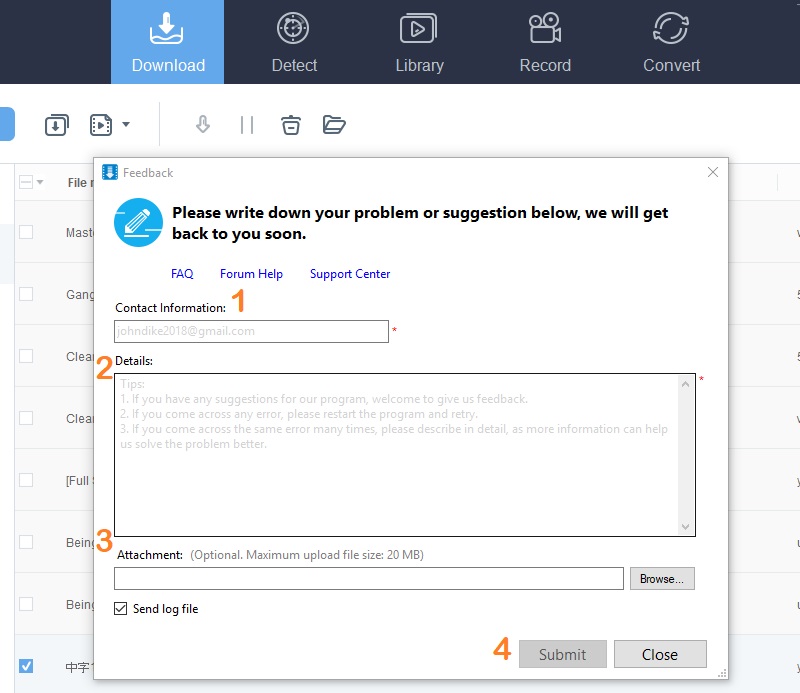
How to Send Feedback?
In any case that your problems are not fixed by following some steps from this article, you can always send us feedback so we can assist you better. To do that, follow these simple steps.
10.1 Locate send Feedback section
To locate the feedback section, click the ellipsis icon, choose "help" then "Feedback."
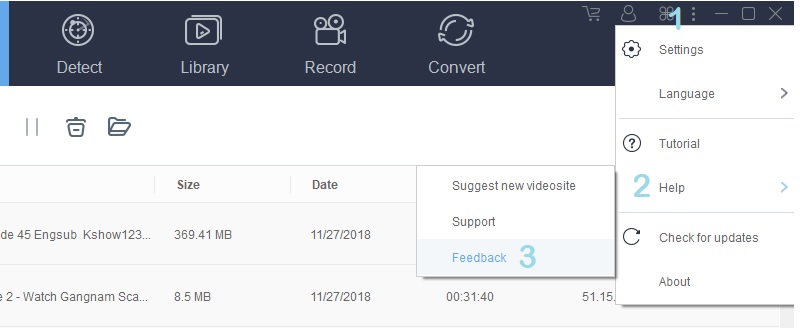
10.2 Write your Inquiry and submit
From there, write your inquiries. I strongly advise writing a detailed one. Suggestions are also open to improve our tool soon. Click submit after writing. This will be reviewed by our technical support for assistance. You will be contacted via email provided.