
 Does your Computer have a specific directory to save VLC recordings? It is known as a popular and multifunctional media player. VLC is a freeware that allows users to download online videos and record all activities happening on their screens. This tool can highlight important scenarios with high-quality video outcomes to save and share with everyone. It supports multimedia files, DVDs, audio CDs, VCDs, and other media tools with high-quality content. It can record everything you play on your screen, including a piece of a video or song, DVD movies, live streams, and various other video and audio file formats. However, many people find it frustrating when they need help finding the recorded files. Where does VLC save recordings afterward? Can I specify or change the VLC recording folder? You can find suitable solutions on this page.
Where Does VLC Save the Recorded Video
Where VLC keeps recordings may frequently mislead you. In addition to this, those who are unfamiliar with the process of recording will undoubtedly ask the same question. This tool is known as a multifunctional media player with a recording capability. To capture video and audio on VLC, follow these easy instructions. The typical procedure can only be done by launching the VLC player on your desktop and choosing the View tab. Additionally, pick the Advanced Controls settings to create a new window with a Play button for recording. However, VLC still features various ways of recording. Where does VLC save recordings, anyway? To find the files you saved using VLC, read the procedures indicated below.
User Guide:
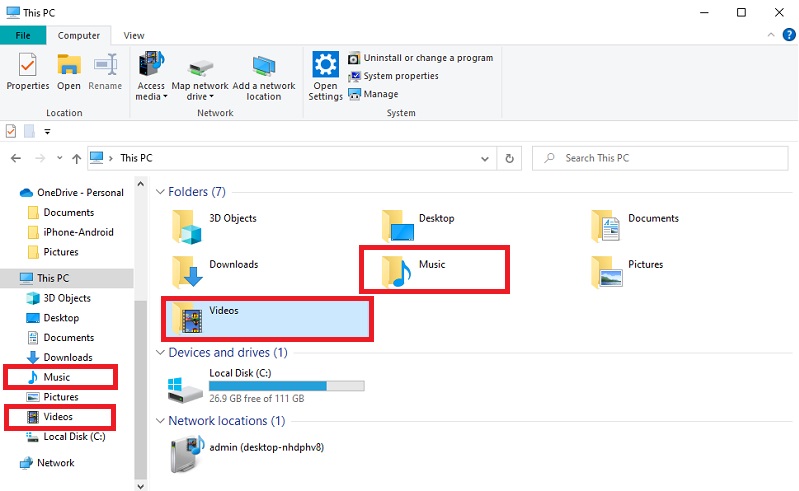
- Open your Windows computer and go to your "File Explorer." Open the "Video" folder if you want to locate the recorded video from VLC. On the other hand, open the "Music" folder to find the recorded audio. The video file will be saved as an MP4 file, and the recorded audio will be saved in MP3 format.
- To locate your VLC Recorded file on Mac, go to your Computer's File Manager. The recorded videos are usually located in the "Movies" folder. Additionally, audio recordings are stored in the "Music" folder.
- You can directly search for your VLC recorded files by simply entering the directory address of your file. For Windows, enter "C:\Users\Your_Username\Videos OR ...\Music". Furthermore, enter Macintosh HD > Users > Your Username > Movies OR Music if you're using a Mac computer.
How to Change VLC Video Recording Location
Maybe you're still unsure about the default location of Recorded VLC files, especially when suddenly VLC not recording. In this regard, you may be able to modify and change your VLC video recordings directory to a specific path location. This way, users can quickly locate their files without needing to find them on their computers. If you're seeking the right and easy way to do it, we provide you with quick ways below.
User Guide:
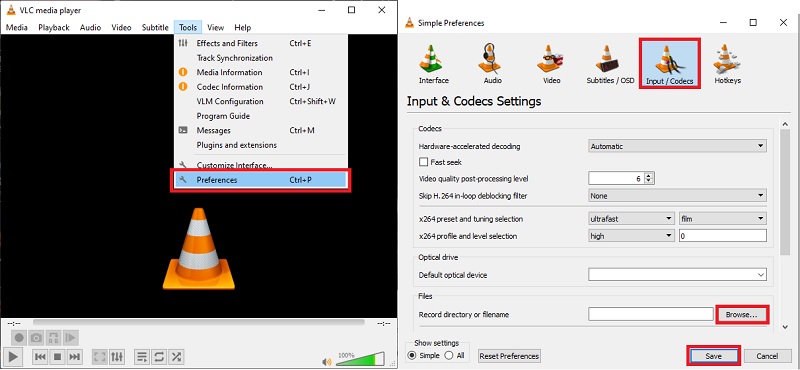
- Open the VLC program and access its main interface. Select the "Tool" option from the menu bar at the upper corner of the tool. Then, choose the "Preferences" menu to access the Simple Preferences.
- From the Window Page, open the "Input /Codecs" tab. Select and open the "Files" section. Go to the Record Directory or File name and click the "Browse" button to change the directory path of the VLC recording based on your preferred location.
- Tap the "Save" button to finalize the changes in your VLC recordings file location settings. Lastly, close VLC or restart the program to see if the changes are successfully set.
VLC Alternative to Record Video
The solutions listed above could be easy to accomplish. Still, it might be difficult for beginners who have not previously used VLC recordings for various streaming protocols. Consequently, Aqua Demo allows you to modify the directory path of each video clip according to your preferences. The software is a powerful screen recorder with numerous useful recorders, including a webcam, an audio recorder, and a video recorder. Both system and microphone sounds can be used in the audio setting. You can acquire a recording in HD quality with a maximum resolution of 4K, which is compatible with various advanced file formats. Moreover, the tools enable users to schedule screen recording, which will run automatically based on your set time. Record drawing on the screen is available to employ once the recording process is on your Computer. Once you have acquired the tool, this will ensure to give you the best recording and file you want on a specific location on your Computer.
Try it for Free
Free Download
Windows 8/10/11
Secure Download
Free Download
Mac OS X 10.15 and above
Secure Download

Step 1 Launch AceThinker Aqua Demo
Download AceThinker Aqua Demo by clicking the download button above. Open the installer file on your Computer and follow the few installation guides given. Once you successfully launch the program, you can access its main interface and familiarize yourself with its tools.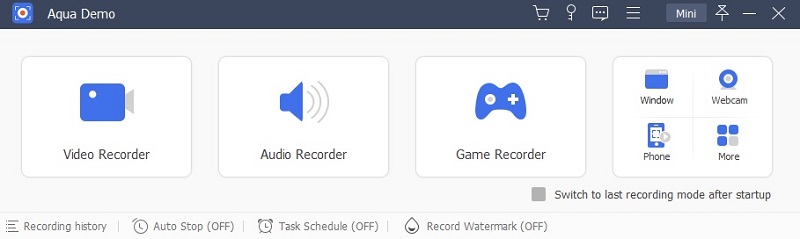
Step 2 Modify the Recording Settings
The tool lets you set up essential recordings to acquire an excellent output. To do so, select the "Gear" icon in the upper-left corner of the interface to access Settings. The preferences window will appear with different options like Mouse Movements, Hotkeys, Output, and more. Select the option to open the "Output" and modify the directory settings and Video settings, including the format, quality, frame rate, and more.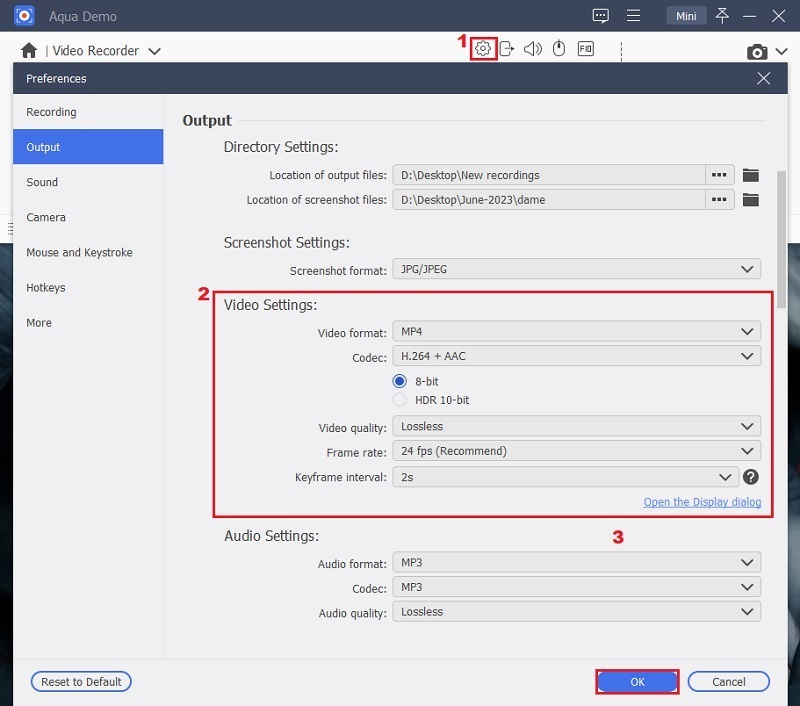
Step 3 Start the Recording
To start the recording, choose the recording mode you need. You can enable a webcam if you select Video Recorder. Then, choose your preferred audio sources for your recordings. Moreover, You can enable the Microphone for voice recording and background sound while selecting the system sounds to include system sounds. After that, tap the "REC" button to begin recording.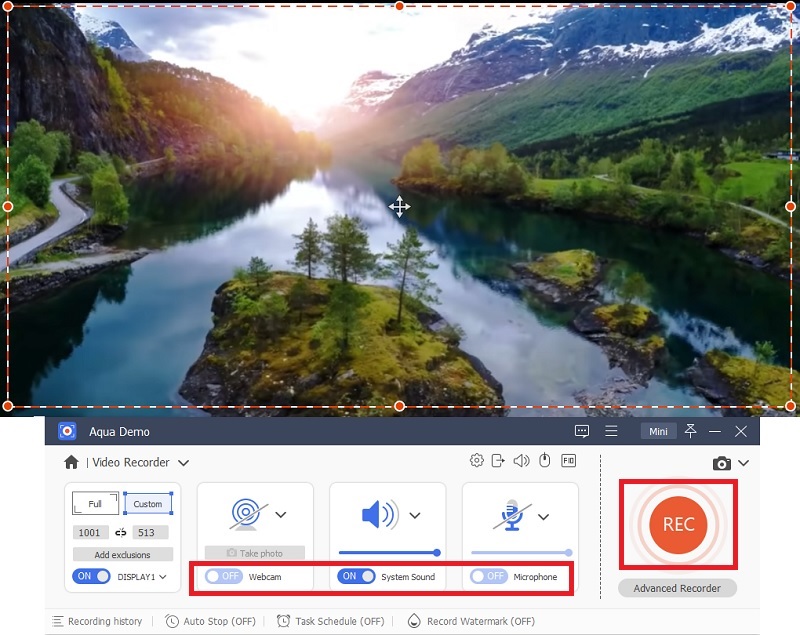
Step 4 End Screen Recording
While screen recording, you can customize your video by adding lines, text, arrows, and more using the annotation feature of the tool. When satisfied, you can end the process by clicking the "Stop" button. The Preview page will display afterward; you can recall your recorded video and trim it if you like.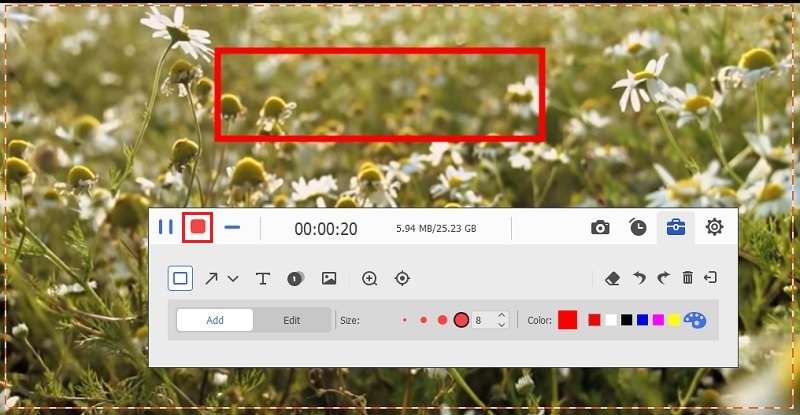
Step 5 Save the file on your Computer
On the preview page, click the "Export" button. It will direct you to the Recording History panel, where all recorded files are stored. On the other hand, all the recorded files are automatically saved on your Computer where you set the directory path of your file from the settings.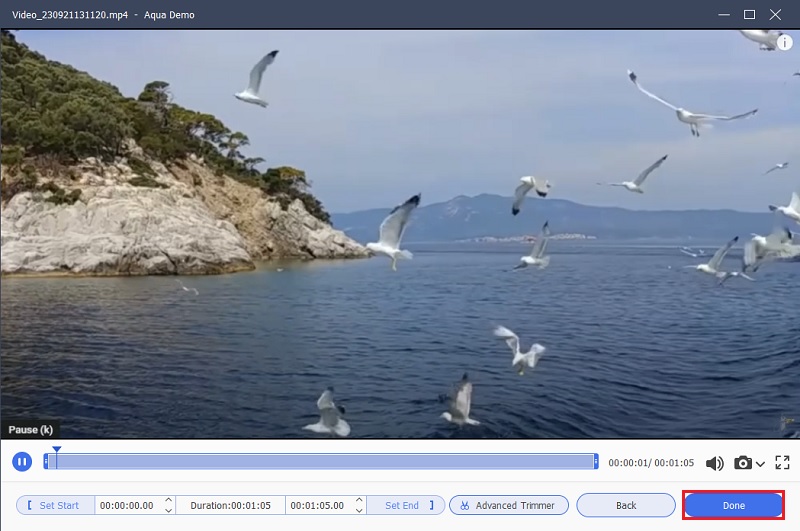
- Record in full screen or a custom region.
- Capture UHD videos without any hassle.
- Save the recordings in various format, like MOV, FLV, MP4, and more.
Conclusion
The highlight of this page focused on how to locate the file location of the VLC recording. Moreover, it also helps users to change the default directory path to a specific file location on their local Computer. This article mentioned a great alternative solution that users can utilize to make personalized audio and video recordings with high-quality resolutions. Using the tool, you can save all your recorded files to your preferred file locations and change them anytime they need.