PC games become popular in the new generation with the development of accessible internet connection. As a result, a variety of games has become famous throughout the years. One of the most well-sought game online applications is Roblox. This platform provides users with many games available for their account to play. It is a popular online gaming system that offers a unique way to entertain a user. It can provide users with a list of games, create a new game, and chat with other Roblox players. These features make this online platform famous not only for kids but also for kids at heart. There are also a massive number of content creators that provide Roblox gameplay videos. But, have you ever known how they can capture the video? In this article, we will unravel a proper way to record Roblox games and which tool is a suitable Roblox gameplay recorder.
Aqua Demo - Best Game Recorder
A screen recorder is a computer application, online platform, or web extension that can capture and record a user's screen activity. It is a commonly used solution to capture activities that cannot be acquired using video downloaders. There is a superabundance of screen recorders that can capture Roblox gameplay videos. Still, AceThinker Aqua Demo is considered the most well-known Roblox screen capture software that contains specific features. For instance, this application includes a dedicated mode to capture gameplay videos using Game Recorder. This recording mode is what users need to check when choosing a better screen recorder for Roblox. What is more, this application contains recording features that are favorable for recording Roblox gameplays. It includes an option to record a specific window on your web browser. It can add system sound, microphone, and webcam to the recordings. Moreover, you can use its annotation tool to draw and highlight an area on the recording region.
Features that the Best Screen Recorder Must Have
There are different ways to select the suitable screen recorder for your computer to capture Roblox gameplay. You can choose the appropriate screen recorder by reading these factors below.
- Availability - Does your tool work on different platforms? That is the first thing you should check on your screen recorder. The tool's availability is a significant factor when choosing a screen recorder for Roblox. You should review the system requirements, including RAM usage, CPU consumption, and required processor. You should also check if the tool can be installed in different operating systems like Windows, Mac, Linux, and mobile applications.
- Pricing plans - When you have checked the availability of your tool, you should also assess its pricing plan to access its features. Does it provide free-trial, freemium service, free-of-charge, and premium plans? When you need to buy a premium service, ensure you get the cheapest program that offers similar functions. You can assess each tool and compare them to get the most affordable tool with better-advanced features.
- Recording Feature - You also need to check the features of the tools and assess which one has the better recording features. Access and evaluate them according to the needs of your Roblox gameplay. A notable feature to watch is the game recording feature which will give you better recording output.
- Editing Feature - The final factor is whether the recorder contains editing features. However, it is not a necessary feature to have an editing function on your screen recorder since you can do it with editing software. Still, it is a plus point when a recording tool has essential editing functions.
Aqua Demo - How to Use
1. Steps on Recording Roblox Gameplay
Step 1 Install AceThinker Aqua Demo
The initial guide on capturing Roblox gameplay videos is to install AceThinker Aqua Demo on your computer. You can get the Roblox screen recorder’s installer by accessing its main webpage on your web browser. Yet, if you need a faster option to install it, hit the download button below. You will be able to get the file installer saved in your download folder. Then, run the file on your computer and finish through the installation prompt.Try it for Free
Free Download
Windows 8/10/11
Secure Download
Free Download
Mac OS X 10.15 and above
Secure Download
Step 2 Log in or Sign up on Roblox
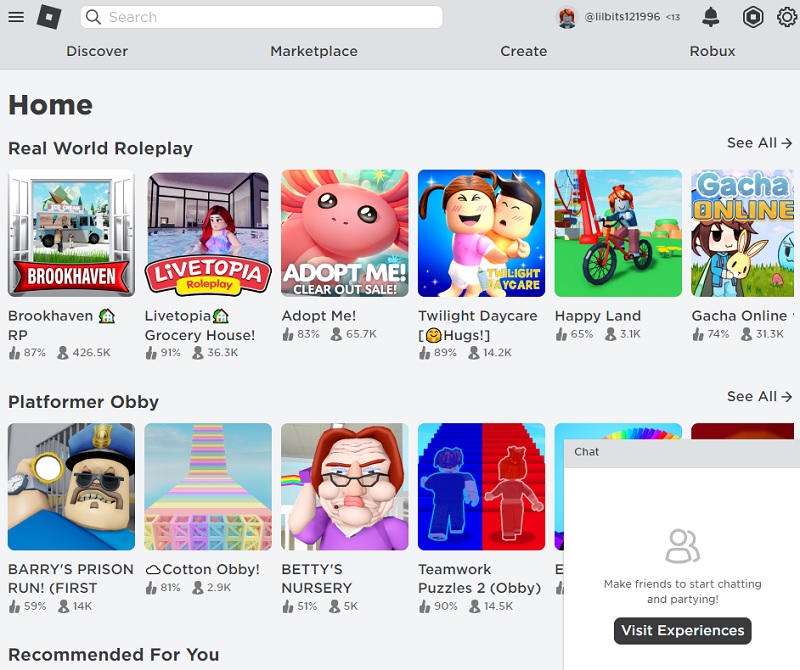
Next, to record Roblox on your computer, you need to access the online platform. You can log in with your Roblox username if you already have an account. Yet, if you are new to the website, you need to sign up for it by filling up the form that will be prompted on your screen. Then, a list of available games will be prompted for you. Please select the one you want to play and record and prepare the tool to capture it.Step 3 Record Roblox Gameplay
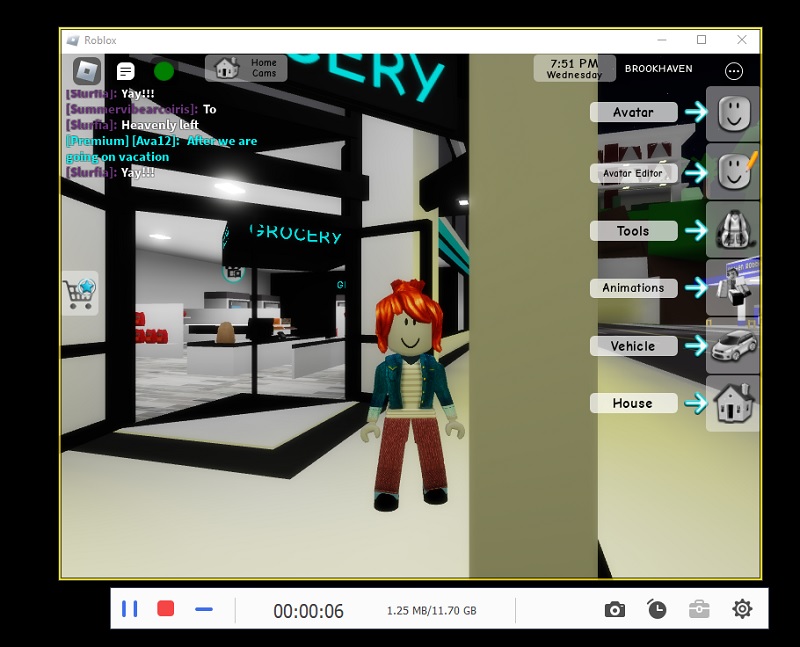
Afterward, access the recording application on your computer by launching it on your screen. Hit the Game Recorder option to access the gameplay recording feature. While the game is starting, select which area you need to record. You can tweak some parameters, including webcam, system audio, and microphone input. Hit the REC button to start the process.Step 4 Stop and Preview Gameplay
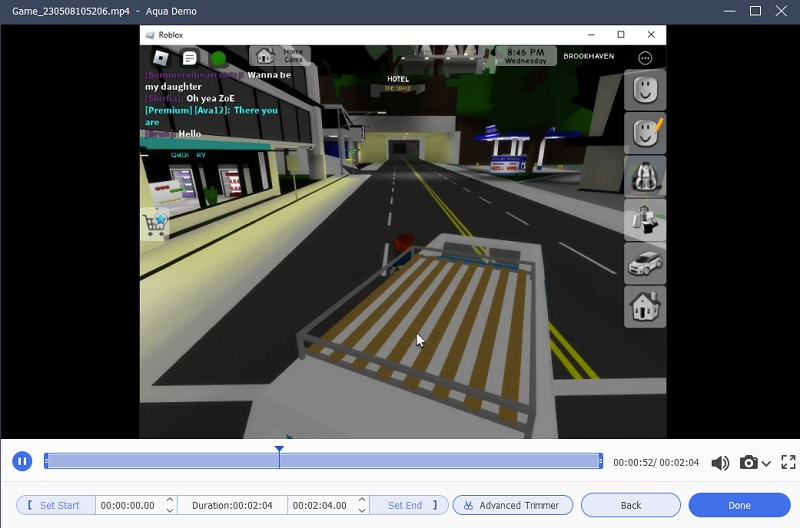
The final step is to finish and record the game until you have completed the gameplay. When the gameplay is finished, hit the Stop icon to save the recorded Roblox gameplay video. A new window will appear to guide you in previewing the video. Next, click the play icon to check the recordings you can save by clicking the Done option.- It supports webcam, internal audio, and microphone recordings.
- Save captured videos in high resolution up to 4K.
- It has drawing tools allowing you to highlight important data in the recording.
2. Tips and tricks for optimal recording quality
If you are a content creator and always publish gameplay videos on your social media accounts, you need better recording quality. Luckily, there are tips and tricks on optimizing the recording quality of your Roblox gameplay videos. You can read them below as we unravel them for you.
- Modify the recording parameter - The initial step is an obvious trick that you should follow. When recording gameplay on Roblox, you must use your screen recorder's best or maximum quality. For AceThinker Aqua Demo, you can modify its video settings by changing it. To do that, go to the Menu icon and preference menu. A new window will appear, and access the Output option and go to the Video Settings. You can see the video quality and select the maximum option, Lossless.
- Optimized your computer - When playing and recording Roblox, you might find your computer RAM and CPU exhausted and used. To have smoother and better recording output, you need to uninstall unwanted applications or declutter your files to free some space. The more internal space your computer has, the better.
- Edit your video - The final tip you can do is to edit your video. If your application has an editing feature, edit it to beautify the output. Yet, if not, utilize video editing software to further enhance the overall appearance and quality of the gameplay video.
Edit Your Recordings Using AceThinker Wind Cut
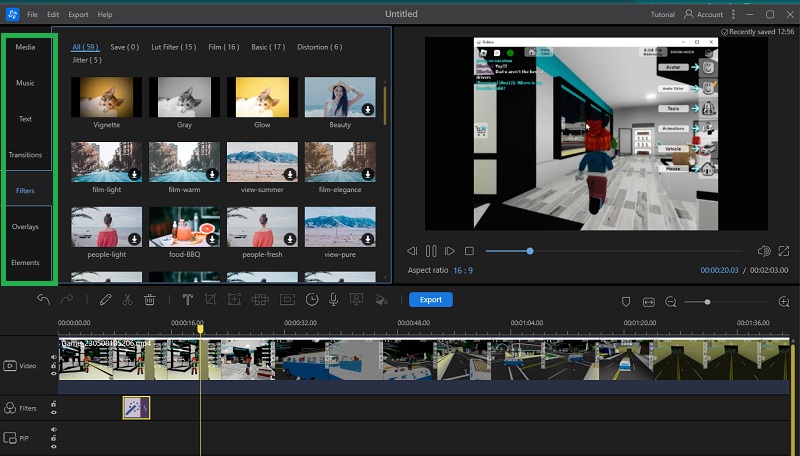
When you need to publish your gameplay videos or enhance the video quality and appearance, one you should do is edit with video editing software. AceThinker Wind Cut is a proper tool to enhance and beautify the raw video. It comes with editing features that can help you heighten the appearance of the video. It has over 50+ inbuilt filters that users can apply to the recorded video. You can also use text to annotate the recordings, add background music to pump the vibe, overlay animation to add some spice, and use the transition to make it professional-looking. All these editing features can be applied on its timeline panel, which is intuitive enough for users to utilize. Moreover, it can export the file and enhance the video quality while rendering it on your computer. Follow the guide below to use this application for editing your Roblox video.
Step 1 Install the Video Editing Software
The initial guide on editing the recording video is to install the AceThinker Wind Cut on your PC. First, hit the Download button below to acquire the file installer. Then, run it on your computer to finish the installation prompts and wizards.Try it for Free
Free Download
Windows 8/10/11
Secure Download
Free Download
Mac OS X 10.15 and above
Secure Download
Step 2 Import and Edit Recorded Gameplay
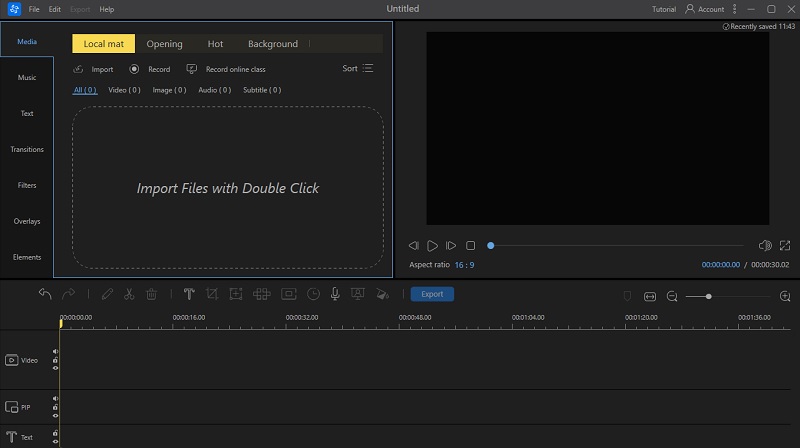
The following step is to import the recorded video. You can drag and drop the file on the menu tab and easily import it on the tool. Then, on the Media tab, you can drag and drop the file on the timeline panel. Afterward, utilize the editing functions of the tool, including adding background music, inserting text and words, applying a transition, having filters, input overlay, splitting, trimming, merging, joining clips, and more.Step 3 Export and Preview the Output File
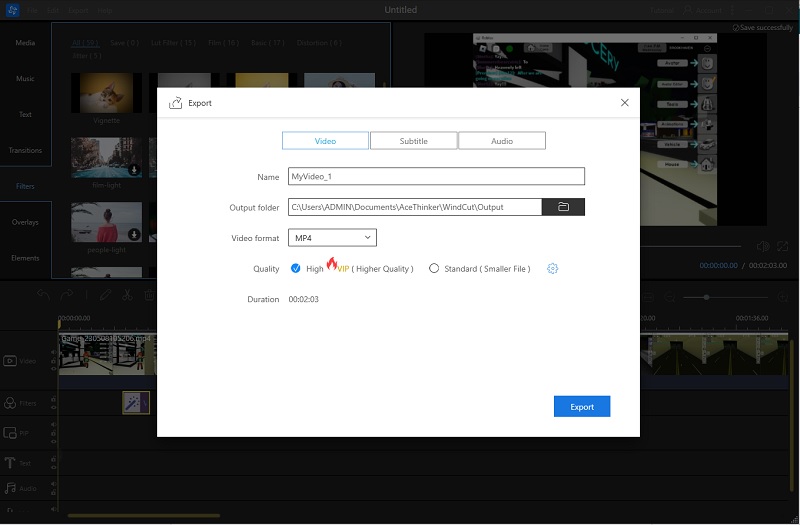
The final step you can perform when all enhancement and beautification have been applied to the recorded file is the Export process. You can easily save the changes made on the video by clicking the Export button above the timeline panel. A new window will appear on your screen, which helps you to choose the quality output. Select the highest possible quality and click Export. The tool will render and save the file in its designated folder. Next, access the output folder to preview the edited file.Tips and tricks for effective video editing
If you are new to video editing software, we have collected some editing tips you can use to enhance your Roblox gameplay videos. We have listed them below; please read them.
- Cut the unnecessary pauses and idle scenes.
- Select the best angle or recording area.
- Utilize excellent video editing software.
- Record in a quiet or less noisy environment if you need to input voice overs.
- Delete recording mistakes.
- Maintain a correct pacing.
- Utilize split edits if necessary.
Alternative Solutions For Roblox Recording Software
1. FBX Game Recorder
This application is a high-performing HD gameplay recorder that you can use to capture your Roblox gameplay videos. It is a dedicated tool to only record applications purposely for PC or computer games. Unlike other screen recording tools, this application can’t capture screen activity if the PC screen does not have ongoing games. Yet, with its advanced technology, it can quickly analyze the process on your computer and suggest its recording option once the game has been initiated on the computer.
2. Xbox Game Bar
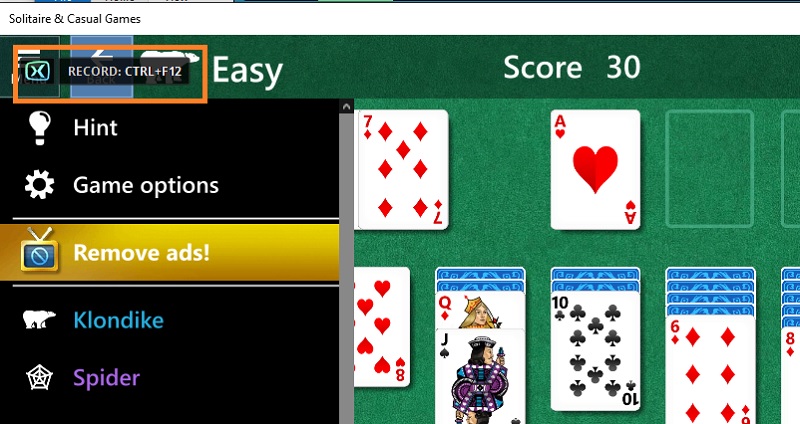
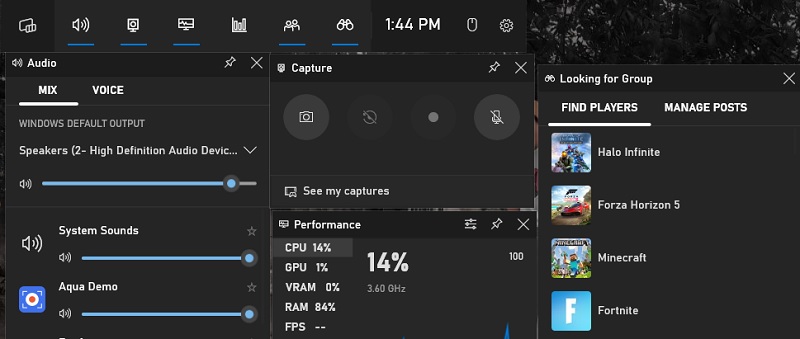
Another Roblox video recorder is the Xbox Game Bar. This application works similarly to FBX Game Recorder, yet this tool is an inbuilt application for the Windows operating system. It was implemented and added as a recording feature for Windows 10 and above. As a result, you can record gameplay Switch videosweb browser games, and PC games. Other than those applications, any screen activity is not available to register with this application. Nevertheless, it can capture high-quality videos with no lag.
3. Bandicam
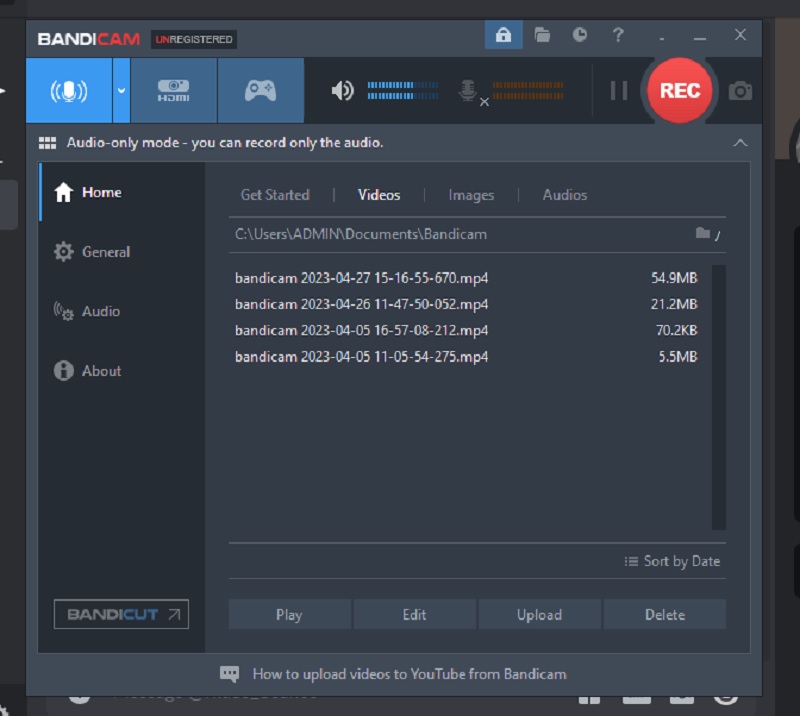
Do you need a no lag screen recorder for your Roblox gameplay videos? Bandicam can help you get through it. This application is a lightweight gameplay recorder for Windows that can record high-quality videos. It uses DirectX/OpenGL/Vulkan graphics technologies to capture Roblox games to have high-quality videos. This application also comes with a better compression process. This feature means it can record Roblox game videos for a long duration with a smaller file size while conserving the quality of the video. Additionally, you can easily record your screen and then edit and upload your videos to platforms like YouTube or Twitch.
Frequently Asked Questions
How can I make my Roblox gaming recordings of better quality?
The first tip is to check the settings of your recording tool. It might be that the Roblox gameplay recorder you are using is at the lowest quality output. Check it and make sure to put the quality output at the max quality. The second tip you can do is to edit it with editing software. You can enhance the recorded gameplay's quality appearance if you perform post-editing processes. The final information is to optimize your computer and ensure you have enough internal space on your device when you record Roblox games. It will give you better output, frame rate, and smoother gameplay recordings.
What is the most reasonable way to post edited Roblox gaming on social media?
If you use software that can already publish editing videos with the tool, you can always do that. Yet, if you still need to, you can access your social media account. Usually, they have the option to post a video on your account. For instance, if you are going to publish a video on Facebook. There is a button for users who need to post a video hit the Photo/Video icon to share the recorded Roblox gameplay on the platform.

