

How to Use AceThinker Screen Grabber Pro
Screen Grabber Pro is a tool for digital users to carry out the simultaneous recording of the screen and webcam. It can be utilized for making video presentations, tutorials, and more. It is also suitable for recording webinars, live streams on the web, video conversations, and more. To facilitate this application, follow these instructions.
Choose the Recording Mode
Download the program from the button above and install it on your computer. You will see the main interface, as illustrated below.
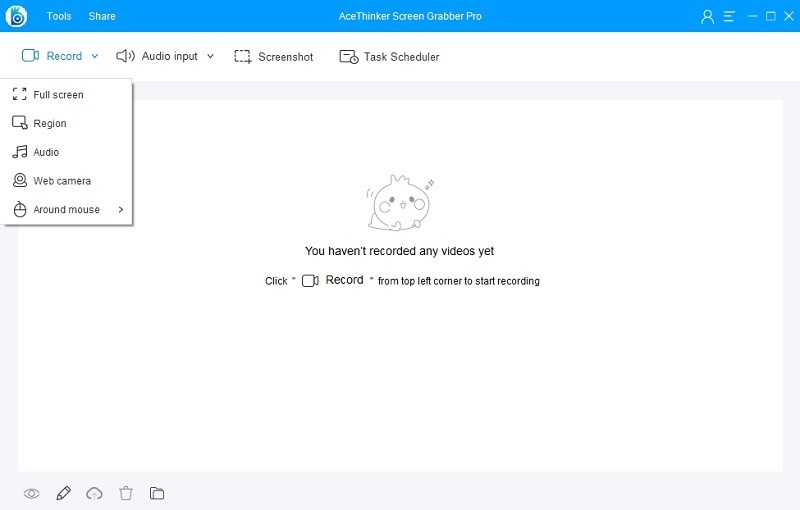
There are many ways for you to capture and record your screen. Choose the recording mode that is suitable for your needs:
- Region: This mode allows you to record the entire screen.
- Full Screen: Record video in the whole screen.
- Around Mouse: This option is specially designed for making tutorials. It focuses on the area that contains your mouse and includes your mouse movements.
- Webcam: This option allows you to record yourself solely, but you may also add the webcam into the recording area on the screen.
- Only Audio: This option allows you to record the audio-only, with no video.
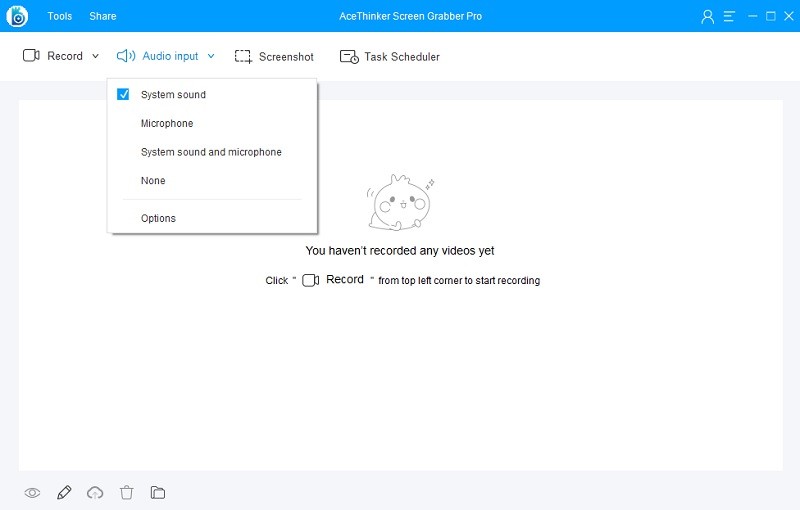
Configure the Audio Input
You can get started with screen recording after selecting a suitable option from the options above. You can also adjust the audio settings before moving on to screencasting. These settings help you to include system or microphone audio into screen recording. You can include both system and microphone audio, making it suitable for recording a demonstration with some background music. You will need to adjust the volume to ensure your voice is not drowned out by the music.
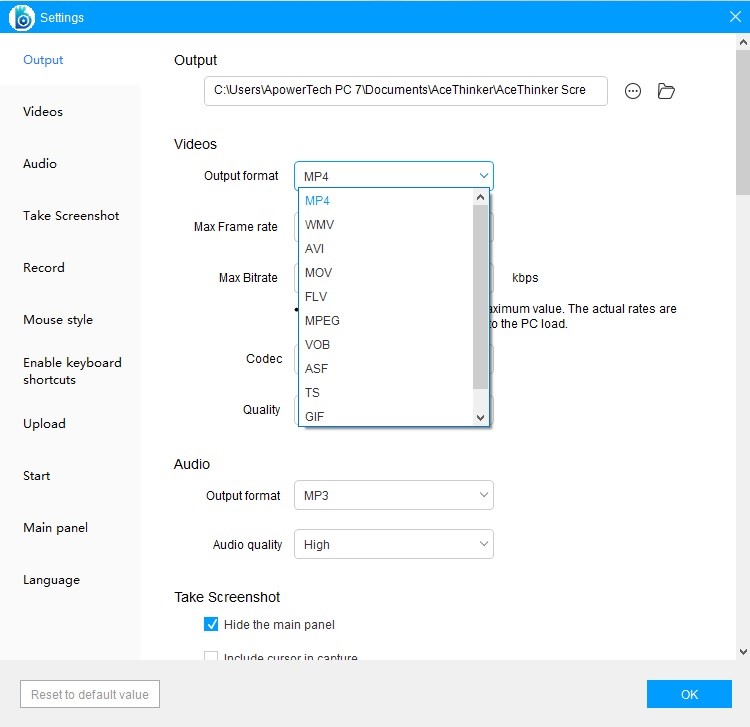
Configure Video Output
If you want to save your recorded video on different devices, such as portable players, you can choose the format relevant to your device. Choose from AVI, MP4, WMV, WEBM, MKV, 3GP, MPG, SWF, VOB, and FLV by going to Settings > Options > Recording.
Start to Record Your Computer Screen
Once you have confirmed the capture region, click OK from the toolbar that will appear to initialize the recording. A three-second countdown will begin, and once it's done, the recording will commence. Then you will see a frame around the capture region with a toolbar below it. You can control the recording progress using the options in this toolbar.
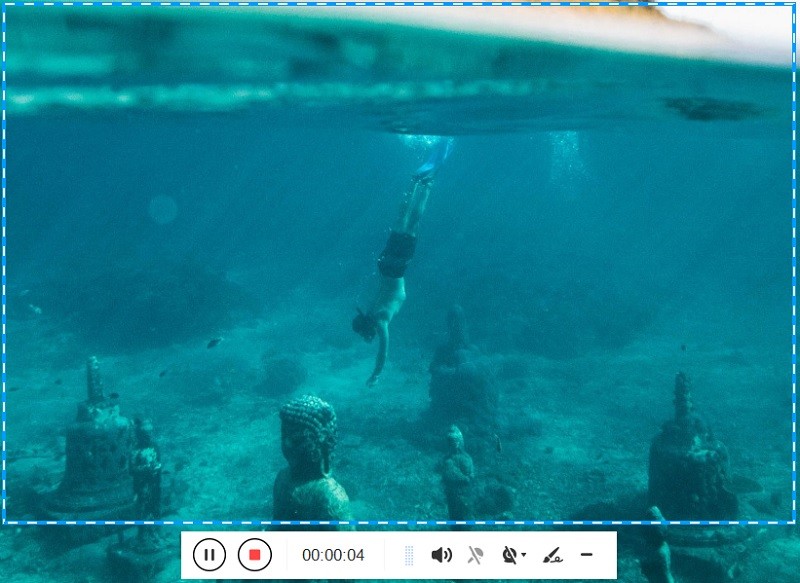
Make Annotations During the Screencast
As you may have noticed, there is an annotation option in the toolbar during recording. It gives you the convenience of highlighting any part or adding your comments. To add annotations, click the Pen icon on the toolbar's right end to expand a list of annotation options. From there, you can access the following (from left to right):
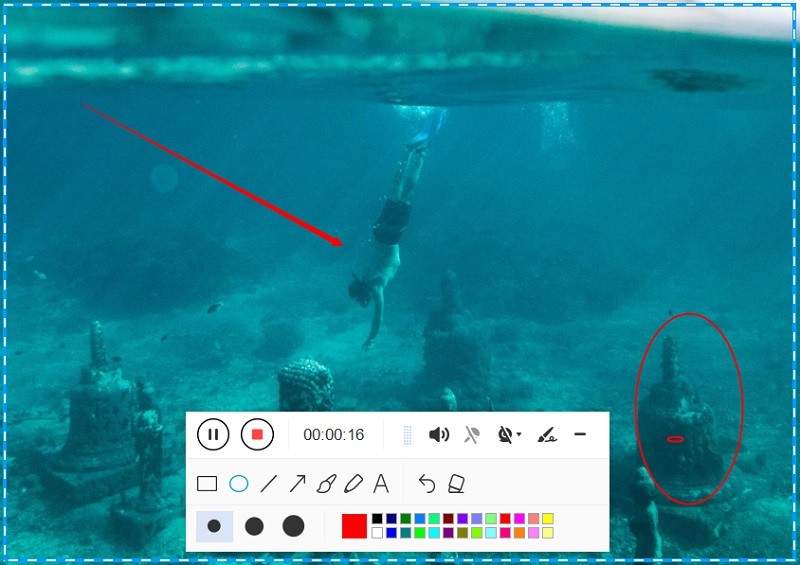
- Rectangle, Circle: This tool allows you to set a frame with a given shape around the portion that you want to emphasize. You can customize the thickness, color, and so on.
- Line: With this tool, you can draw a straight line. This tool can be used for separating two parts or for other purposes.
- Arrow: This tool can be used to point to a specific object or to connect two relevant objects.
- Free Hand: With this tool, you can draw on the screen in any way you prefer.
- Highlight: This tool is like a brush to highlight an area with a chosen color, and you can adjust the transparency. It can also be used to hide sensitive information during recording.
- Text: This tool allows you to add text in your desired font, size, and color.
- Redo: This tool cancels the previous step.
- Rubber: Use this tool to erase your drawings.
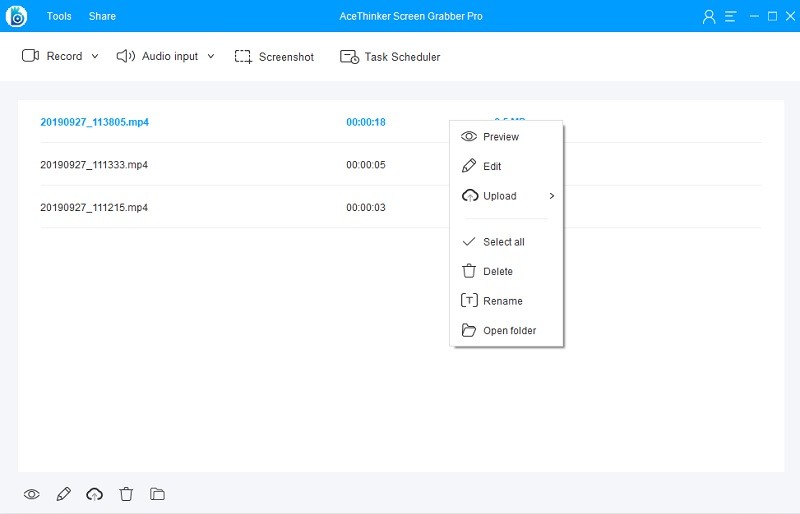
Publish and Manage Recorded Videos
When you are done recording and annotating, click the Stop button to finish the screencast. Once the recording ends, the recorded video will appear on the preview panel of the tool. You can play the video, upload new content, locate the file, and more. If you have multiple videos recorded, you can arrange them in a list or rename them according to your needs.
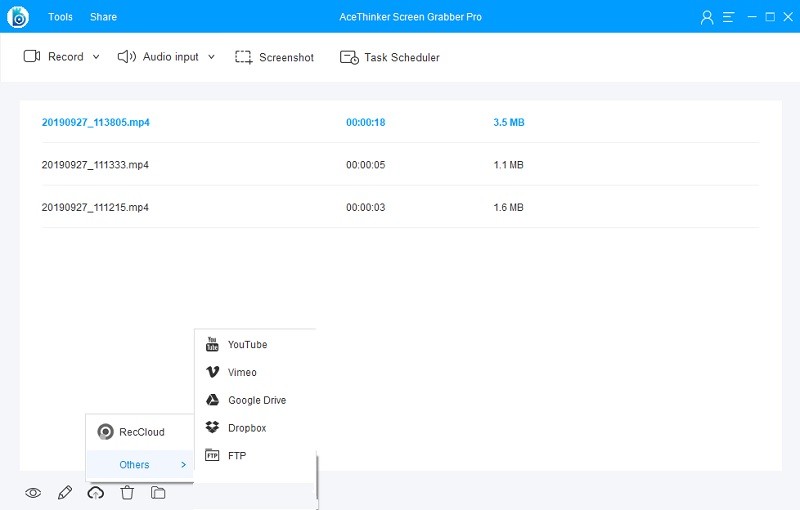
Upload the Recorded Videos
If you want to share the recorded video on YouTube or your FTP, you can access the upload option. By clicking the "Upload" button from the main interface, and clicking "Others" from the option that will appear, a list of available websites where the video can be uploaded will appear. Enter the information on the chosen video sharing site. Then click the "OK" button from the window that will appear to finalize the upload process.
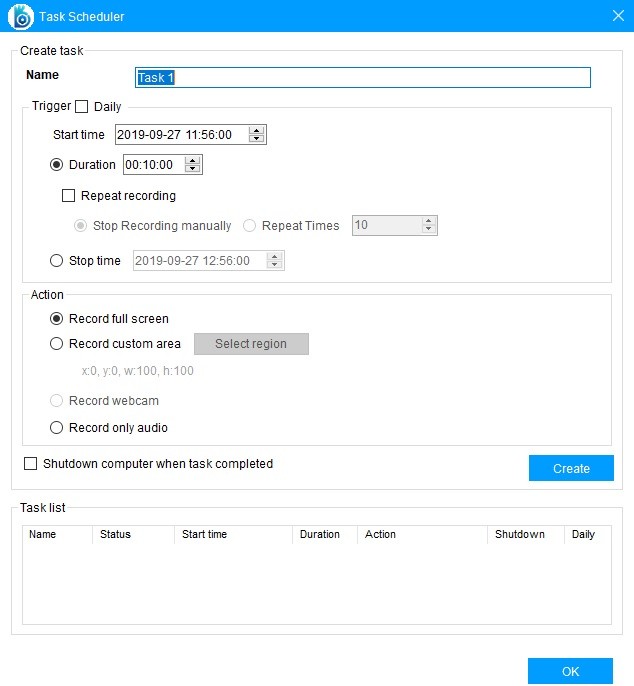
Task Scheduler
This function is for users who need to record an event that will happen in the future. Click the Task Scheduler option from the main interface, and the window to configure the scheduled task will appear. You can also configure the duration, date schedule (if you need to record on a daily or weekly basis), and more. In a short amount of time, you can finish your plan and leave the rest for the software. This feature is beneficial for monitoring screens and recording live shows on the web, recording webinars, and so on.
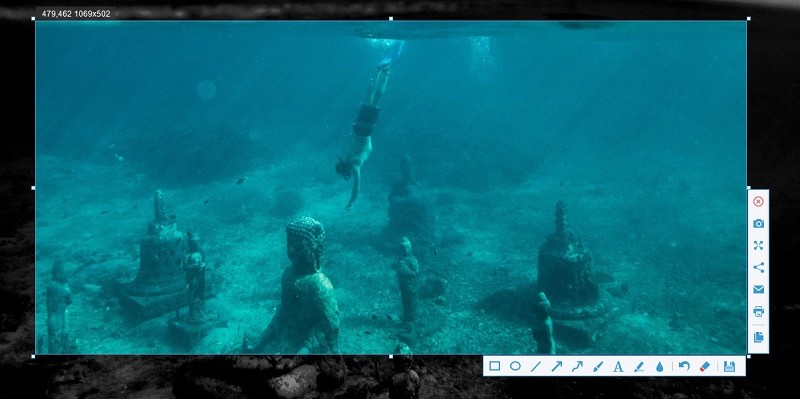
Take Screenshot
This versatile program includes a built-in snapshot feature. It lets you capture any region of your screen quickly and edit the image before saving it. Click the Screenshot option located at the upper part of the tool interface. Your mouse will turn into a crosshair, allowing you to drag to choose a region on the current screen. When you release your mouse, the program will capture the region you selected. From the horizontal toolbar, you can annotate the image with a wide variety of shapes, text, lines, arrows, and more. From the vertical toolbar, you can save your image in the desired format, deliver it to social networks, connect to a printer, and more.
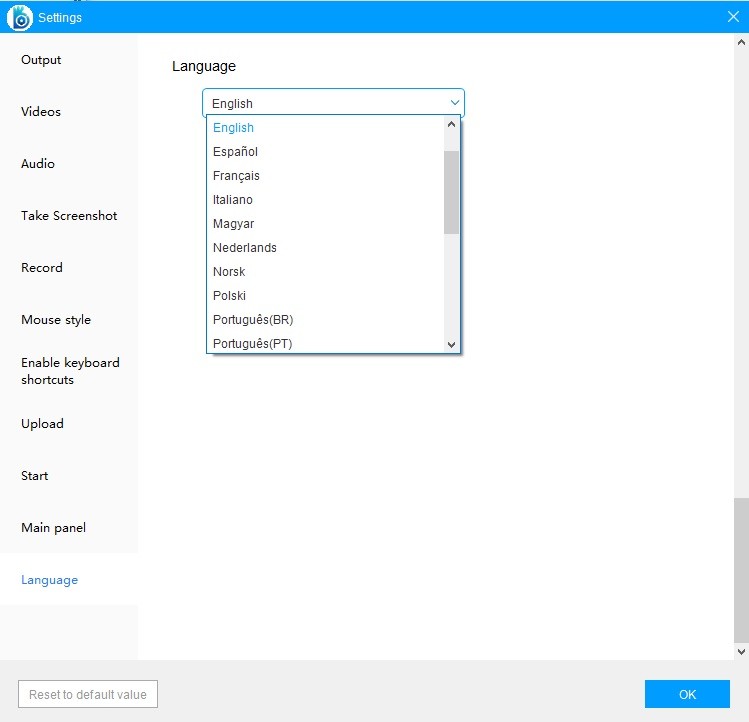
Change Tool Language
Users can also change the language of their respective devices by toggling it on the settings. This will give ease of use to users who have trouble reading English texts on the software. To change the language settings of Screen Grabber Pro, head to the "Settings" window and toggle it from there. From there, click the "Language" tab and then select which language to use for the tool from the drop-down menu.
FAQs of AceThinker Screen Grabber Pro
Do you have any queries about this screen recording software? You can have a look at the FAQ page to find answers to all your questions to help you out: https://www.acethinker.com/support/screen-grabber-pro-faq